The Fresh Loaf

A Community of Amateur Bakers and Artisan Bread Enthusiasts.

Most bookmarked

Kjknits's picture
Kjknits

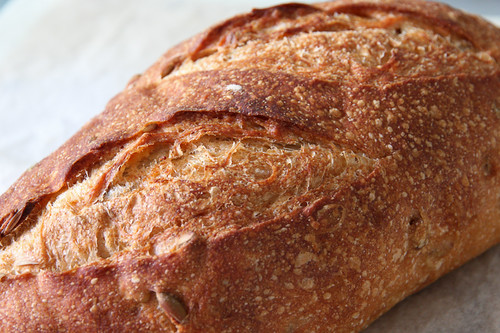
Sourdough sandwich bread

It's been a while since I've had the luxury of daily check-ins with TFL. Lots going on this summer, and actually I really don't have the time even now! But I made some sourdough sandwich bread today for the first time (so far I have only made rustic loaves with my starter), and I wanted to get the recipe written down and share it with anyone else who might like it.

I already have a favorite sandwich bread, but wanted to try using my homegrown 100% hydration starter in a sandwich loaf. Specifically, I wanted to use my starter in my favorite sandwich bread. I started with a google search and came up with a method for using starter in your favorite recipe. The website (which I can't find now, typical) stated that this was a method modified from one in Sourdough Jack's Cookery. Take 2/3 of the flour from your recipe and add it to all of the water, plus 1 cup of active starter. Stir, cover, and set on the counter overnight. Then add the rest of the ingredients and proceed as usual. This method as written, however, only allowed for a 10 minute rest after mixing, followed by final shaping. I wanted a bulk fermentation followed by shaping and a final proof. So, here's what I did, using amounts from my recipe:

Night before baking:

Combine 1 C starter (at feeding time, I feed mine every 12 hours at a 1:4:4 ratio) with 4 C KAF bread flour and 2 C Brita-filtered water at room temp (or it might have even been straight from the fridge). Stir, cover with plastic wrap and leave out overnight.

Day of baking:

Pour sponge mixture into mixer bowl and add 1/4 C melted butter, 2 TBSP sugar, 2 tsp kosher salt, and 1 C flour. Mix until combined, then add remaining cup of flour until dough is fairly stiff (my usual yeast-raised dough uses about 6 C flour and 2 C water, plus 1/4 C melted butter, for around a 35% hydration level). The dough will clear both the sides and bottom of the bowl. Knead at speed 2 for about 4 minutes or until dough passes the windowpane test. Transfer to oiled bowl and let rise in warm place until doubled, around 2 hours.

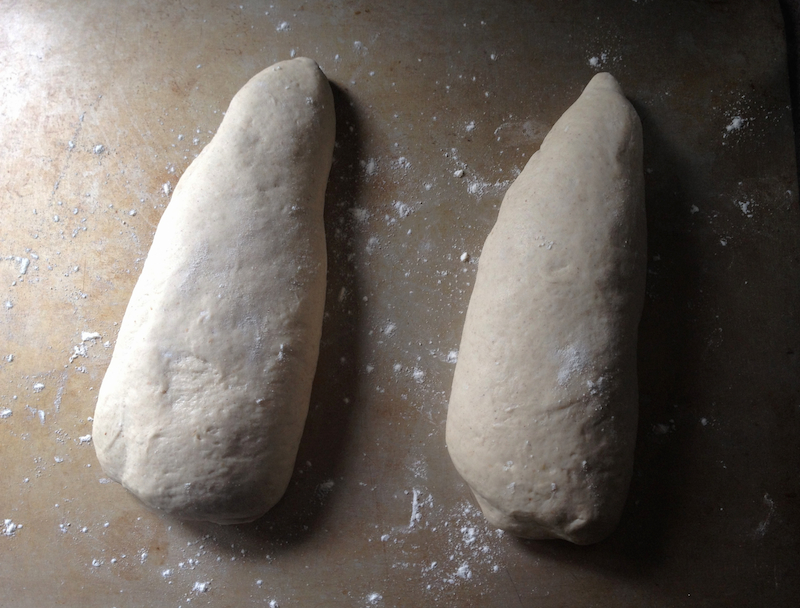
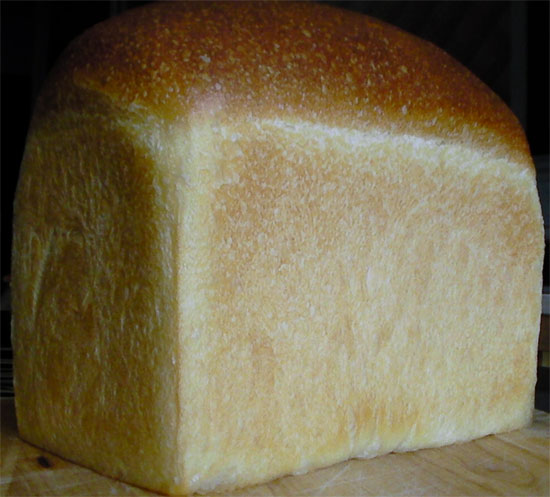
Shape into loaves and place into greased pans. Let rise for about an hour, or until light and risen nicely, then bake at 375.

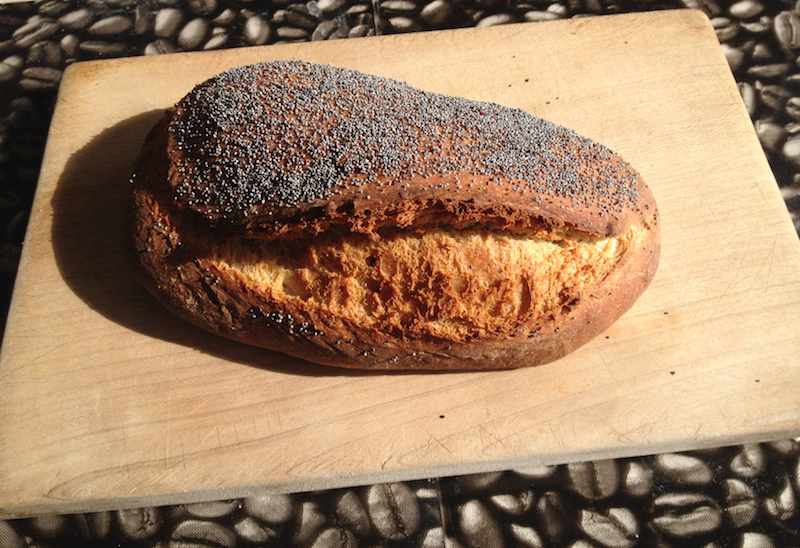
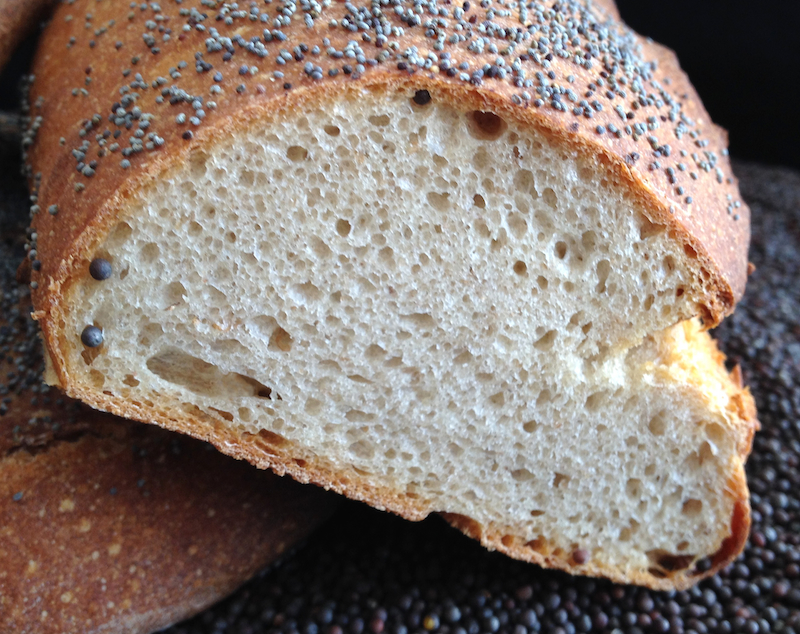
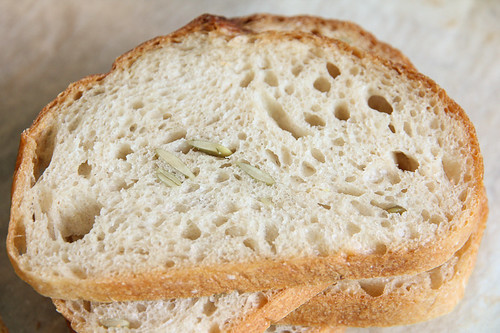
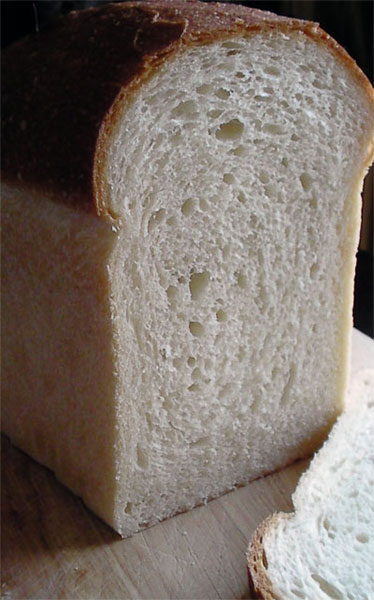
This bread is tangy but not terribly sour. It tastes a little like Panera's sodo, actually, but is less chewy and has a very thin and soft crust. Moist, tender and fine crumb. Can't wait to try it in a ham sandwich!

sodosandwich1

bwraith's picture
bwraith

A Hamburger Bun

A Hamburger BunA Hamburger Bun

I just got a new barbecue grill, so hamburgers were in order. As a home bread baker, I've occasionally made homemade hamburger buns, and there is no question that a hamburger is just better with freshly baked buns.

If you've had the same thought, well here's a recipe for a hamburger bun. The recipe uses direct method instant yeast, so it only takes 3-4 hours. The hydration is a little higher than french bread, but still very easy to handle.

A Hamburger Bun

The Dough:

  • AP flour (I used KA AP) 650 grams
  • Water 290 grams
  • milk 200 grams
  • olive oil 30 grams
  • salt 13 grams
  • 1 package active dry yeast
  • Mix flour, water, milk together using frisage and a few folds, and let sit for 20 minutes.

Mix/Knead

Work yeast into the dough, then work salt into the dough, then work olive oil into the dough. This can be done with a mixer or by hand using frisage and a few folds. Then knead the dough for about 5 minutes until it becomes workable, stretchy, and seems like it bounces back when you punch it, or whatever magic you use to tell if the dough is right. Add flour or water if necessary to make the dough elastic and not too stiff, but it shouldn't spread out when placed on a table. Place the dough in a container to rise.

Bulk Fermentation and Folding (about 2.5 hours)

When the dough has risen by about half, which should happen in roughly an hour, turn it out on the counter, spread it out a little, pressing on it gently. Then, pull a side of the dough and gently stretch and then fold it into the center of the dough. Do this for four sides. You will now have approximately a ball of dough again. Turn it over and push the seams created by the folding under it. Place it seams down back in the container. Repeat this again in about another hour when it should be about double the volume of the original dough when you first mixed it. Then, let it rise for another 0.5 hours or so.

Shaping

Split the dough into ten pieces. I use a scale and break pieces of dough off if necessary. Let the pieces rest for 5 minutes. Take each piece and do the same type of fold as above in the bulk fermentation. You press it down and spread it out gently, and then fold the four sides toward the middle. After folding, turn it over, and make it into a small boule by pushing the sides under and creating some tension on the top surface. Press down on it with your palm again, to seal the seams underneath. Shape all ten buns and place them on a peel or sheet, leaving some room. I had to bake these in two batches in order to have enough room in my oven. Spray them very lightly with oil. Cover them with a towel.

Final Proof

While the buns are rising, preheat the oven to 450F.

Prepare to Bake

Paint the buns with milk and sprinkle sesame seeds on top. Press them down gently with your palm to spread them out a little.

Bake

Bake for about 15 minutes at 450F. The internal temperature should be around 207F

Cool

Let them cool for a few minutes at least.

buddye's picture
buddye

Sourdough Banana Bread

This is an outstanding sourdough banana bread that I would like to pass on. This came from Don and Myrtle Holm's Sourdough Cookbook in 1972. I have used it many times with excellent results.

1/3 cup shortening
1 cup sugar
1 egg
2 cups all-purpose flour
1 tsp baking powder
1/2 tsp baking soda
1 tsp salt
1 cup mashed banana
1 cup sourdough starter
3/4 cup chopped walnuts
1 tsp vanilla or 1 tsp grated orange rind

Cream together the shortening and sugar, add egg, and mix until blended. Stir in bananas and sourdough starter. Add orange rind or vanilla. Sift flour, measure again with salt, baking powder, and soda. Add flour mixture and walnuts to the first mixture, stirring just until blended. Pour into greased 9x5" loaf pan. Bake in moderate or 350� oven for 1 hour or until toothpick comes out clean. Cool before slicing.

Hint: I used 1/2 cup cooking/baking Splenda for regular sugar. Came out beautifully.

RoundhayBaker's picture
RoundhayBaker

Menhir Sarrasin - a Buckwheat Bread

I cannot get the recipe template to work. Never mind, I'm posting it here instead.

Description

I love it when your own take on a bread is the latest addition to a chain that extends back into the mists of time. In this case, I was inspired by MC’s blog (http://www.farine-mc.com/2015/05/meet-baker-eric-marche.html) about Breton-based baker Éric Marché. In the blogpost she writes about how M.Marché roasts buckwheat flour for his menhir-shaped loaves. I’ve never been a huge fan of buckwheat bread, but this sounded worth a try. It was. It’s a great idea. Delicious.

This is my version of Éric Marché's loaf, using, as a template, Dan Leader’s Buckwheat Bâtard recipe which, apparently, he adapted, in turn, from an Éric Kayser recipe. Anyway, I hope I've done them justice.

It makes a beautiful dough, easily handled and shaped. It’s ideal for long cold retardation (Éric Marché keeps his for up to two days). I sprinkled it with black poppy seeds because their flavour complements the buckwheat. I haven’t tweaked the colours at all. Buckwheat loaves really do bake to this rich russet golden colour.

I baked test batches with both white and wholemeal flours. They're equally good. The latter needs a much longer fermentation (double-hydration is also a good idea) and gives a more open crumb (see the photo on MC's blog).

Makes 2 x 440g loaves (baked, approx).

INGREDIENTS

Levain:

  • 40g liquid (100% hydration) sourdough starter
  • 45g water
  • 70g buckwheat flour

Dough:

  • 130g buckwheat levain
  • 300g water
  • 450g unbleached bread flour, or wholemeal/wheatmeal
  • 44g buckwheat flour
  • 22g roast buckwheat flour
  • 17g salt
  • 1 tsp poppy seeds, optional

METHOD

Roast the buckwheat:

  1. Roast the buckwheat in a 160/140(fan)℃ (320/280F) oven for a total of 15 minutes (mixing it every 5 minutes to prevent it from burning.

To form the buckwheat levain:

  1. Mix the ingredients well, cover and let stand for 8-12 hours or overnight.

It makes a medium-stiff levain. Don't expect a huge amount of activity with buckwheat flour, but you should expect to see a moderate increase in volume.

Form the dough:

  1. Combine the buckwheat levain with the water. Break up the levain so it can be easily mixed with the rest of the ingredients.
  2. Add the bread/wholemeal flour, buckwheat, and roast buckwheat. Mix well.
  3. Autolyse for 30 minutes.
  4. Add the salt. and mix.
  5. Knead until the dough passes the windowpane test - about 5 minutes with a stand mixer (or 8-10 minutes by hand). You will have a smooth, creamy dough that still tears if you pull at it.
  6. Leave it in it's bowl, cover, then bulk ferment the dough for 1 hour
  7. Stretch-and-fold in the bowl, rotating one quarter between folds for one complete turn of the bowl. 
  8. Do the windowpane test. It you feel the gluten is still under-developed, do another stretch-and-fold. 
  9. Cold retard for 6-10 hours (or overnight).
  10. Then gently de-gas, divide the dough, and pre-shape into boules or blunts. No need to be fancy: do it in four quick turns per boule - you don't want to rip the skin.
  11. Rest for 20 minutes.
  12. Shape into menhirs. To do this gently de-gas each boule/blunt again. Next flatten and stretch them into the form you'd use to shape a bâtard, but with one side being shorter than the other. Now stretch and fold under tension - again, just as you'd do with a bâtard - but don't seal the final fold with the heel of your hand, leave it as it is. You should now have two loaves, each in the shape of a blunt-nosed cone (see photo below). 
  13. Set aside, make sure the seam is on the side of each loaf, cover, and prove for 1-2 hours
  14. Preheat your oven to 230/210(fan)℃ (450/410F). Prepare your steam tray too.
  15. When the loaves are ready, spray their upper surfaces with water then sprinkle with seeds.
  16. Score to enhance the shape by running your lame along the seam on the side from tip to base.
  17. Steam the oven. I just pour water onto my steam tray which has been sitting in the oven for ten minutes. A few squirts of water onto your baking stone can also be a big help.
  18. Bake - immediately turning the heat down to 220/200(fan)℃ (430/400F) - for 25-30 minutes.
  19. Remove the steam tray after 15 minutes into the bake. 
  20. Once the loaf turns a golden russet brown and the base is hollow to the tap, remove from the oven and set aside to cool.

Additional Notes:

The Kerloas Menhir, Plouarzel, Brittany, France. (Creative Commons, China_Crisis)

Menhirs are ancient standing stones, sometimes six or seven thousand years old. Thousands of them are found in Britain (Stonehenge), Ireland, and northern France. In particular, they dot the landscape of Brittany (the forest of them at Carnac has to be seen to be believed), hence Éric’s inspiration.

And, as those of you who read Asterix and Obelix books as a kid will know, a menhir is also the giant rock Obelix uses habitually as a weapon to flatten Roman legionaries. I was a childhood fan (still am), so I just couldn’t resist.

Great with cheese or cured meats.

limmitedbaking's picture
limmitedbaking

Polenta Pepita Sourdough

Hi all back to posting after a long hiatus. Inspired by the numerous Tartine 3 breads that have been popping up over thefreshloaf and reminded by a post that is filed under my to-bake list, I decided to make a Polenta Pepita Sourdough over the weekend. 

I mainly followed the Marcus's recipe here: http://www.thefreshloaf.com/node/34729/polenta-pepita-sourdough but instead of soaking in boiling water, I cooked up a batch of polenta by stirring it over the stovetop over low heat. Here's my take on it:

Sourdough

Metric

1 kg

Bread Flour

180

92.78

Water

125

64.43

Mature sourdough culture

35

18.04

Total

340

175.26

Cooked Polenta


Polenta

40

20.62

Water

160

82.47

Total

200

103.09

Final dough


Bread Flour

660

340.21

Whole Wheat Flour (15%)

150

77.32

Water

520

268.04

Salt (2%)

20

10.31

Cooked Polenta (15%)

150

77.32

Sunflower Seeds (10%)

100

51.55

Sourdough

340

175.26

Total

1940

1000

Mix all and autolyse for 20 minutes. 
Bulk ferment for 3 hours with 4 S&F at 20 minutes interval.
Proof for 1.5 hours and bake at 230C for 40 minutes.

I think the difference between the two approaches show in the final result. The cooked polenta totally disappeared into the crumb resulting in a softer texture bread but no noticeable specks of polenta. My bread's crumb turned out slightly off yellow rather than the yellow in Marcus's picture. There is no gritty bite of the polenta too.

But otherwise the texture was good with a nice slight chew and sweetness probably from the cooked grains. Next time, I will further bump up the polenta to 20% and try the soaking method instead. Now off to trying other porridge breads!

-Tim

CAphyl's picture
CAphyl

Five Grain Levain Bread

I adapted the Hamelman recipe below, as I really wanted to make a multi-grain bread with a soaker. I didn't have any bulghur, so I used cous cous instead. I continue to go for the bold crust, so I allow a little extra time on the bake.

It is just so much fun getting that soaker going, isn't it?

The liquid levain got so bubbly and smelled great.  I had to push this a bit, as I indicated in the recipe below.

I love my covered baker and used it for this recipe. I have started using the oblong covered baker a bit more with better results than my early bakes.  I never tried this before, but for this bake I proofed the dough in the baker (with a bit of cornmeal underneath) and pre-heated the lid. I have always found it difficult to transfer the proofed dough to the baker, even using parchment paper.  This new system worked well, with a nice bake underneath and a bold bake on top.  In fact, in the past the bread would be a little overdone underneath, and this was just about perfect, so I think this is my new method for this baker. There was good oven spring as well and decent height.

I am always concerned about the crumb, but it was fine for a dense bread like this.

I got in trouble with my husband as I snatched his sandwich for a photo just as he was getting ready to take a bite!  The bread was crusty, tangy and very nutty.  Delicious.  It's nice to know that you can vary the soaker and still have very good results.  Phyllis

Five-Grain Levain Bread

Adapted from Jeffrey Hamelman’s Bread: A Baker's Book of Techniques and Recipes

Makes 3 medium loaves
Overall formula
Bread flour 680 g
Whole wheat flour 226 g
Cous cous 82 g (I didn’t have Bulghur as called for in the recipe, so I used the same amount of cous cous)

Flaxseeds 82 g

Sunflower seeds 71 g

Oats 71 g

Water 890 g
Salt 22 g

Total 2.13 kg


Liquid Levain build
Bread flour 226.8 g
Water 283.5 g
Mature culture (liquid)  45 g


Soaker

Cous cous 82 g

Flaxseeds 82 g

Sunflower seeds 71 g

Oats 71 g

Water, boiling 400 g

Salt 5 g (1 teaspoon)


Final Dough
Bread flour 453 g
Whole-wheat flour  226 g
Water 250 g

Salt 17 g (1 tablespoon)
Soaker all of the above
Levain all less 3 tablespoons


Baker Percentage

Bread flour 75%

Whole wheat flour 25%

Cous cous  9.2%

Flaxseeds 9.2%

Sunflower seeds 7.7%

Oats 7.7%

Water 98%

Salt 2.5%
Total 235.1%

METHOD

  1. Liquid-levain build: Make the final build 12 - 16 hours before the final mix.  I ran out of time, so I accelerated this to seven hours, placing the hot soaker on top of the levain build bowl.
  2.  Soaker: Make the soaker at the same time when making levain build. Pour the boiling water over the grain blend and salt, mix thoroughly. Put it in a covered container and sit at room temperature.

3.  Mixing: Add all the ingredients to the mixing bowl except the salt. Mix or stir the ingredients together until it becomes a shaggy mass. Cover the bowl with cling wrap or plastic bag and let it stand for an autolyse phase for 20 -60 minutes. At the end of the autolyse, sprinkle the salt over the surface of the dough and mix on a medium speed for 3 -5 minutes until the medium gluten development is achieved.

4.  Bulk fermentation: 1 to 1 ½ hours or 2 hours if the dough is retarded overnight. (I bulk fermented for 2 hours with a fold over with my dough scraper at the 1 hour mark).

5.  Folding: If the fermentation is 1 ½ hours, fold once after 45 minutes.

6.  Dividing and shaping: Divide the dough into three equal pieces, pre-shape the dough into round. Cover the dough with tea towel and let it rest for 15 minutes. Final-shape the dough into either oblong or round. (I froze the other two loaves, which were a touch smaller than the one I baked.  It will be interesting to see how these come out when I bake them later).

7.  Final fermentation (proofing): Retard the loaves in the refrigerator over night.

(I baked my loaf in my covered baker.  I proofed the loaf in the bottom of the covered baker with cornmeal on the bottom.  I preheated the top of the baker at 500 degrees and allowed the loaf to warm up at room temperature while the oven preheated.  I baked the loaf with the cover on for 30 minutes at 500 degrees and then took the lid off and lowered the oven to 435 degrees convection.  If you don’t have a covered baker, the original recipe instructions follow).

8.  Baking: with normal steam, 235C for 40 45 mins, turn the loaves half way through the bake.


Omid's picture
Omid

Iranian Barbari Bread (نان بربری سنتی ایران)

Greetings! I am a new member here, and this is my very first post. So, allow me to briefly introduce myself. My name is Omid, from Southern California. About two years ago, I brought my law career to an abrupt end after working for many years in the field of civil litigation. I just had to find a new undertaking, a new reason to seduce me to life, something "creative". So, I have been working as a pizzaiolo in a Neapolitan pizzeria for the past two years. On the side, I try to bake breads at home as much as time allows me. I find it quite riveting when one can discipline one’s own senses and hands in order to transform raw materials (such as water, flour, salt, and a fermentative agent) into a work of art, in which one can find oneself, define oneself, overcome oneself, recreate oneself. In my assessment, the psychology of baking is just as important as the act of baking itself. In other words, baking is about transforming the raw materials as much as it is about transforming oneself, cultivating oneself, building artistic character. As German philosopher Karl Marx eloquently expressed, “As man works on nature outside himself and changes it, he changes at the same time his own nature.”

Upon scanning this forum, I noticed that barbari bread has not been discussed in appreciable details here. I am by no means a professional barbari baker, but I will try to make contributions, if the members are interested, as much as time allows and as far as my knowledge can assist me in this matter. Once upon a time, I did one year of internship (six hours per week) at a traditional barbari bakery in Tehran, Iran. Unfortunately, back then I was too impatient to absorb everything.

Last Monday, I baked some mini barbari breads. Below are some pictures of the bake session.

Barbari breads in the process of baking inside the brick oven

Mebake's picture
Mebake

illustration: Stretch and Fold in the Bowl

I thought i'd share my piece of illustration on the Stretch and fold in the bowl technique:


Khalid 

Syd's picture
Syd

White Sandwich Loaf

Poolish

250g all purpose flour
250g water
1/16 - 1/8 of a tsp yeast (more if it is cold, less if it is hot)

Mix together and leave for 12 hours.

Dough

300g white bread flour 
130g milk (scalded)
unsalted butter 6g
10g salt
3g instant yeast
a little less than 1/4 tsp of ascorbic acid

[Hydration = 69%]

Scald milk and add butter and salt to it. Stir until dissolved. Allow milk to cool to room temp.  Add to poolish, then add dry ingredients.

Knead for 5mins - rest for 5mins - knead for 5mins. Allow to proof until doubled. A stretch and fold half way through fermentation is necessary not so much for gluten strength, as it is to degas the dough.  Pre-shape. Shape and put into a two pound tin. Let it rise until coming about an inch over the top of the tin. (My tin is a 10x19x11cm 900g loaf tin).

Bake at 230 C with steam for 15 mins and without steam at 190 C for 35 mins. Remove from tin for last 10 mins .


This loaf has a crisp crust and a tender, moist crumb.  It toasts very evenly and makes a good sandwich.  It keeps well, too.

Syd


kolobezka's picture
kolobezka

Sourdough loosing elasticity - please help

Hi,

I would like to ask for help with my sourdough breads. Even if the dough looks nice after kneading, it becomes extremely loose (sometimes even liquid) during the fermentation. And in times it is possible to handle and somewhat shape, it becomes completely flat during proofing.

I have my second starter now. My first starter produced wonderful breads, I never experienced any big problems. But the one that I started after the Days od Unleavened Breads is really strange. I keep it the same way - 60% hydration, 20% whole rye, 80% white flour, feeding every 12 hours and it rises very well.

It happens only when the bread is pure sourdough. When I add the starter to a yeasted bread (1% fresh yeast), everything is OK.

It happens with whatever recipe (the same recipes that were OK with my first starter), so I will give only one example:

80g firm starter

100g T800

100g T650

200g whole wheat

340g water

10g sugar

5g salt

1 tsp caraways seeds

Mix, autolyse 30min, French fold 100 strokes, 10min rest, then 4 Stretch&Folds after 15minutes. Bulk fermentation 3-4hours in the kitchen (71-74°F) then overnight in the fridge. In the morning preshape - shape - proofing app 120min.

The same problem happens when there is only 20% whole wheat or whole rye. Moreover when I tried to replace the white flours with KAF AP (a present form US), in the morning the dough was completely liquid.

Well, that said if I do not watch the flat shape or bake in a pan, it tastes wonderful, the bread is quite light and the cumb is open.

Any idea or suggestions?

Pages