I was in a baking mood today (well, on what day am I not?) so I decided to surf the net for an interesting recipe. I found this potato bread recipe on a website for a company that sells potatoes (convenient!). I adapted it to my tastes and the ingredients I had on hand. The recipe is as follows:
Honey-Wheat Potato Bread
Makes 2 loaves (using 8x4x2" pans)
1 large potato, peeled and chopped into chunks
1 1/2 cups water
1/2 cup whole milk (approx.)
2 packages (1/4 oz each) active dry yeast
1 cup whole wheat flour
5 cups all-purpose white flour
3 TBS pure honey
2 TBS butter
2 tsp salt
Cook potato chunks in the water until they are tender. Do not drain! Reserve 1/2 cup of the potato water, and mash the potatoes with the rest of the water. Using measuring cup, add enough whole milk to potato mixture to make 2 cups of potato mixture (I needed about 1/2 cup of milk). Make sure reserved potato water is around 110 degrees F (if it has cooled too much, nuke it in the microwave for a few seconds until it warms up...if it is still too hot, wait till it cools). In a large mixing bowl, sprinkle the yeast onto the reserved potato water. Add mashed potato mixture, the cup of whole wheat flour, 1 cup of the white flour, the honey, the butter, and the salt. Beat on LOW speed for 30 seconds or until ingredients are combined. Scrape sides of bowl. Beat on HIGH speed for 3 minutes (set a timer!). Then, on low speed or with a wooden spoon, stir in as much of the remaining white flour as possible. Turn dough out onto floured surface and continue to knead in the remaining flour until a semi-stiff dough is formed. Knead dough, without adding extra flour, about 8 minutes. Place in oiled bowl and cover with plastic wrap. Let rise until doubled, about 1 hour. Gently deflate dough, divide in half, cover and let rest for 10 minutes. Shape dough into loaves or other desired shape, place in oiled pans, cover with plastic and let rise again till almost double, about 40 minutes. While loaves are rising, preheat oven to 375 degrees F. Bake loaves about 40 minutes. If crust starts to brown too much, cover with foil.
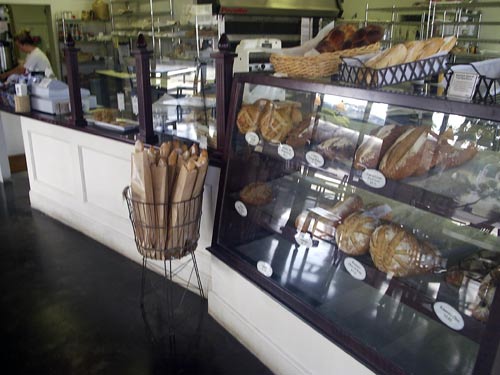
My husband gave me a mini digital camera for Christmas, just so that I can post photos of my baked goods. :-) Here are a couple pictures of my finished loaves...


As you can see, the loaf on the left rose significantly higher than the loaf on the right during the 2nd rise. I was not expecting this. The only thing I can attribute it to is that I had quite a time shaping the left loaf, and thus ended up having to knead the dough a little as I shaped it. The right loaf did not get the extra kneading after punching the dough down after the first rise.
We couldn't wait till these loaves cooled, they smelled so good! We each had a slice to sample from the smaller loaf, and the flavor is amazing. Pleasantly nutty (probably from the whole wheat flour) with a wonderful crunchy crust, but soft and tender inside. I'll be baking this weekly from now on, I think!


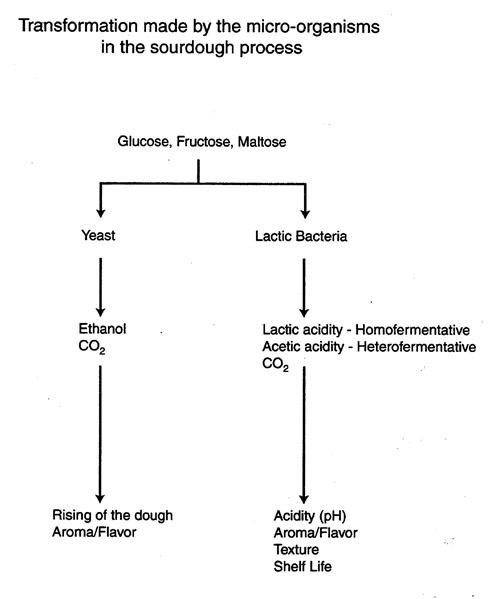 The transformation made by the micro-organisms in the sourdough process
 The Sourdough feeding process when the starter is taken from the final dough
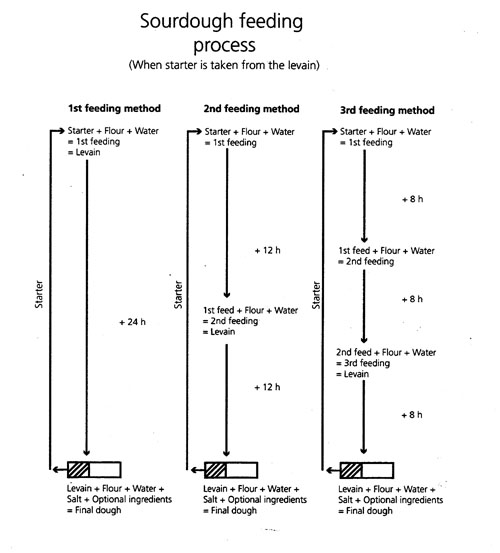 The Sourdough feeding process when the starter is taken from the levain
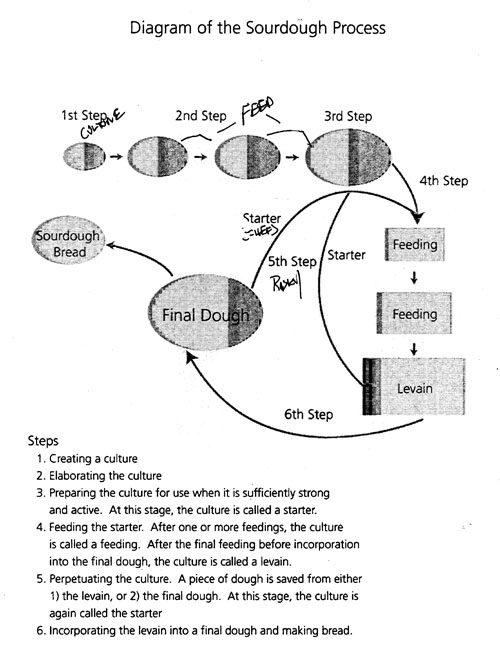 Diagram of the sourdough process