The Fresh Loaf

A Community of Amateur Bakers and Artisan Bread Enthusiasts.

Most bookmarked

eclair tray

Want to impress your sweetheart this Valentine's Day? REALLY impress your sweetie? Then make these éclairs.

They look like they'd be a ton of work, don't they? I thought they would be, but they really aren't that hard. From first flipping open the cookbook (the 1997 edition of the Joy of Cooking) to the moment I was getting blissed out eating them was under two hours. Not bad at all, and fresh out of the oven these were the best éclairs I've ever had.

Eclairs

There are three parts to éclairs: the pastry (pâte à choux), the filling (crème pâtissière), and the topping (chocolate ganache). If you are strapped for time you could cut corners on one or more of the parts by doing things like using frozen puffed pastry for the pastry, pudding or whipped cream for the filling, or some other frosting for the topping. Take a look at the recipes before doing so though: none of the pieces are that hard. There are a few places where you have to bring things to a boil carefully to prevent scalding, but I've found that if you warm the ingredients in the microwave before combining them in your sauce pan you can easily cut 10 or 15 minutes of stirring out of the process.

Choux Paste (pâte à choux)

1 cup all-purpose flour

1/2 cup water

1/2 cup milk

1 stick (8 tablespoons) unsalted butter

1/2 teaspoon salt

4 eggs

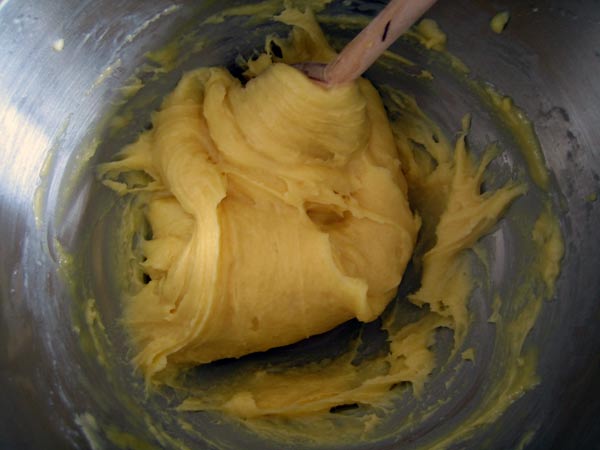
Combine the water, milk, butter, and salt in a small saucepan. Bring it to a boil. Stir in the flour and, while mixing, cook another minute or 2 to eliminate excess moisture. Transfer to a bowl and let cool for 5 minutes, stirring occasionally.

choux paste

Beat in one egg at at time. When they have all been beaten in and the paste is smooth and shiny, set aside to cool. The paste may be use immediately or covered and refrigerated for later use.

Pastry Cream (Crème Pâtissière)

1/3 cups sugar

2 tablespoons all-purpose flour

2 tablespoons corn starch

4 egg yolks

1 1/3 cups milk

3/4 teaspoon vanilla

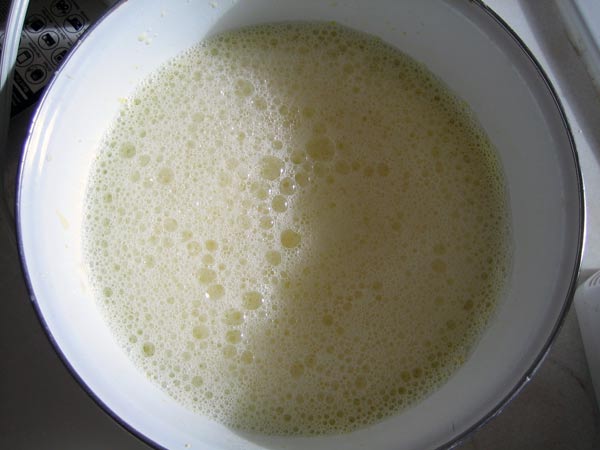
Combine the sugar, flour, corn starch, and egg yolks in a bowl. Beat with an electric mixer for 2 minutes until the mixture is thick and pale yellow.

egg mixture

In a small saucepan, bring the milk to a boil. Gradually pour the milk into the egg mixture, stirring it in as you do so. When fully combined, pour all of it into the saucepan and bring to a boil, whisking constantly. Boil for 1 to 2 minutes then remove mixture from heat. Stir in the vanilla and set aside to cool.

Cover the top with wax paper or parchment to prevent a skin from forming. This cream may be refrigerated for a day or two before use or used immediately.

Chocolate Ganache

3/4 cup heavy cream

8 ounces semisweet or bittersweet chocolate

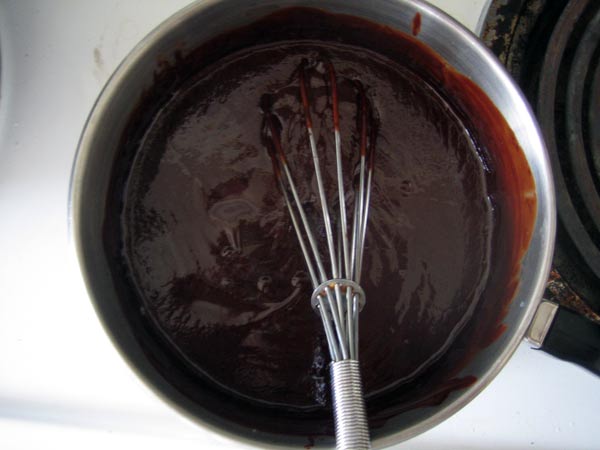
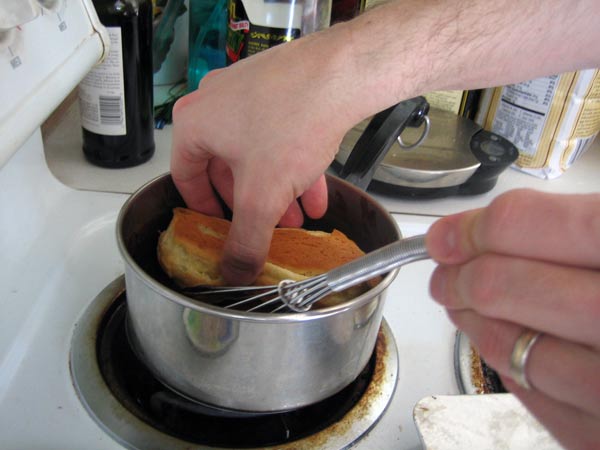
Heat the cream. Stir in the chocolate and continue heating and stirring until all of the chocolate is melted.

ganache

Éclairs: Assembly

Preheat the oven to 400 degrees.

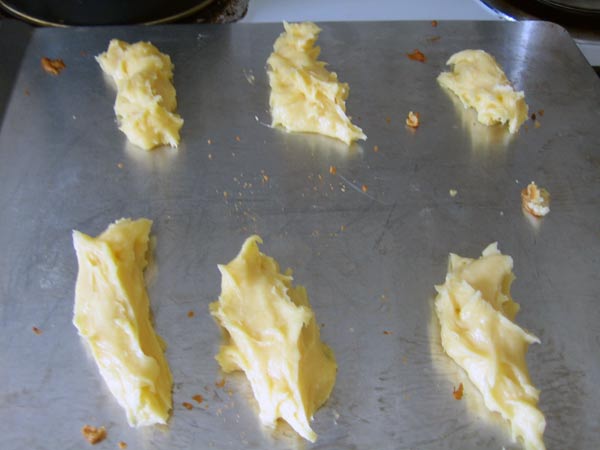
Form small logs out of the Choux paste on a baking sheet. If you have a pastry bag with large tips, you can squeeze them out neatly. I do not, so I just formed the logs with a spoon and my fingers.

eclair shaping

These were about an inch across and 3 to 4 inches long.

Bake the pastries for 15 minutes at 400 degrees. Reduce the oven to 350 degrees and bake for another 10 to 30 minutes, depending on the size of the eclairs you are making.

When they are golden brown, turn the oven off. Poke a hole in the small end of the eclair and place them back in the oven for another 10 minutes to dry out. Remove the eclairs from the oven and let them cool a few minutes.

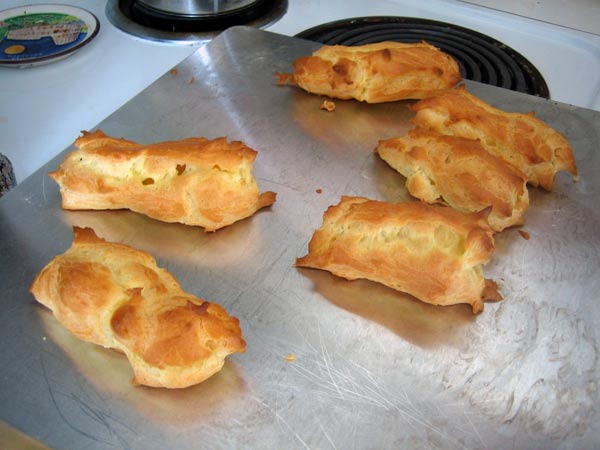
baked eclairs

For the topping, dip or dribble the eclairs in the chocolate ganache.

eclairs

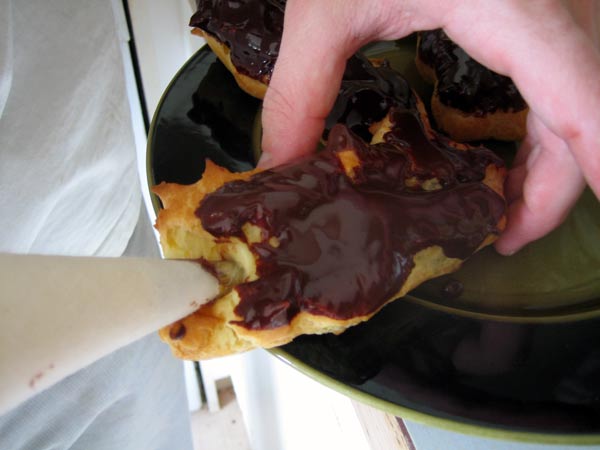
To fill the eclairs, you can either use a pastry bag and squirt the pastry cream in through the drying hole as I did. Or you can slice the eclairs lengthwise and scoop the filling inside and place the top half back on top.

filling eclairs

There you have it: chocolate, creamy bliss.

The eclairs keep OK for a few days in the refrigerator in an air tight container, but they are not nearly as good as when they are first assembled. Take my advice: make all of the elements in the same session, bake them up and make a fresh pot of coffee, and enjoy them immediately. You won't be sorry!

tray of eclairs

Related Recipes: Pain Rapide au Chocolat, Brioche.

Eclairs

The Fresh Loaf
Pocket Book of Bread Baking

Now available for Kindle

When I tell people I am into bread baking, people often respond by telling me that they wish they could bake bread but it just seems too complicated. I find this discouraging, because baking a basic loaf of bread is about the easiest thing you can do in the kitchen. Once you understand what is going on in a simple loaf of bread you should be able to look at 90% of more difficult bread recipes and have a sense of what that loaf will taste and feel like.

Bread, at its core, is just four things:

Flour
Water
Yeast
Salt

That's it. There are even methods to cut out at least two more of those (yeast and salt), but the end product is unlikely to come out tasting like a typical loaf of bread.

Each ingredient and step in the process of making bread serves a distinct purpose. Once you understand what role each ingredient performs and what is occurring in each step of the process you will feel liberated to experiment and create your own recipes.
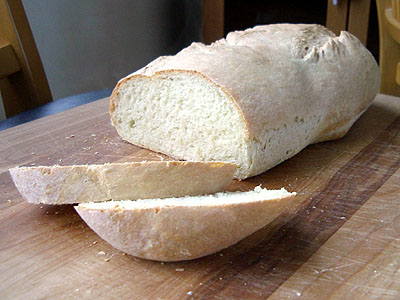
Understanding the Ingredients

  • Flour. There are a million different types of flour. Among them are those made from different grains, those made from different types of wheat, bleached and unbleached flour, enriched flour, blended flours, whole grain flours, and on and on. Don't let this intimidate you! Realize that your standard grocery store, All-Purpose Enriched Unbleached Flour that comes in a ten pound bag for under two bucks is good enough to produce an excellent loaf of bread. It is probably higher quality than the flour that 90% of bakers throughout history have ever gotten their hands on. Ok, you are unlikely to win the Coupe du Monde de la Boulangerie (The Bread Baker's World Cup) using it, but that isn't what most of us are aiming for.

    Flour forms the basis for your loaf of bread. No flour, no bread.

  • Water. You can probably find some of this around the house, can't you?

    Water activates the yeast and dissolves all of the other ingredients. Adding more water results is a stickier, flatter loaf with less regular holes in it, like a Ciabatta. Too little water restricts the expansion of the dough and results in a tight, dry, hard loaf.

  • Yeast. Once again, basic Instant Yeast (also known as Bread Machine Yeast) from the grocery store that comes in those little packets is good enough for all but the most elite baker.

    Active Dry Yeast, another kind commonly found in grocery stores, needs to be activated by pouring it in warm water prior to mixing it into the dough. So read the back of the packet before adding it to your mixture.

    Yeast is what causes the dough to rise. Adding more yeast will cause the loaf to rise more quickly. Adding too much yeast can cause a beery, off taste in your loaf. A teaspoon or two of yeast per loaf is typically called for.

  • Salt. Table salt works well enough. The kosher salt or sea salt that most grocery stores carry tastes a little better, but it isn't worth picking any up just for baking your first loaf: use whatever you've got in the house.

    Salt retards the yeast and helps control the fermentation process. It also adds flavor that most of us expect in even the simplest of breads.

These are the fundamental ingredients for making a decent loaf of bread. Additional ingredients add flavor or complexity to your bread. These will be discussed in a later article.

Once you understand the way these four principle ingredients function, you can look at any recipe and realize that the basic rules of how bread works don't change.

Understanding The Process

For a basic loaf, all you need to do is put the ingredients together in a large bowl, mix them together with a wooden spoon, and then knead the dough on a hard surface for approximately 10 minutes.

Kneading
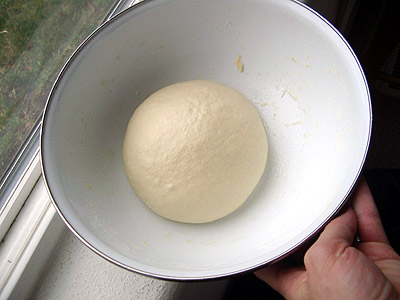

before rising

Kneading is more than just stirring: kneading actually releases and aligns a protein in the flour called gluten. Gluten strands are what allow bread to form irregular pockets of carbon dioxide. Without this step your bread will have uniformly small holes, more like a muffin or loaf of banana bread.

As long as you aren't tearing or cutting the dough it is hard to go wrong with kneading. Squish and roll, squish and fold, applying a fair amount of pressure on the dough, is a basic kneading technique.

At some point, typically around seven or eight minutes into the process, the consistency of the dough will change. It'll become silky and smooth. You should feel it change. This is a good sign that you've kneaded enough. I typically give it another 2 or 3 minutes before calling it quits.

At this point, drop the dough into a bowl (it's helpful if the bowl is greased to keep your dough from sticking to the bottom - regular spray oil will usually do the trick) and throw a towel over the bowl, and leave it alone to let it rise.

Rising
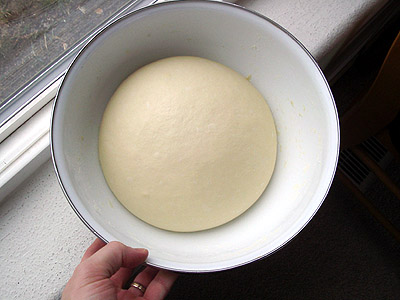

after rising

Status check: by the time you are ready to let your loaf rise the yeast should be activated and the gluten should be aligned. The yeast does what any organism does after a long nap: it eats. The yeast feeds on the simple sugars that occur naturally in the flour. The yeast then releases carbon dioxide, which causes the bread to swell and form pockets.

If you have kneaded properly the dough will form long strands of gluten which allow large air pockets to form in your loaf. If not you will end up with numerous smaller holes. No holes in your dough means your yeast failed to activate.

The loaf must rise until it is approximately double in size. This typically takes from 45 minutes to a couple of hours, all depending on how much yeast the recipe called for. Temperature too is a factor: the warmer the room is the quicker the yeast will rise.

Punching Down and Shaping
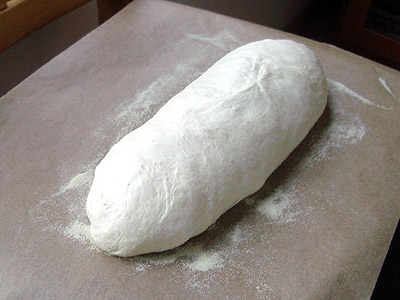

shaped loaf

Some recipes call for one rise before shaping the loaf. Other recipes call for punching down the loaf to allow two or more rises. Punching down means simply to squish the risen dough down and re-knead it so that it is smaller again.

The purpose of punching down is to free up more food for the yeast. The longer the yeast feeds, the more complex the flavor of the loaf. Too many rises, however, can result in off flavors, such as bitterness and a beery flavor, to occur in your bread. As well as carbon dioxide yeast releases alcohol and acids. Too much acid in your loaf can actually cause the yeast to die off.

You do not shape the loaf until you are ready for the final rise. Either you place the loaf in a loaf pan or you shape it into a baguette, batard, round, or whatever shape you want. Then you give it another hour or so to double in size again.
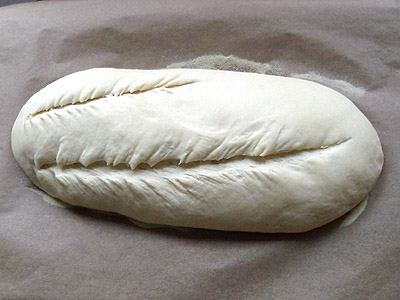

scored loaf

Scoring the bread is just slicing it. You'll want to use something really sharp so that the dough doesn't fall and collapse again. A razor blade does the trick if you don't have fancy knives. The purpose of this is to release some of the trapped gases in your loaf so that it doesn't tear open while baking. It also makes your loaf look nice.

Baking

In the first five minutes in the oven your loaf will have one last growth spurt. This is called oven spring. Think of it as the yeast feeding itself quicker and quicker as it heats up until the rising temperature finally kills it off.
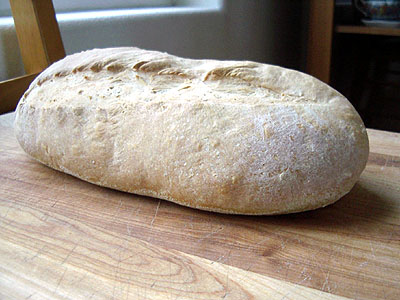


done

Many bakers use baking stones, which retain heat, to try to maximize the oven spring. This is helpful but not necessary when starting out.

Let's Make a Loaf!

OK, now that you have the basic idea, let's try it out with a really simple basic recipe. I tried this one today while stuck inside during an ice storm. This worked out well, since the freezing rain hit before we had realized that our refrigerator was lacking eggs and milk, along with a variety of other grocery items!

A Generic Recipe

3 cups flour
2 teaspoons salt
2 teaspoons yeast
1 1/8 cup water

Mix everything together. If it is too wet and won't come free from the sides of the bowl or keeps sticking to your hands, add a little more flour. If it is too dry and won't form into a ball, add a bit of water.

Knead it for 10 minutes. Cover and set it aside to rise until it doubles in size, approximately 90 minutes. Punch it down and let it rise again. Shape it, either by putting it in a greased loaf pan or by rolling it out into a long loaf and putting it on the back of a cookie sheet.
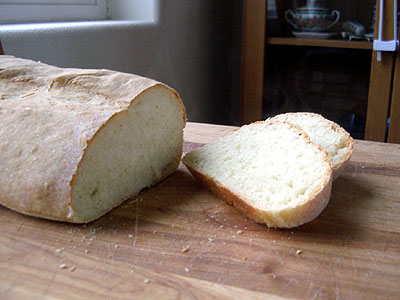


Ready to eat!

After it has risen to twice it size again, another hour or so, put the loaf into a preheated oven at 375 degrees. Let it bake for 45 minutes and then pull it out. If you made it into a long skinny loaf, it may cook 5 or 10 minutes quicker, so adjust the time based on what shape you chose. I baked the loaf in these photos for 40 minutes). 350-375°F for 45 minutes is typical for a loaf in a loaf pan.

Eat!

Wrap Up

Well, how was it? It may not be the best loaf of bread you've ever had, but it ain't bad.

There are many additional ingredients and techniques that are used in creating world class breads (some of which I will talk about in future articles), and each step of the process that we discussed (kneading, rising, shaping, scoring, baking) can be further elaborated on, but the approach used in this recipe is at the core of almost every other recipe you will encounter.

Continue to Lesson Two: Adding Something More to Your Loaf.

Your First Loaf - A Primer for the New Baker

idaveindy's picture
idaveindy

7 things about fresh-milled flour

In my experience, Fresh-Milled flour has 7 "things" I need to allow for:

This is based on using a sourdough starter/levain. Commercial yeast (dry or fresh) will be slightly different.

1. Fresh-milled flour is usually thirstier, takes more water, than store-bought WW. This is a general rule. You will eventually find exceptions, i.e., some grain will already be high in moisture, and therefore need less water.

2. Fresh-milled flour takes more time to soften, so use 30-90 minutes of soak/autolyse (without starter/levain, depending on granularity (particle size).

Sidenote: because of 1 and 2, if I make a combo fresh-milled WW and white flour loaf, I autolyse only the fresh-milled WW because the white flour would "steal" the water first.  So in that  case, I add the white flour (and some water) when I combine in the levain.  I'm sure there are other ways to do it.

3. Fresh-milled flour is Tricky, in that you think you over-wetted it, but then it absorbs and it feels underhydrated, but then it eventually slackens. So after you learn by trial and error (keep meticulous records of weights) and "dial it in", then you have to trust it to end up at the right spot of hydration.  You sort of have to learn three or four  different "feels", one at each stage, (depending if you add salt in a separate stage -- salt tightens dough, temporarily.)

3a. "Wet sand" feel. Home-milled flour can sometimes be gritty, especially extra hard wheat such as durum and Kamut/Khorasan.  I need at least a 1 hour autolyse (no starter/levain) for these.  And even then, the transformation from "wet sand" to dough doesn't happen, for me at least, until 30-60 minutes after incorporating the levain.

My procedure is usually: 1 hour autolyse, gently incorporate levain (no kneading, just gentle folds), let it rest 30 min, incorporate salt and hold-back water, let rest 30 minutes for it to slacken becasue salt tightens it up, then do stretch and folds.

3b. Important: Do not knead or do "stretch and folds" until the  "wet sand" becomes "dough" and the dough is extensible enough.  If the dough never slackens/loosens or becomes extensible ("stretch-able") enough say, 45 minutes, after adding salt (or after adding levain, if salt was already in it), then it likely needs more water.

4. Fresh-milled ferments FAST!  I use 3.5% prefermented flour for an overnight bulk ferment, or an overnight proof.  Fresh-milled, like most store-bought WW, maybe even more than store-bought WW,  keeps on fermenting in the fridge, more so than white flour does in the fridge.  The fridge won't "stop" WW from fermenting/aging/breaking down.

5. Fresh-milled flour has oil from the bran and germ  Store-bought WW has had some oil evaporated off, and might not even have had the germ in it, depends on brand. So I use little to no oil compared to store-bought WW.

6. If I over-hydrate a dough, and feel like I need to add flour to adjust, I add _white flour_ because it will absorb water quicker than fresh milled WW.  The late addition of WW and especially fresh-milled WW won't get as hydrated/soaked as well as what was in there from the beginning.  In other words, to "salvage" an over-wet dough at some point in the bulk ferment, I use white store-bought  flour.

7. Good oven spring on a boule or batard (ie, not a pan-loaf, like sandwich bread) generally requires under-fermenting. Do not let it rise (first or second rise) as much as you do with a loaf baked in a pan.  First rise (usually called bulk ferment) can be 30-50% increase.  2nd rise (usually called final proof) even less, depends on if you do it at room temp or in fridge.

Your mileage may vary.

-----

Suggested reading:

About home-milled, from user "agres": http://www.thefreshloaf.com/node/66636/better-bread

About home-milled from SeasideJess: http://www.thefreshloaf.com/node/64101/tips-100-freshmilled-whole-wheat-baking

Avoiding/removing bugs: http://www.thefreshloaf.com/node/64081/tip-bugs-whole-grains

Starch damage: http://www.thefreshloaf.com/node/62154/oven-spring-possible-miche

Sifting and multiple passes through your mill: www.thefreshloaf.com/node/62237/bolting-sifting-comparison-1-pass-vs-5-passes

Easy sandwich loaf formulas: http://www.thefreshloaf.com/node/62486/community-bake-approachable-loaf-bread-lab

Testing/comparing different varieties of home-milled wheat (just the comment, not the whole thread/post): http://www.thefreshloaf.com/node/56742/community-bake-maurizios-fiftyfifty-whole-wheat-sourdough-everyone-welcome#comment-412372 

---------

The home-millers you would do good to follow on here are: SheGar, SeasideJess, danni3ll3, ifs201, agres, barryvabeach, DanAyo, MTloaf, dabrownman, pmccool, deblacksmith, UpsideDan, TopBun, albacore, .. with apologies to any others I missed.

----

Video about using fresh-milled flour with Nick Giusto of Central Milling and Pablo Giet.  They speak of several things I mention above such as fast fermentation and the enzymes.
https://www.instagram.com/tv/CI6VsoZhTqK/

------

Notable comments. See more below, in the comment section:

From MTLoaf:

2. [...] I like to use around 15% bread flour for more consistent results. Extra kneading will make the loaf lighter.

3. Sifting is worth the effort. Even if you are going to bake with all the brown bits because it oxygenates the flour and allows it to absorb the water better. Separating them with a #40 will collect about 5>7% and a #50 will get around 15%. The bran can be presoaked, used in a levin, toasted or used for other things. My chickens love a bran dough ball.

4. My personal preference with whole wheat is to error on the side of over hydrate because the bran will absorb moisture even after it has baked. The Approachable Loaf from the recent Community Bake here at TFL (http://www.thefreshloaf.com/node/62486/community-bake-approachable-loaf-bread-lab) is 85 to 90% water and produces a Wonder Bread soft sandwich loaf. Say no to the brick.
5. Other grains like rye, spelt, white whole wheat, kamut are nice to have on hand. [...]

Anonymous baker's picture
Anonymous baker (not verified)

1.2.3, An Easy Formula for Sourdough Bread

Hi Everyone!

I'm Flo Makanai, French "author" of the (in French, sorry...) blog Makanai (http://makanaibio.com/). I love bread baking, especially sourdough baking, and I've been doing it for about 15 years.

As I always have many obligations other than baking bread (who does'nt?!) AND lots of sourdough to use (I hate throwing it away once it has reached maturity), I eventually came to "invent" a formula that works for me in France (Janedo from http://aulevain.fr/, whom you certainly know, has also tested that formula and it works for her too).

Here it is:

I weigh the liquid (100%) mature sourdough I have on my counter. It gives me a weight which I shall call weight 1.

I then multiply "weight 1" by 2 to obtain the quantity of liquid (water, rice milk, milk...) I'll need. So the liquid will weigh twice as much as the sourdough.

Then, I multiply "weight 1" by 3 to obtain the quantity of flour(s) (always organic for me) that I'll need. So the flour(s) will weigh 3 times the sourdough. 

I mix those 3 ingredients, I let the dough rest 30 minutes and then I knead my dough, adding 1.8% to 2% of the flour(s) weight of salt.

So "1" = sourdough weight

"2" = liquid weight, which is "1"x2

and "3" = flour(s) weight, which is "1" x3

Example : with 125g sourdough, I'll bake bread with 250g liquid and 375g flour + 6 to 7g salt

The reason I'm writing today on TFL is that I wonder if that formula works in the States, where flours are so different from the ones we have in France. Is anyone interested in trying and then posting a comment on TFL? That would be interesting.

I posted this formula (in French, but you can use the Google translator, even if the result is quite ... unusual!) on Makanaibio yesterday (here: http://www.makanaibio.com/2008/10/123-pain-au-levain-une-formule-qui.html), if you can read French or if you'd like to see a few pictures of some of my breads.

(And please excuse my english, I certainly made mistakes I'm not even aware of...)

I hope to read you soon!

Flo Makanai

BobS's picture
BobS

Life with Fred: maintaining a starter in pictures

There's lots of discussion and great information about starters on TFL. Everyone does things a little differently, and what works for you is best. Here's what works for me.

I typically make two sourdough loaves a week. Sometimes more, and sometimes I miss a week, sometimes two. Sometimes I make more than two loaves.


When I started baking sourdough I had a lot of questions and two constraints. First, I traveled a fair bit for work, often on short notice, so I needed a process that was not too fussy  - no twice-daily feedings, no big mason jar of goo on the kitchen counter.  Second, I hate waste; the idea of discarding half of anything bothers me. I addressed the first constraint by having Fred live in the fridge nearly all the time; and addressed the second by keeping him fairly small. Here's Fred:


That's a half-cup container, and it contains 2.5 ounces of Fred. He's a little guy. Fred is a 100% hydration starter, so he's 50/50 flour/water by weight.  Fred's hydration is not so important, but one reason 100% is nice because it makes the math simpler. Fred is too small to make bread by himself, I use him to innoculate a levain that typically ferments 12-14 hours.

I made the original Fred about 3-4 years ago using the great instructions on this site from Debra Wink. Pineapple juice rocks.

The evening before (or two evenings before if I am retarding the final proofing) I take Fred out of the fridge and build a levain. Sometimes, when I have presence of mind, I take him out an hour or two before I start to let him warm up a bit, but often I just take him right out of the fridge. This is what he looks like after being in the fridge for about 10 days:


Sometimes, after a week or so, Fred will blow his top in the fridge. Not a big deal, and if no one notices for a day or two Fred will create a dry crust on top to keep his innards moisty. Fred's a bit of a teetotaler: I very seldom see hooch, perhaps only after a couple of weeks in the fridge. If Fred looks all watery and hoochy, I might feed him once or twice, but usually I will let him warm up and he comes back to life.

I feed Fred in a 1:2:2 ratio: 1 part starter, 2 parts flour, 2 parts water. My experience  (YMMV) is that this ratio provides adequate food so that he will be in good shape to innoculate a levain in a week, and can tolerate cooling his heels for longer if necessary . I always (well, almost always) remove 2 oz (of the 2.5 total) to start the levain build:


There's just a little bit of Fred left (0.5 oz):


The 1:2:2 ratio means we need to add 1 oz of water and 1 oz of flour in order to make Fred the man he was.  So we add 1 oz  water (that's a chopstick, which works really well for mixing the remaining starter and water) and then 1 oz flour. I feed Fred with AP or Bread flour, but I always give him a little treat of rye:


The 2 oz of starter is built into the levain - in this case a stiffer levain for Pain au Levain. There's no waste; I haven't discarded any starter.


If the formula for the levain called for less than 2 oz of starter,  I decrease the amount of flour and water in the levain by the excess amount of starter. For example, if the formula called for 1 oz of starter, I would use 2 oz of Fred, but then reduce the amount of flour and water I add by 0.5 oz each (that's what I meant about the 100% making the math easier). (It could be that innoculating the levain with more than the amount of starter called for in the formula changes the flavor profile of the bread. That's okay; I'vehad no complaints yet, and I have other details of technique to work out before addressing that one. If I found that it did make a difference, I would simply scale Fred down.)

The levain I'm building often has a different hydration than Fred. Sometimes it uses a different type of flour, e.g. rye. No matter.

The chopstick doesn't work for a lot of stiff starter, so I switch to the handle of a wooden spoon.

The levain goes in the proofing box overnight. Fred goes in for an hour or so just to help get his juices flowing. (I'm writing this in New Hampshire in February - the proofing box is required equipment). Then Fred goes in the fridge and does not reappear for a week or so. It seems to take about 4-5 days for Fred to develop sufficient strength in the fridge. If I want to use him sooner I will take him out and place him on the counter or in the proofing box until he's bubbly.


The next morning the kitchen is at 63F, but the levain looks good:


Fred, flour, water, salt:


dmsnyder's picture
dmsnyder

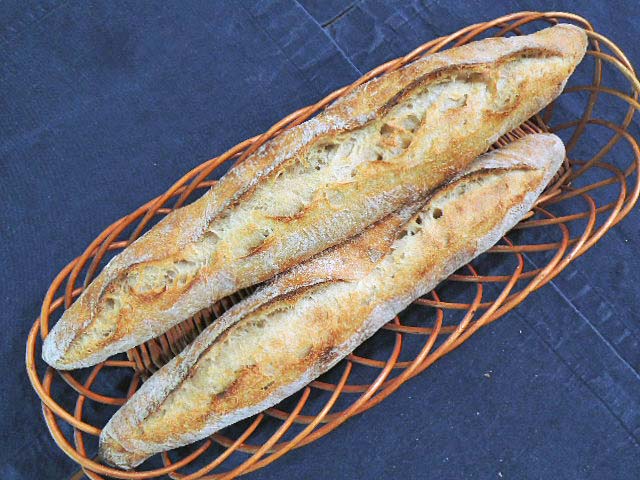
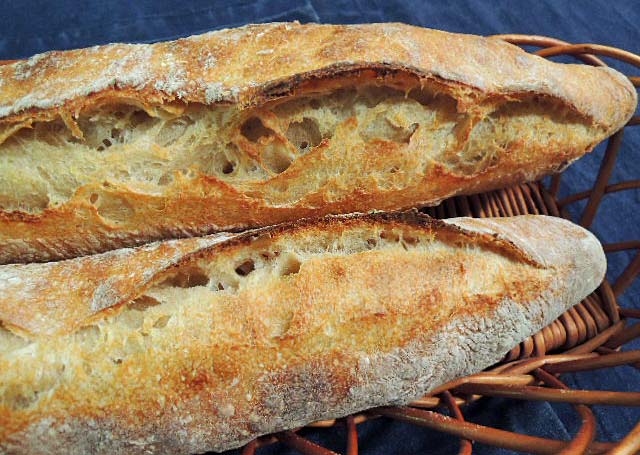
Sourdough baguettes: My version of Gosselin's "baguettes tradition"

I have made baguettes following many different formulas. Some of the most interesting have been various versions of “pain à l'anciènne,” including those of Reinhart in The Bread Baker's Apprentice and of Leader in Local Breads. Sometime back in 2008, I found an e-mail that Peter Reinhart had sent to a bread bakers' Usenet mailing list in 2003 which described the formula for pain à l'anciènne as he got it directly from Philippe Gosselin. The version that ended up in BBA was simplified somewhat by Reinhart, adding all the ingredients before the mixing, omitting the double hydration and delayed addition of the salt.

When I first made baguettes from Gosselin's original method, they were the best-tasting ones I had ever made. I finally got to taste Gosselin's baguettes tradition (from the rue Caumartin shop) last year. To my taste, they had a bit of a tang suggesting they might have been made with levain, so I modified the formula to use a liquid levain and found I preferred the result to that leavened with commercial yeast. In fact, I preferred what I had baked to Gosselin's own.

This is the version I used for today's bake:

Ingredients

Wt.

Baker's %

Organic AP Flour

400 g

100

Ice Water

275 g

69

Salt

8.75 g

2

Liquid Levain

200 g

50

Instant yeast (optional)

¼ tsp


Total

883.75 g

221

Notes: Accounting for the flour and water in the levain, the total flour is 500 g and the total water is 375 g, making the actual dough hydration 75%. The actual salt percentage is 1.75%.

For today's bake, I made 3/4 of the dough amount in the table above.

I mixed the levain the night before starting on these and retarded it in the fridge overnight. 

Method

  1. The night before baking, mix the flour and levain with 225 g of ice water and immediately refrigerate.

  2. The next morning, add the salt and 50 g of ice water to the dough and mix thoroughly. (I did this by hand by squishing the dough between my fingers until the water was fully incorporated.)

  3. Place the dough in a lightly greased bowl with a tight cover.

  4. Ferment at room temperature until the dough has about doubled in volume. (3 hours for me) Do stretch and folds in the bowl every 30 minutes for the first two hours.

  5. An hour before baking, pre-heat the oven to 500ºF, with baking stone and steaming apparatus in place.

  6. Divide the dough into 4 more or less equal pieces and stretch each into a 12-14 inch long “baguette.”

  7. Score and bake immediately at 460ºF, with steam for 10 minutes, and for about 20 minutes total.

  8. Cool on a rack before eating.

Notes: In Step 7., I specify shaping the loaves by simply stretching the dough pieces into a rough baguette shape. This is a very slack dough and a challenge to handle as one might a lower-hydration baguette dough. If you are very comfortable handling slack dough, have a firm grasp of the “iron hand in a velvet glove” principal and are feeling up to the challenge, you can shape the pieces as you would shape a baguette ordinarily. That is, in fact, what I did for this bake.

You will also note that I scored these baguettes with a single, longitudinal slash. I find the results more satisfactory than the traditional 5 or 7 cuts when scoring a very sticky dough like this. However, the difference is merely cosmetic.


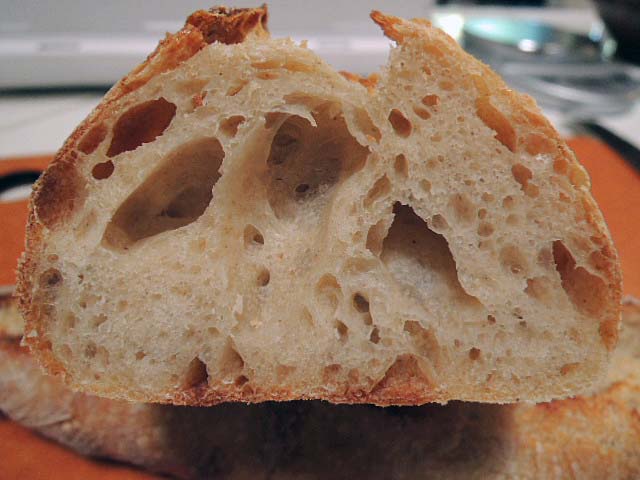
These baguettes had a chewy crust, except for the ears, which were crunchy. I think they could have baked 5 minutes longer, or I could have left them in the turned off oven for another 5-7 minutes to dry the crust. The crumb was nice and open. The flavor was sweet, complex and moderately tangy. I attribute this to a combination of factors – retarding the levain overnight and fermenting the dough, after the final mixing, at 85 dF.

This baguette is still a favorite.

David 

Submitted to YeastSpotting

txfarmer's picture
txfarmer

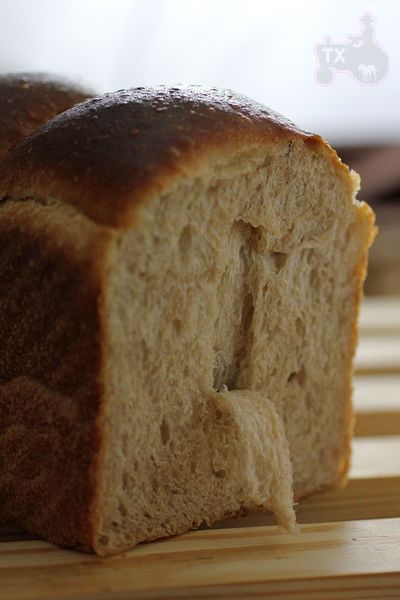
30% rye sourdough sandwich loaf - yes, even rye breads can be fluffy and soft!

Sending this to Yeastspotting.

Click here for my blog index.


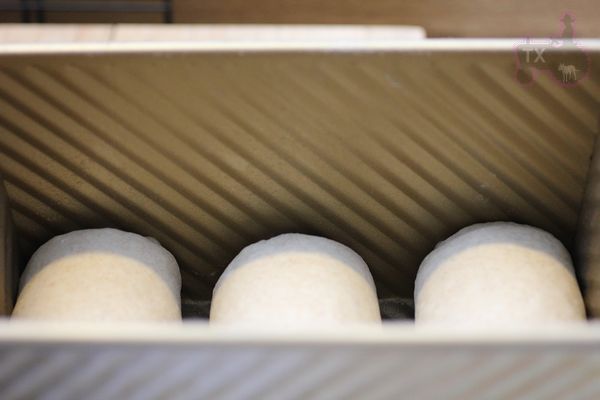
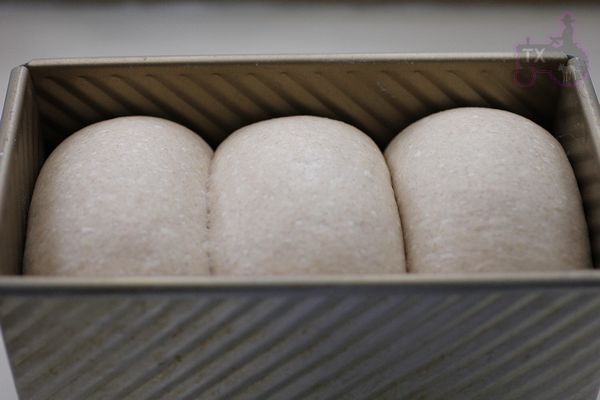
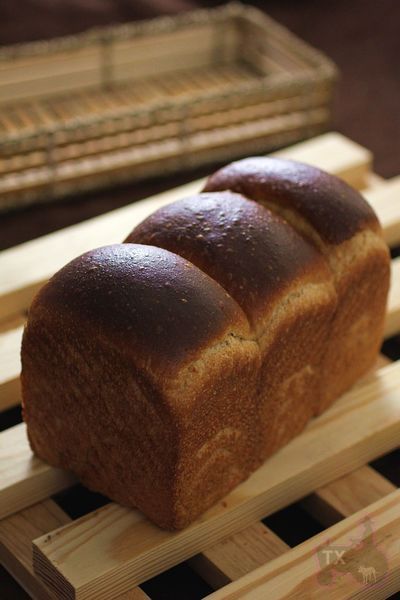
It's another variation for my favorite sourdough sandwich breads. This time there are 30% rye in the flour, 15% of which in levain, the rest in final dough. Before this loaf, I tried other rye ratios, 30% seems to be the sweet spot - enough rye flavor yet the dough is still strong enough to be soft, bouncy, and fluffy. The total flour amount is 280g for my Chinese pullman tin, which is 30g more than an all white flour sandwich dough. I knew I would need more dough to compensate for the rye, but 30 is much less than I anticipated, just shows that a bit of rye won't hurt the dough strength that much.

30% rye sourdough sandwich loaf
Note: 15% of the flour is in levain
Note: total flour is 280g, fit my Chinese small-ish pullman pan. For 8X4 US loaf tin, I suggest to use about 302g of total flour. For KAF 13X4X4 pullman pan, I would suggest using about 481g of total flour.

- levain
rye starter (100%), 12g
water, 19g
medium rye flour, 36g

1. Mix and let fermentation at room temp (73F) for 12 hours.

- final dough
bread flour, 196g (I used half KAF bread flour and half KAF AP flour for a balance of chewiness and volume)
medium rye, 42g
brown sugar, 28g
oil, 28g, softened
milk, 143g
salt, 6g
egg, 34g

1. Mix everything until stage 3 of windowpane (-30sec), see this post for details.

2. Rise at room temp for 1 hours, punch down, put in fridge overnight.
3. Takeout, divide, round, rest for 1 hour. shape as instructed here for sandwich loaf.

4. rise at room temp for about 5 hours. For my pullman pan, it should be about 80% full; for US 8x4inch pan, it should be about one inch above the edge. The dough would have tripled by then, if it can't, your kneading is not enough or over.

5. for sandwich loaf, bake at 400F for 15min, then 375 for 25-30min, brush with butter when warm.


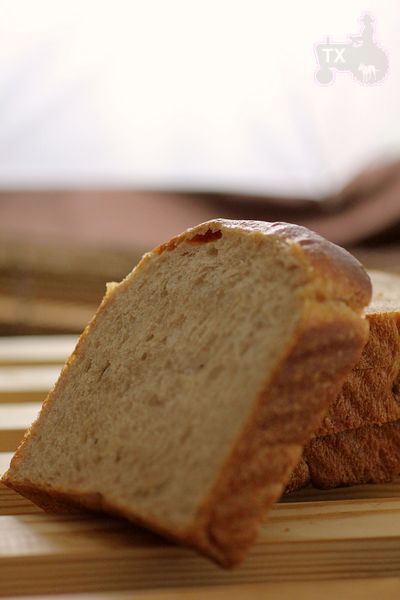
To counter the effect of rye flour, there needs to be enough tenderizing ingredients in the dough: oil, sugar, egg, milk all serve this purpose. The slices were extremely soft and fluffy, yet full of flavor.


Used brown sugar rather than white sugar, oil rather than butter, to better complement the rye flavor

RonRay's picture
RonRay

Yeast Water Examples with Photos TFL Links Only

Yeast Water Examples with Photos TFL Links Only [Updated: 110605-0720]

This is a follow up on my Yeast Water & Other Wee Beastie Bubbles (No Math) posting at the link below:

http://www.thefreshloaf.com/node/23441/yeast-water-amp-other-wee-beastie-bubbles-no-math


I wanted to provide an easy way, for those interested, to find visual examples of what has been done by TFL members using Yeast Water Levain (YWL).

The intent is to list links to any TFL posting that meets two criteria:

1/ The baked item used Yeast Water (YW) as one of the levains, and

2/ The posting shows some photographic material of the baked item.


I have searched the TFL index, and have gone through Threads, which I thought might have such postings/comments with in them. There is no intent to exclude any material that meets the two criteria given above. Therefore, if you know of any existing posting not list below, that meets the criteria, please, provide me with the link, and I will attempt to add it to this index. This is not intended to be a continually updated posting, however, for those new postings in the very near future, I will try to get them added, as well – if they are reported to me.

There are 17 categories – 15 Yeast Water type groups, 1 group of mixed &or unclear types, and the first category which is not the baking, but rather the making of YW or YWL.


Within each category, I have tried to list them from oldest down to the most recent. I hope no one finds it odd that many of the examples are my own postings, but the world does have those who get upset by nearly everything.


01 *** Making YW &or YWL...

http://www.thefreshloaf.com/node/6012/baking-natural-wild-yeast-water-not-sourdough

http://www.thefreshloaf.com/node/20460/banana-saga-%E9%95%B7%E7%AF%87%E6%95%85%E4%BA%8B#comment-142706

http://www.thefreshloaf.com/node/20460/banana-saga-%E9%95%B7%E7%AF%87%E6%95%85%E4%BA%8B#comment-142813

http://www.thefreshloaf.com/node/23719/time-lapse-video-apricot-yw-levain

http://www.thefreshloaf.com/node/23809/how-i-make-and-maintain-raisin-yeast-water

02 *** Apple YW examples...

http://www.thefreshloaf.com/node/20460/banana-saga-%E9%95%B7%E7%AF%87%E6%95%85%E4%BA%8B#comment-143250

http://www.thefreshloaf.com/node/20693/culturing-growing-and-baking-range-wild-yeasts#comment-143857

http://www.thefreshloaf.com/node/20693/culturing-growing-and-baking-range-wild-yeasts#comment-145005

http://www.thefreshloaf.com/node/20693/culturing-growing-and-baking-range-wild-yeasts#comment-145082

http://www.thefreshloaf.com/node/20693/culturing-growing-and-baking-range-wild-yeasts#comment-146554

http://www.thefreshloaf.com/node/21251/bread-who-grew-horn-or-apple-yeast-gone-wild

03 *** Apricot YW examples...

http://www.thefreshloaf.com/node/23752/apricot-yeast-water-test-loaf

http://www.thefreshloaf.com/node/23816/apricot-yeast-water-pullman-loaf

http://www.thefreshloaf.com/node/23818/survival-fittest-pt-2-raisin-yw-wins

04 *** Blueberry YW examples...

http://www.thefreshloaf.com/node/23676/fruitfed-yeast-adventuremadness#comment-170888

05 *** Cherry YW examples...

http://www.thefreshloaf.com/node/23676/fruitfed-yeast-adventuremadness#comment-170888

http://www.thefreshloaf.com/node/23818/survival-fittest-pt-2-raisin-yw-wins

06 *** Clementine YW examples...

http://www.thefreshloaf.com/node/20460/banana-saga-%E9%95%B7%E7%AF%87%E6%95%85%E4%BA%8B#comment-143000

http://www.thefreshloaf.com/node/20460/banana-saga-%E9%95%B7%E7%AF%87%E6%95%85%E4%BA%8B#comment-143153

http://www.thefreshloaf.com/node/20693/culturing-growing-and-baking-range-wild-yeasts#comment-144440

 07 *** Lemon YW examples...

http://www.thefreshloaf.com/node/20693/culturing-growing-and-baking-range-wild-yeasts#comment-146895

 08 *** Mixed or Type-Unsure YW examples...

http://www.thefreshloaf.com/node/6012/baking-natural-wild-yeast-water-not-sourdough#comment-32470

http://www.thefreshloaf.com/node/20460/banana-saga-%E9%95%B7%E7%AF%87%E6%95%85%E4%BA%8B#comment-143159

http://www.thefreshloaf.com/node/20693/culturing-growing-and-baking-range-wild-yeasts#comment-143785

http://www.thefreshloaf.com/node/20693/culturing-growing-and-baking-range-wild-yeasts#comment-145327

http://www.thefreshloaf.com/node/20693/culturing-growing-and-baking-range-wild-yeasts#comment-145701

http://www.thefreshloaf.com/node/20693/culturing-growing-and-baking-range-wild-yeasts#comment-146231

http://www.thefreshloaf.com/node/20693/culturing-growing-and-baking-range-wild-yeasts#comment-146950

http://www.thefreshloaf.com/node/21104/my-first-panettone-milanese

http://www.thefreshloaf.com/node/23348/my-japanese-sandwich-loaf

http://www.thefreshloaf.com/node/23379/cuban-bread-japanese-sandwich-starterliquid-yeast

http://www.thefreshloaf.com/node/23440/raisin-water-yeast#comment-169592

http://www.thefreshloaf.com/node/23519/bread-who-grew-horn-or-apple-yeast-gone-wild#comment-170137

http://www.thefreshloaf.com/node/23613/liquid-yeast-sourdough

http://www.thefreshloaf.com/node/23615/strawberry-pocky-my-version-mixed-fruit-yeast-water

http://www.thefreshloaf.com/node/23440/raisin-water-yeast#comment-170489

http://www.thefreshloaf.com/node/23440/raisin-water-yeast#comment-170580

http://www.thefreshloaf.com/node/23694/standard-kiss-loaf-or-keep-it-simple-smiley

http://www.thefreshloaf.com/node/23440/raisin-water-yeast#comment-171399

http://www.thefreshloaf.com/node/23779/survival-fittest-%E2%80%93-which-fruit-yeast-water-keep

http://www.thefreshloaf.com/node/23818/survival-fittest-pt-2-raisin-yw-wins

09 *** Peach YW examples...

http://www.thefreshloaf.com/node/23708/search-offlavor-peachy-boule#comment-171159

10 *** Potato YW examples...

http://www.thefreshloaf.com/node/23793/potato-yeast-water-pullman-loaf-shorty

11 *** Prune YW examples...

 http://www.thefreshloaf.com/node/20693/culturing-growing-and-baking-range-wild-yeasts#comment-145016

http://www.thefreshloaf.com/node/20693/culturing-growing-and-baking-range-wild-yeasts#comment-145570

12 *** Raisin YW examples...

http://www.thefreshloaf.com/node/6012/baking-natural-wild-yeast-water-not-sourdough#comment-31414

http://www.thefreshloaf.com/node/20693/culturing-growing-and-baking-range-wild-yeasts#comment-146574

http://www.thefreshloaf.com/node/20693/culturing-growing-and-baking-range-wild-yeasts#comment-146735

http://www.thefreshloaf.com/node/20693/culturing-growing-and-baking-range-wild-yeasts#comment-146880

http://www.thefreshloaf.com/node/20693/culturing-growing-and-baking-range-wild-yeasts#comment-147134

http://www.thefreshloaf.com/node/23593/david039s-miche-raisin-yeast-water

http://www.thefreshloaf.com/node/23726/thank-you-syd

http://www.thefreshloaf.com/node/23818/survival-fittest-pt-2-raisin-yw-wins

http://www.thefreshloaf.com/node/23440/raisin-water-yeast#comment-172317

13 *** Rice YW examples...

http://www.thefreshloaf.com/node/20693/culturing-growing-and-baking-range-wild-yeasts#comment-147023

http://www.thefreshloaf.com/node/20693/culturing-growing-and-baking-range-wild-yeasts#comment-147096

14 *** Strawberry YW examples...

http://www.thefreshloaf.com/node/23440/raisin-water-yeast#comment-169026

http://www.thefreshloaf.com/node/23440/raisin-water-yeast#comment-169740

http://www.thefreshloaf.com/node/23440/raisin-water-yeast#comment-170434

http://www.thefreshloaf.com/node/23676/fruitfed-yeast-adventuremadness#comment-170888

 15 *** Tea YW examples...

http://www.thefreshloaf.com/node/6012/baking-natural-wild-yeast-water-not-sourdough#comment-31954

16 *** Tomato YW examples...

http://www.thefreshloaf.com/node/23680/tomato-pretzel-yeast-water-raisin-yeast-water-used#comment-170927

17 *** Yogurt YW examples...

http://www.thefreshloaf.com/node/20693/culturing-growing-and-baking-range-wild-yeasts#comment-145564

http://www.thefreshloaf.com/node/20693/culturing-growing-and-baking-range-wild-yeasts#comment-145610


Ron

dmsnyder's picture
dmsnyder

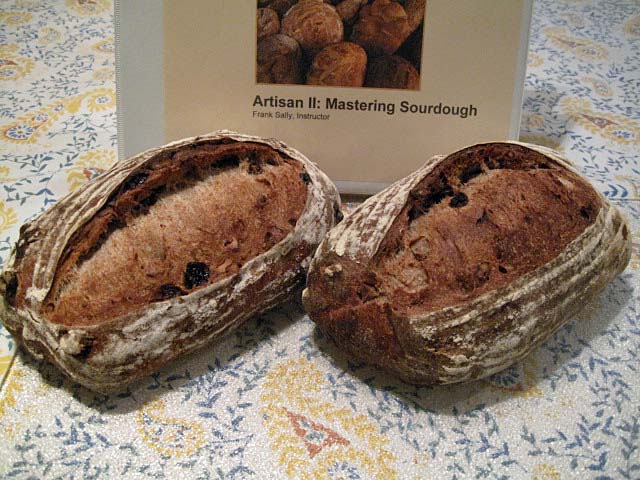
Walnut Raisin Sourdough Bread from SFBI Artisan II


Most of the breads we baked in the Artisan II workshop at the San Francisco Baking Institute (SFBI) are found in Michel Suas' “Advanced Bread & Pastry” (AB&P) textbook. A couple of the breads I and the other students enjoyed the most are not, and one of them was a delicious Walnut Raisin bread made with a firm levain and a small amount of instant yeast.

The following is my scaled down version which made two loaves of 563 gms each. (The 26 g by which the dough exceeded the ingredient weights must be due to water absorbed by the raisins.) I incorporated an autolyse in the procedure which we did not use at the SFBI.


Total Formula


Ingredients

Baker's %

Wt (g)

KAF AP flour

71.57

383

KAF Whole Wheat flour

19.77

106

BRM Dark Rye flour

8.66

46

Water

67.62

362

Walnuts (toasted)

15.81

85

Raisins (soaked)

19.77

106

Salt

2.13

11

Total

206.41

1100


Levain


Ingredients

Baker's %

Wt (g)

KAF AP flour

95

77

BRM Dark Rye flour

5

4

Water

50

40

Stiff Starter

60

48

Total

210

169

  1. Mix all ingredients until well incorporated.

  2. Ferment 12 hrs at room temperature.


Final Dough


Ingredients

Baker's %

Wt (g)

KAF AP flour

65

275

KAF Whole Wheat flour

25

106

BRM Dark Rye flour

10

42

Water

72

305

Yeast (dry instant)

0.1

0.4

Walnuts (toasted)

25

85

Raisins (soaked)

20

106

Salt

2.7

11

Levain

40

169

Total

259.8

1100

Procedure

  1. Mix the flours and the water to a shaggy mass. Cover tightly and autolyse for 20-60 minutes.

  2. Toast the walnuts, broken into large pieces, for 15 minutes at 325ºF. (Can be done ahead of time)

  3. Soak the raisins in cold water. (Can be done ahead of time)

  4. Add the salt and the levain and mix at Speed 1 until well incorporated (about 2 minutes).

  5. Mix at Speed 2 to moderate gluten development (about 8 minutes).

  6. Add the nuts and raisins (well-drained) and mix at Speed 1 until they are well-distributed in the dough.

  7. Transfer to a lightly floured board and knead/fold a few times if necessary to better distribute the nuts and raisins.

  8. Round up the dough and transfer to a lightly oiled bowl. Cover tightly.

  9. Ferment for 2 hours at 80ºF.

  10. Divide the dough into two equal pieces. Pre-shape as boules. Let the pieces relax for 20-30 minutes, covered.

  11. Shape as bâtards or boules and place, seam side up. In bannetons or en couche. Cover well.

  12. Proof for 1.5 to 2 hours.

  13. An hour before baking, pre-heat oven to 500ºF with baking stone and steaming apparatus in place.

  14. Transfer the loaves to a peel. Score them. Transfer to the baking stone.

  15. Turn the oven down to 450ºF and bake for 15 minutes with steam, then another 15 minutes in a dry oven. (Boules may take a few more minutes to bake than bâtards.)

  16. When the loaves are done, turn off the oven but leave the loaves on the baking stone with the oven door ajar for another 8-10 minutes.

  17. Transfer the loaves to a cooling rack.

  18. Cool completely before slicing.

Notes

Because of the water in the soaked raisins, The dough was wetter than expected from the 67% hydration given for the total dough. It felt more like a 70-72% hydration dough.

The crust was thinner and got soft faster with this bake than that done in the deck oven at SFBI. I might try baking at 460ºF and also leaving the loaves in the turned off oven for longer. Perhaps a shorter period baking with steam would help get the crunchier crust I would like with this bread.

This bread has a delicious flavor which is exceptionally well-balance between the grains, nuts and raisins. There is a very mild sourdough tang. Definitely a bread I'll be baking frequently.

David

Submitted to YeastSpotting


Section I: Introduction

There are few things that smell quite as good as a loaf of bread baking in the oven. But there are other benefits beyond just that lovely smell of baking your own bread. It’s cheaper, tastier, and, more often than not, healthier than buying it from the store.

Our goal with this e-book is to help amateur bakers produce the kind of bread that they would most like to pull from their ovens. We hope that it helps you.

Pages