Stayed home today to nurse my lame dog, so I have time to make some notes for myself for future reference:
For this past weekend's baking, I decided to make the Thom Leonard Country French bread (Glezer) again, but using my rye starter, and compare it to the Essential Columbia (also Glezer) my current favorite recipe. For the Columbias, however, I made two different batches for further taste comparison: one with a wet rye starter (saving the step of making a firm starter if you don't keep one) and the other with the firm white starter called for in the original recipe in Glezer's book.
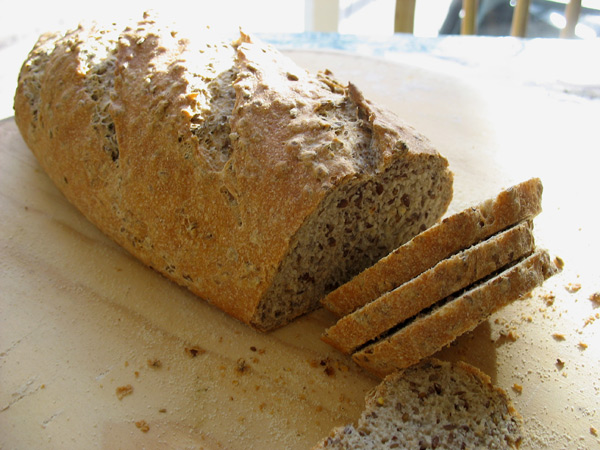
Here is how the Thom Leonard bread came out:

The crumb was beautiful as was the oven spring and crust. I also used King Arthur AP flour only, rather than a mix of AP and Bread, because the protein level of KA AP is as high as other bread flours (11.7%). The last time I made this bread using KA bread flour, the crumb was way too tough and chewy, even for me who likes chewy bread. Seems like the only reason to use a very high protein bread flour like KA (12.7%) would be to strenghten mostly whole grain breads. The Thom Leonard above tasted very nice for a mostly white French bread, however, I have developed a taste for a bit more whole wheat in my bread which is why I prefer the Columbia at the moment. Of course, the original Thom Leonard recipe calls for high extraction flour, not white AP flour. If I can ever get my hands on some, I will try it again with that.
Next, I made the Columbia using a wet rye starter, and omitted the small amount of rye called for in the recipe, replacing it with additional whole wheat and white AP. To first make the levain for this recipe using the wetter rye starter rather than the stiff white starter called for, I used a bit more starter, a bit less water, and a bit more flour, until the correct consistency was achieved and the total weight of the levain as an overall ingredient in the recipe was preserved. This was a pretty slack dough, as I like to work with wetter doughs for improved crumb, so when I tried to slash it for the batard, the darn razor dragged again despite oiling and I went over the same slash too many times and compressed the dough too much in those spots, you can see the results in the crumb shot below:
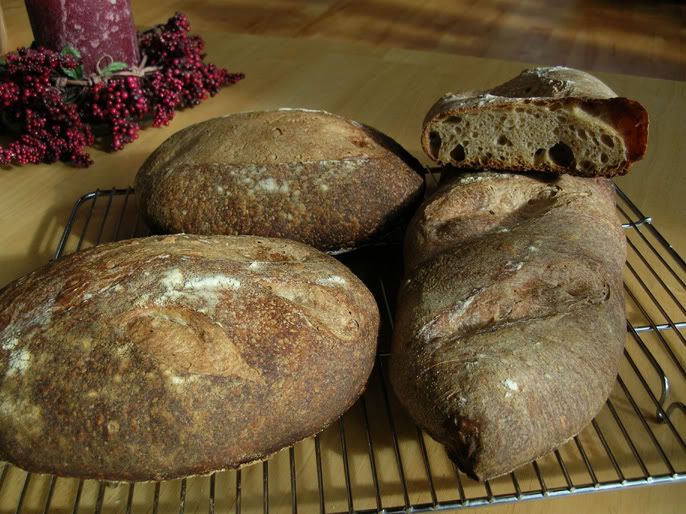
Despite the spread out loaf, I still got some nice holes and the crust was gorgeous! The taste was as great as before, with a slight flavor from the rye starter that made it taste mildly like a rye bread.
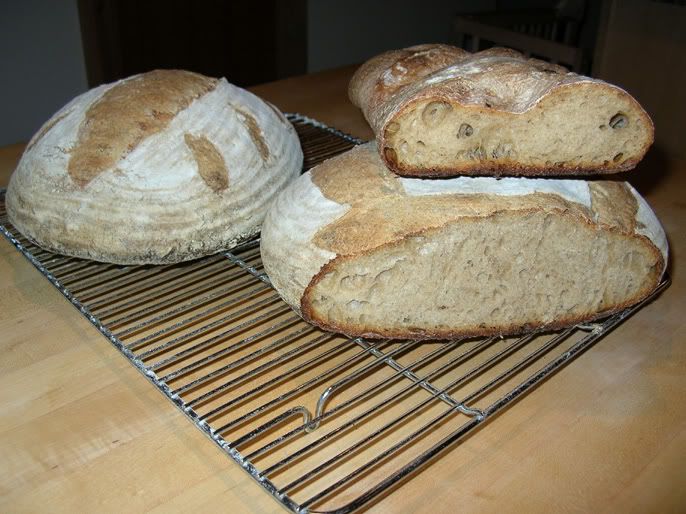
The next batch of Columbias were made with the stiff white starter called for in the recipe, my stiff starter uses 75% white bread flour to 25% whole wheat flour. I fed it 3 times at 12 hr intervals before making the levain with it for this recipe. Rather than making 4 smaller loaves, I made 2 large ones using bannetons. I had trouble with slack dough sticking to bannetons before so I got over-eager with the flour on these, and I had to brush a lot of it off after baking. I also think it inhibited the crust forming nicely as in the free-form loaves above which have the nice crisp crackly bubbles. The other thing I did differently was to degas them by pressing the flat of my hand all over the dough before rounding into boules, thinking I would try to even out the crumb more, but I overdid it, and I did not get as nice holes this time - there are some big ones, but not as many as I like to have and not as even. Below are photos of the large boules made with the stiff starter, and for comparison I stacked the previous batch's smaller rye starter batard on top of the sliced boule - the pic on the right is without a flash and shows the holes in shadow a little better, while the left shows the actual color of the crumb nicely:
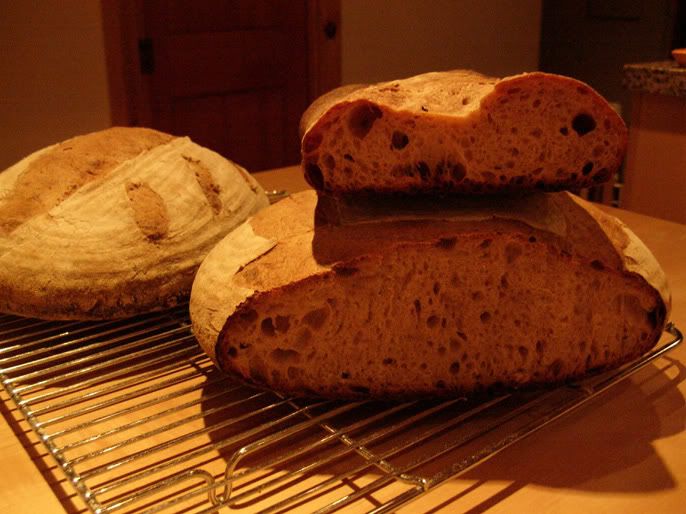
I also found that I prefer making the smaller batards free-form for this recipe rather than using a banneton to make larger boules. Not only does this avoid getting excess flour on the crust, but it provides a greater surface area and ratio of crust to crumb, since the crust is so good on this bread. As far as taste difference in crumb between the wet rye starter method vs. the stiff white starter, it is very hard to tell the difference, but I like the stiff starter version's flavor slightly better - it has a bit more tang and wheaty flavor and slightly less rye flavor - the rye flavor in the rye starter batch may outcompete the wheat germ and malt flavors. I would probably get the same result using my wet white starter, so I will try that next.
Lessons learned:
1) levain: using a wet starter seems to work just as well in this recipe as using a stiff one - the type of flour used will make a bigger difference in flavor than the hydration does.
2) first fermentation: do not de-gas the dough completely, just fold it 2 or 3 times for strength during fermentation 30 min. apart. I also retarded the dough overnight in the fridge after a 2 hour room temp. first fermentation.
3) shaping and proofing: handle as little as possible without de-gassing as noted above, but do gently form smaller batards rather then large boules to get more crust ratio. Without pressing out the gas, do tighten the batard into a very tight cylinder as much as possible to create enough surface tension to avoid it spreading out too much or flattening when scoring.
4) when slashing a slack dough like this, don't score over it again or it will flatten it out too much.
5) avoid over-flouring bannetons as it ruins the crust and didn't really help with the sticking anyhow, maybe a spray oil is better - I'd like to know how people avoid banneton stickiness and resulting collapse with the coiled willow baskets.
That's it for this week...