The Fresh Loaf

A Community of Amateur Bakers and Artisan Bread Enthusiasts.

Most bookmarked

Anonymous baker's picture
Anonymous baker (not verified)

NYT No Knead Bread, Rye

 I made this rye today in my oval 4 1/2 qt. Le Creuset (Shown in backround). I used KA Rye Blend Flour which is made up of Organic Whole Rye, White Rye, AP flour, Malted Barley flour. I used 2 cups of the blend and 1 3/4 cup AP flour. I added a couple of TRye NYT Bread: I made this rye today in my oval 4 1/2 qt. Le Creuset (Shown in backround). I used KA Rye Blend Flour which is made up of Organic Whole Rye, White Rye, AP flour, Malted Barley flour. I used 2 cups of the blend and 1 3/4 cup AP flour. I added a couple of TBLS. Vital Wheat Gluten.

RFMonaco's picture
RFMonaco

Ciccioli

If your Italian, you'll recognize this hard to find recipe. Very tasty!

Ciccioli Bread from Carol Field's book, "Italy in Small Bites".

1 recipe pizza dough made with 2 Tbs. of olive oil prepared thru the first rise. 2 lbs pork fatback or 1 Tbs. olive oil & 1/2 cup , about 3 ounces diced pancetta One & a quarter tsp. coarsely ground pepper 1 Tbs. olive oil Cornmeal While the dough is rising, cook the cracklings or pancetta. If you are using cracklings, slice the pork fatback into small pieces. Set in a small saucepan, cover with cold water and cook slowly over medium-low heat until the fat is completely rendered. Remove the crisply golden cracklings with a slotted spoon and drain on paper towels. Turn up the heat under the saucepan and boil until the water has evaporated. Save 3 Tbs. of the fat. Allow the cracklings to cool. If you are using pancetta, heat the olive oil in a small heavy skillet. Saute the pancetta over medium-high heat until it is crunchy & crisp, about 10 minutes. Cool. Reserve the pan drippings. Shaping and second rise. The recipe continues to tell you to flatten the dough & scatter the cracklings & reserved fat, or the pancetta and its drippings over the surface and forming into an 18 inch log. ( In Carol Field's other book, "Celebrating Italy", she forms the dough into rounds ). Set the dough on a lightly oiled baking sheet, cover with a towel & let rise until doubled, about one to one & a quarter hours. Preheat oven to 425 degrees. Bake for 15 minutes, reduce heat to 375 degrees & continue baking until the top is golden & a tap on the bottom of loaf produces the hollow sound, about 20 to 25 minutes.


JIP's picture
JIP

My first starter (Dialup warning many photos)

Well I finally did it,  I have been baking for all these years and finally made a starter.  I decided to use the one from Breads from La Brea Bakey I just started it 3/11 and thought I might chronicle my adventures here in case anyone cares and even if they don't it still will be fun. 


Day 1+2 was just like the book said "Pancake batter" I guess on day 2 I could see a few bubbles but I was getting a little worried.  For those who read my first posts on the subject I did use non-organic black grapes that I scrubbed very very well to remove any residue I figured out the blueberries idea was just not feasable.

Day 1 Photos                                                                                                                 


Obviously no action a few bubbles just from mixing

Day #3

Wow! what acceleration I woke up this morning and realized I have a living thing in my kitchen.  The grapes had all but dissapeared in a cloud of bubbles the liquid on top has gradually moved to the bottom.  I just looked at it before I came up to post this and I cannot see the grapes anymore at all.  Well tomorrow will be my new pet's first feeding wish me luck all.


staff of life's picture
staff of life

Overly acidic sourdough starter

My lovely sourdough starter has gotten a sharp acidic smell to it, and isn't leavening very well.  I guess this means the acetic acid has gotten the upperhand?  How do I fix this?

pumpkinpapa's picture
pumpkinpapa

Spelt sourdough

I created a delicious spelt starter at the beginning of February and made some great loaves from it recently.


The one on the left was a 50/50 organic AP with organic light spelt flour (I can only afford 2.5 kg bags of spelt and ran out) while the one on the right is a 100% light spelt loaf. Both were excellent! The kids liked the 50/50 while I found the 100% to be exactly like pumpernickel in texture, great spread with peanut butter or pb/banana/honey!

I used Sourdolady's recipe for starter but reduced all liquids by 25%, otherwise too much liquid and the starter never matures. After a week the starter was active, not as much as white or rye, and definitely not as volatile as whole wheat, but it was bubbly and produced a pleasant aroma. You can use either whole or light spelt with no loss of nutrients as they are contained in the germ not in the bran as in wheat.

I used the basic sourdough recipe as given in Peter Reinharts BBA but with 25% less water again:

Starter:

4 ounces spelt starter, 4.5 ounces spelt flour, 0.75 to 1.5 ounces water

Final dough:

20.25 ounces spelt flour, 0.5 ounce Celtic sea salt, 9 to 10.5 ounces lukewarm water 

Kneading took about 20 minutes, but my house is cool these days which affects proofs immensely as well. However unlike all my sourdough experiences (save for yeats spiked variations), this spelt sourdough had far faster and greater second proofing results than wheat or rye starter.

This is going to be my main bread, and if the kids continue to enjoy it then I should experiment with spelt cinnamon buns soon too. 

After two weeks of experimenting with the Steam Maker Bread Baker kit, I can definitely say I noticed improvements in the quality of my crust.

The model I was sent consists of a steam gun and a 4 inch tall lid.

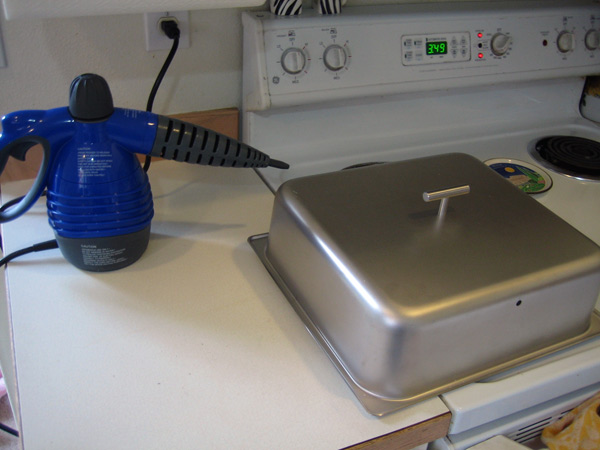
The idea is that you heat your stone, load your bread on to it, then cover the bread with the lid and inject a 5 to 10 second blast of hot steam. After 5 to 10 minutes, you remove the lid and bake the loaves as usual.

I got the smaller of the two units because it fit my existing baking stone. I already find my baking stone to be a bit on the small side. Unfortunately, with the lid on, quite a bit of stone is lost.

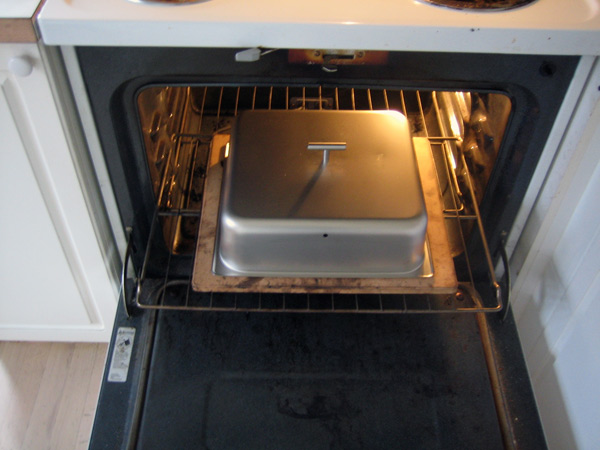
Realize also that you need to leave a half inch to an inch of space from the edges on the inside so that the loaves can expand and you can remove the lid without mashing them and it is quite tight.

I found myself having to adjust the shape and size of my loaves just to fit under the lid, or only baking one round at a time instead of my usual two. That stinks, and totally threw off my timing and rhythm. I would definitely suggest springing for a larger model if you order one.

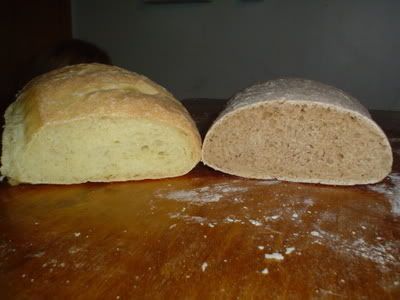
The loaves on the left are made with just a spray of steam. Those on the right are made in the Steam Maker Bread Baker.

These loaves are Hamelman's Golden Raisin Levain.

golden raisin bread

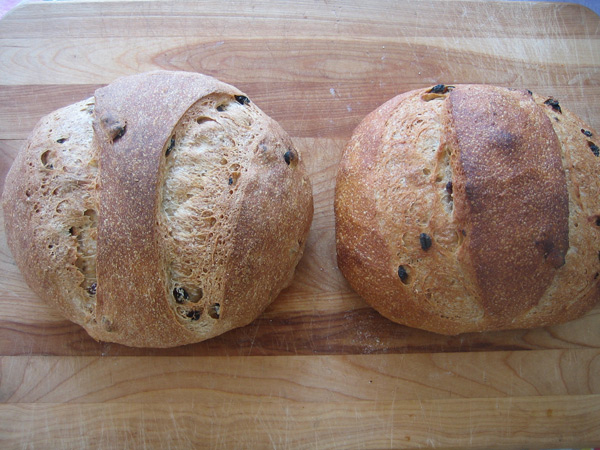
The loaf on the left came out with a thicker, drier crust. The steam baker came out with a thinner, crisper crust.

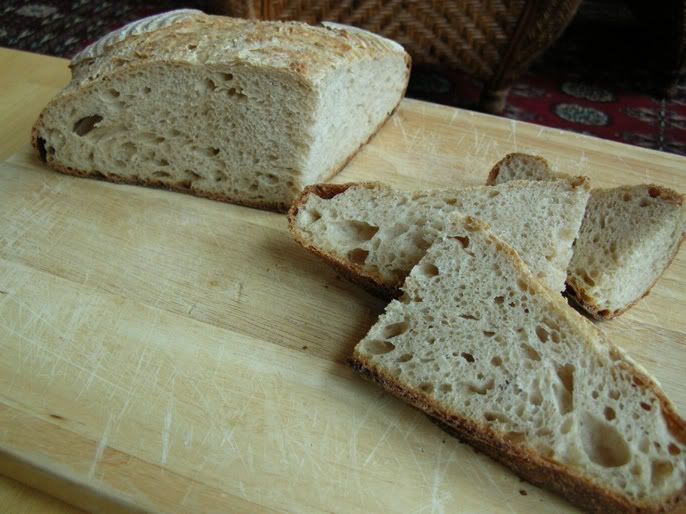
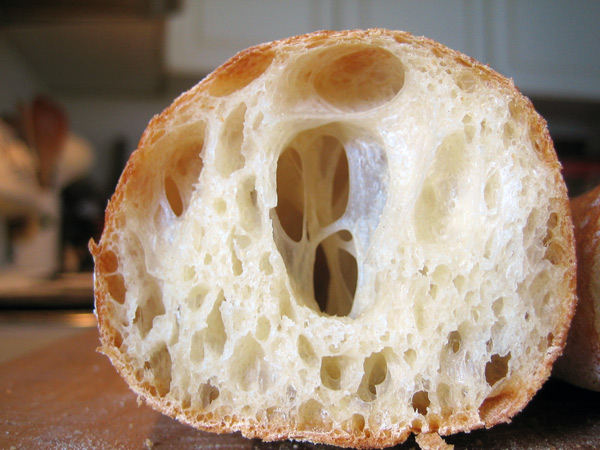
These were a ciabatta I did.

ciabatta

ciabatta

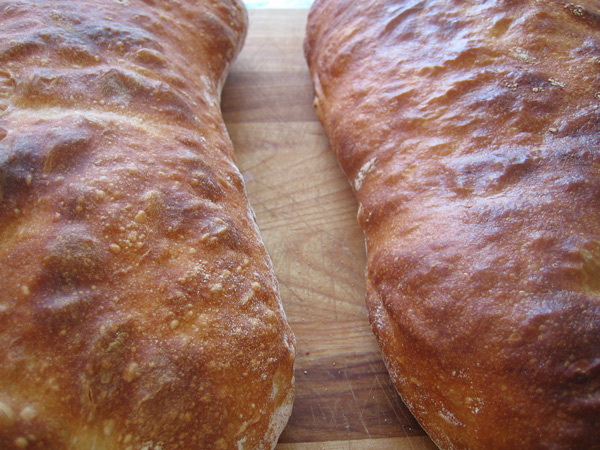
More of the raw flour was absorbed on the steam maker loaf, since it was baked in a moister environment. It also came out with a glossier crust.

crusty loaf

This was a sourdough baguette I did. It is hard to tell, but the crust was definitely thinner and crisper than what I typically end up with. Normal it takes some teeth to tear through my crust. With this one, it crackled easily.

Using the Steam Maker Bread Baker I was able to observe a state in baking I've never seen. When I removed the lid after 6 or 7 minutes, the exterior of my loaves was gelatinous rather than dry, and not at all beginning to brown yet. I don't typically open my oven 6 or 7 minutes into baking, so it is possible that I have been achieving that state and just not known about it, but I doubt it. It appears to me that the steam maker kept my crust moist for a good 4 or 5 minutes longer than what I typically get with my iron skillet on bottom of the oven technique. This results in a thinner, crisper, lighter, more authentic crust.

As has been much discussed here, with ingenuity the home baker can devise other decent ways of creating steam in their oven with extremely inexpensive equipment. And as has also been pointed out, the individual components of the Steam Maker Bread Baker can be assembled independently by someone who wants to put some time and energy into it. Nevertheless, the Steam Maker Bread Baker is a nice kit for someone who wants to dive into artisan baking: as well as the steamer and lid, they include a nice booklet with some basic bread recipes and tips. I could see purchasing one of these for someone who has gotten enthused about baking by trying the no-knead loaf and who is interested in exploring a more versatile solution.

If you already have a steam making solution you are happy with, I say stick with it. But if you don't have a solution, don't find your solution to be good enough, or are afraid your solution is going to short out the circuitry in your oven (as a few of us have), this is a pretty good way to go.

Review: Steam Maker Bread Baker

Bred Maverick's picture
Bred Maverick

The Ultimate Dough Retarder

If you would like to shape your dough beforehand and then refrigerate it, consider buying a dough retarder. Your household refrigerator should be set at 41 degrees or colder. The temperature for retarding dough should range between 46 to 50 degrees, depending on the number of hours you want to retard your dough. In addition to my refrigerator being too cold, I have also found little room inside for my expanding doughs.

Of course, a commercial dough retarder, which runs thousands of dollars and takes up huges amounts of space, is not appropriate for the home bread baker.

After a little bit of research, I purchased a small wine cooler - the Cuisinart CWC 900 Private Reserve. I can set the temperature digitally from 45 to 68 degrees. I couldn't be more pleased. When I'm not retarding dough, my husband uses it to cool wine. ;-)

Diane

Wayne's picture
Wayne

Semolina Filone No. 2

As promised, I made a second Filone today using methods mentioned before, just to make sure I could duplicate the formula.  Worked out great.  First picture is the whole filone, and the second picture is the filone sliced:

pumpkinpapa's picture
pumpkinpapa

Posting recipes from books

I am not sure how to go about this, but what is the rule or concensus on posting recipes from books, whather we modify them or not?

mountaindog's picture
mountaindog

help for overproofed loaves?

For about the past 2-3 weeks, it seems that my Thom Leonard boules, which I have made every week since about November, are suddenly coming out overproofed even though I have not changed my technique: as soon as the loaves are slashed on the peel and hit the hot oven stone, they collapse and spread out at the slashes.

I was wondering if it was because my 100% hydration starter is getting very acidic as it is maturing, despite being well fed at either 1:4:4 or 1:2:2 by weight. Do I need to adjust proofing times and temps accordingly with a strong starter? Is it gobbling up the gluten too fast? Seems if I feed my starter more than 1:4:4 it does not get active enough, though, so I don't want to over-dilute it either. Are the population of lbs overpowering the polulation of yeasts?

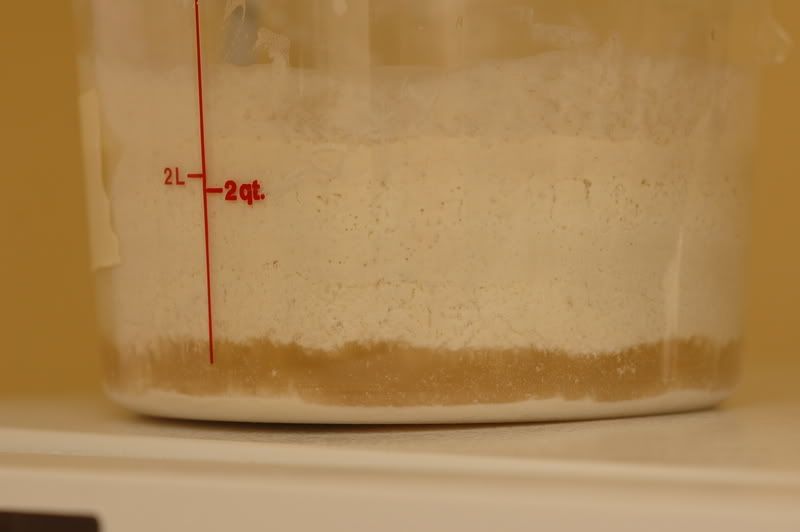
To try to adjust, in yesterdays batch, I used a slightly stiffer dough, and lowered the first fermenting time from 4-5 hours down to 3-3.5, before the dough doubled, then proofed for only 2.5 hours down from 3.5-4. I also fermented and proofed at about 75F rather than 85F.

I got better results but still not as good as I had in the very beginning of my sourgdough baking: the loaves still rose nicely and held their shape a little better in the bannetons but still spread out very wide at slashes when I slashed and baked, but at least this time they got decent oven spring and rose to a better dome than my last 2-3 tries. Notice how much the dough spread out at the slashes - the interior had little structure and was getting gooey and batter-like just before putting in the oven.

I got some holes in the crumb but nothing spectacular, more dense in the center than I like for this recipe:

The only other variable I can think of between the past 2-3 weeks and before, other than the acidity of my starter, is that I am now using King Arthur organic artisan flour rather than the King Arthur regualr AP flour. Perhaps the organic artisan is using a softer wheat and therefore has less gluten? They have about the same protein and ash contents according to the KA website, though.

Any ideas on what is going on? Suggestions?

Pages