The Fresh Loaf

A Community of Amateur Bakers and Artisan Bread Enthusiasts.

Blogs

beanfromex's picture
beanfromex

I am sitting at my sister,s dining room table trying to type on a laptop..  I have never done this before and the keys are sooo narrow!!!

 I baked yesterday, twice in a week!! I did the ciabatta and my brother in law took pictures with a great camara, pictures to come soon. He does part time camera work for hockey teams, so shooting bread gave him a whole different goal.

The flour worked differently again, and the crumb is once again different We had to open the windows as the cornmeal was burning and she was worried about the fire alarm going off..

The first loaf was a raison cinnamon loaf, with hardly any cinnamon as she was out...note to self-always check ingredients in the pantry before starting baking.

I picked up some baking tins, one for english muffins and the other for individual loaves.

I have not bought the BBA yet, and it was on back order from the library...so I will have to wait until I get into Chapters...canada's verrsion of barnes and nobles.

It is gently snowing here and looks very christmassy...

Hasta luego and hello to all.

ps two more weeks left in the north!!


tomsbread's picture
tomsbread

Its probably stale by now but I made an attempt at claypot bread. I probably need a few more practice to get the hang of it but it was fun. Perhaps I am too used to the conventional way of making bread but I think the old way makes bread that is predictable and better looking.

More pictures in http://www.angelfire.com/planet/tomsbread/index.htm

pmccool's picture
pmccool

After a 3 week stretch with no baking, I finally caught up a bit this past weekend.  With the exception of some crescent rolls for Thanksgiving dinner from a recipe in Southern Living magazine, everything was from the Bread Bakers Apprentice.

My wife volunteered me to bring cinnamon rolls to a brunch with friends.  I decided to try Reinhart's formula from BBA and it was a big hit.  I made a double batch so that I could try both the cinnamon roll and the sticky bun variations.  Plus, we needed a bunch anyway.  The dough is fabulously rich and sweet.  The inclusion of the lemon zest adds both a fragrance and a flavor that are still identifiable in the finished baked goods.  Because it was for a Saturday brunch, I made the dough Friday evening, shaped it into rolls and put them in the refrigerator to retard overnight.  That gave me time to bake them in the morning and convey them, still warm, to the brunch. 

I did take a few liberties with the rolls.  Reinhart calls for spreading a cinnamon sugar mixture on the dough before rolling it up, using white sugar.  I replaced the white sugar with brown sugar for some additional flavor.  And, remembering a delightful twist from my college days, I scattered some chopped apple and chopped walnuts on the cinnamon rolls before rolling up the dough.  (That idea comes from the enormous cinnamon rolls that are still available from the Hilltop Restaurant in L'Anse, Michigan, just up the hill from Lake Superior.  They will even ship the rolls to buyers in the U.S. if you want to order them from their website at http://www.sweetroll.com/.  And no, I don't get any commission, just a bit of nostalgia.)  The other variation was to add some chopped pecans on top of the glaze for the sticky buns.

Here are the cinnamon rolls, after coming out of the refrigerator:

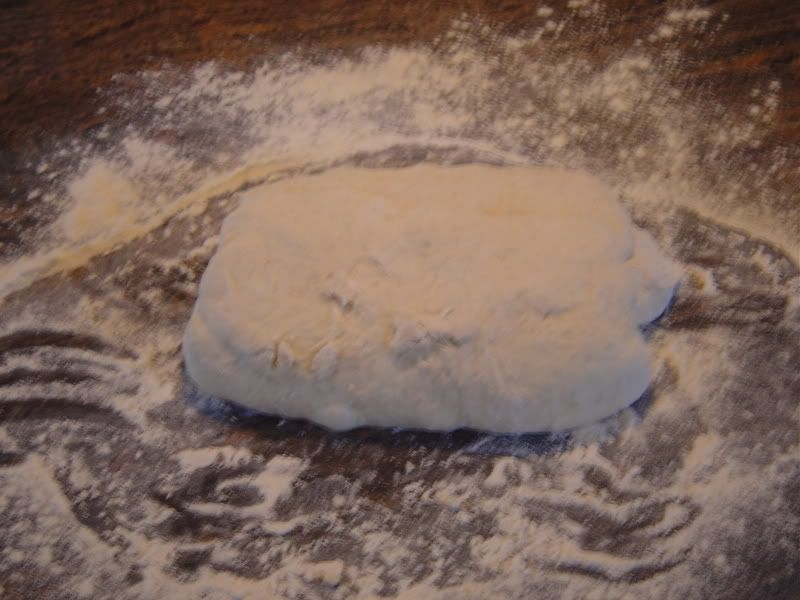
You can see that the dough is so soft (I didn't even need a rolling pin to spread it into a rectangle; just patted it out) that some of the rolls have partially collapsed, even though they were refrigerated.  If I have to use the overnight retard again, I think that I will allow them to rise to nearly full size before putting them into the refrigerator.  That way they will hold their shape better.  As it was, I had to nudge them back into shape as they completed rising at room temperature.

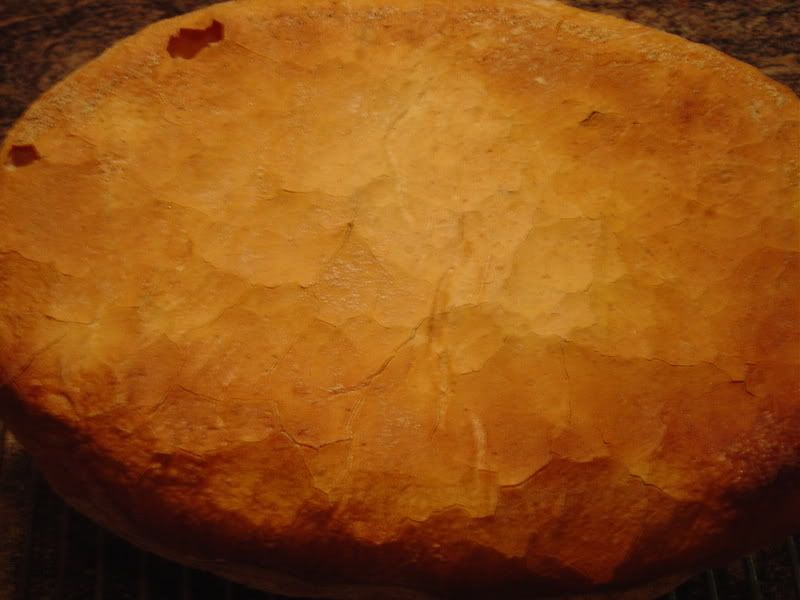
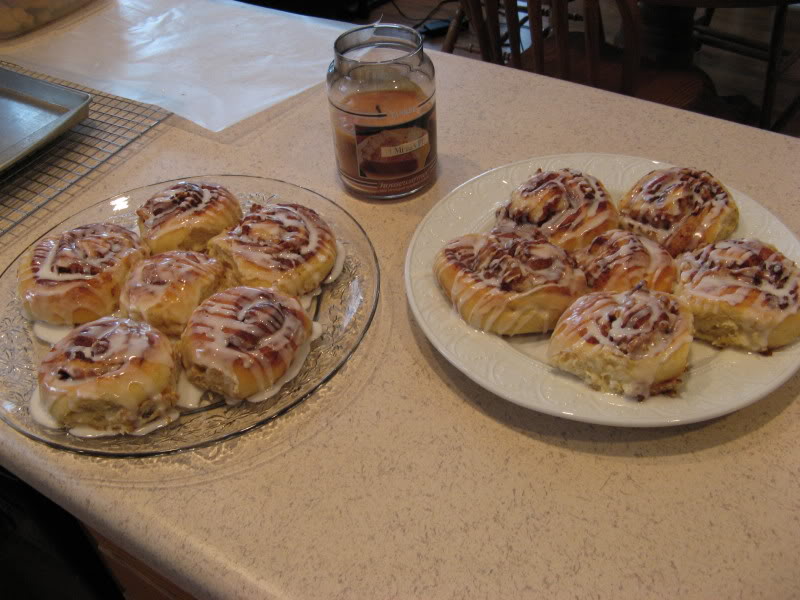
Finished, they looked like this:

The sticky buns looked like this after being taken from the refrigerator:


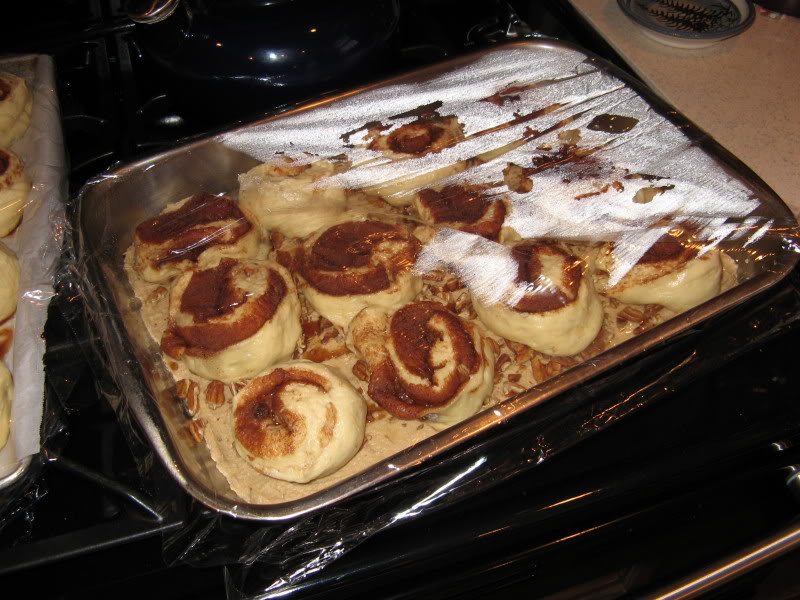
As with the cinnamon rolls, I had to straighten these up as they rose.  You can see the layer of caramel topping in the bottom of the pan, with the bits of pecans.  Reinhart notes that any excess topping can be refrigerated.  Silly man!  We used it all!

After baking and inverting onto another pan to let all of that wonderful caramel coat them, the sticky buns looked like this:

Oh, yeah, they are good!  One friend said that although the cinnamon rolls were the best she had ever had, the sticky buns were over the top.  My wife has already told me that these will be on the menu when everyone is home for Christmas.

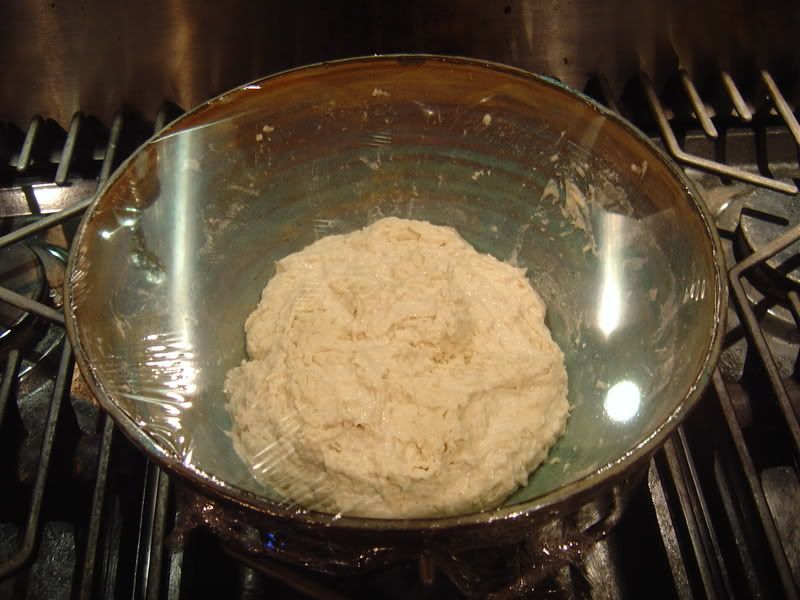
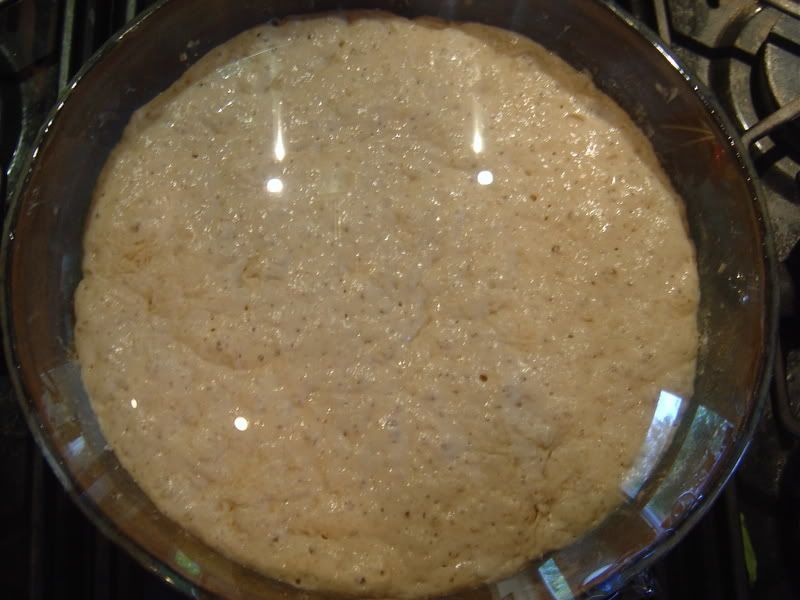
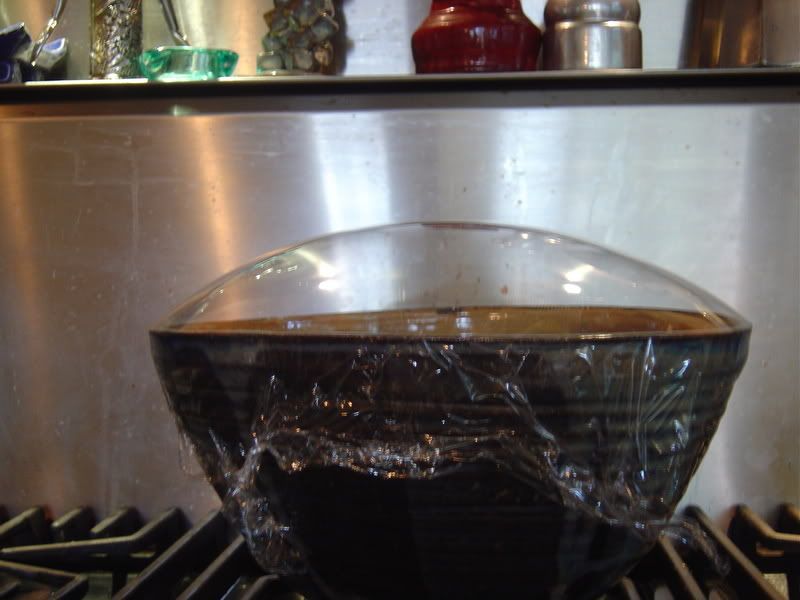
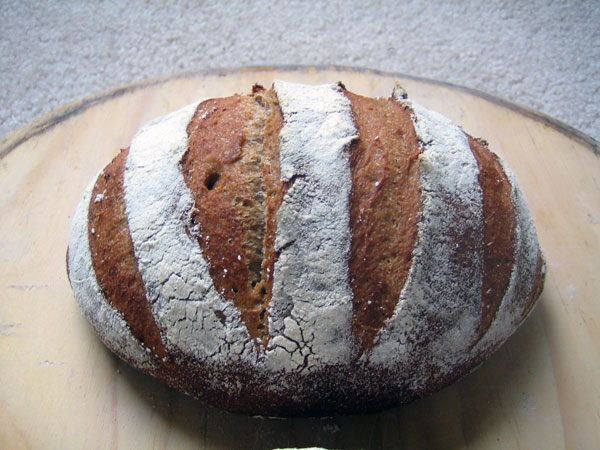
It also occurred to me that my sourdough starter had been neglected recently, so I started feeding it on Friday morning.  After four feedings, one of rye, it was ready to go to work Saturday afternoon.  Since there was enough to fuel two batches of bread, I started with the New York Deli Rye from BBA.  When I made the deli rye previously, I used fennel seeds in place of the optional caraway seeds.  This time, I remembered just how well dill gets along with onion, so I added dill seed to the dough.  It may not be original, but it is absolutely delicious in this bread.  What a great foundation for sandwiches!  The dill seed, I think, will be a standard part of this recipe going forward.  Because of the yeast that Reinhart includes in this formula, I was able to complete this bread before going to bed Saturday evening.  Here are the finished loaves:

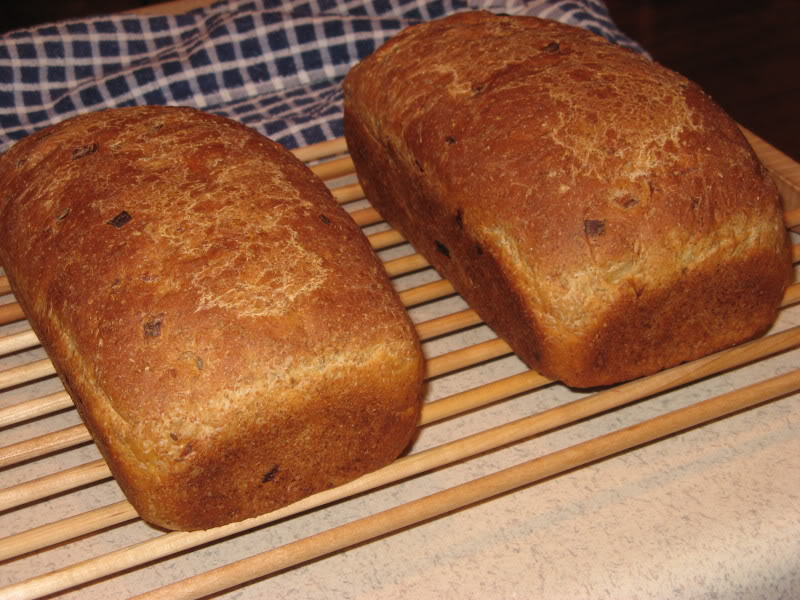
I'm not entirely certain what caused the lighter blotchiness on the top crust, unless maybe it was the spray oil on the plastic that I used to cover the loaves while they fermented.

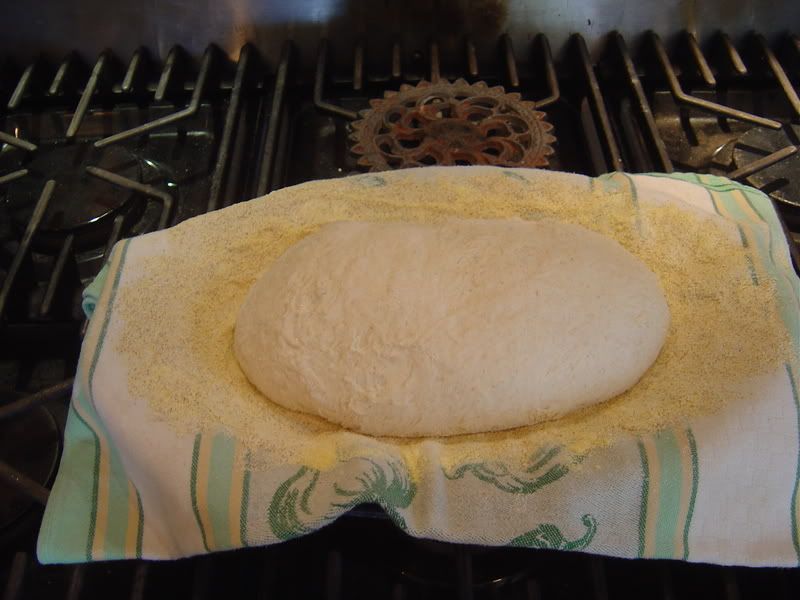
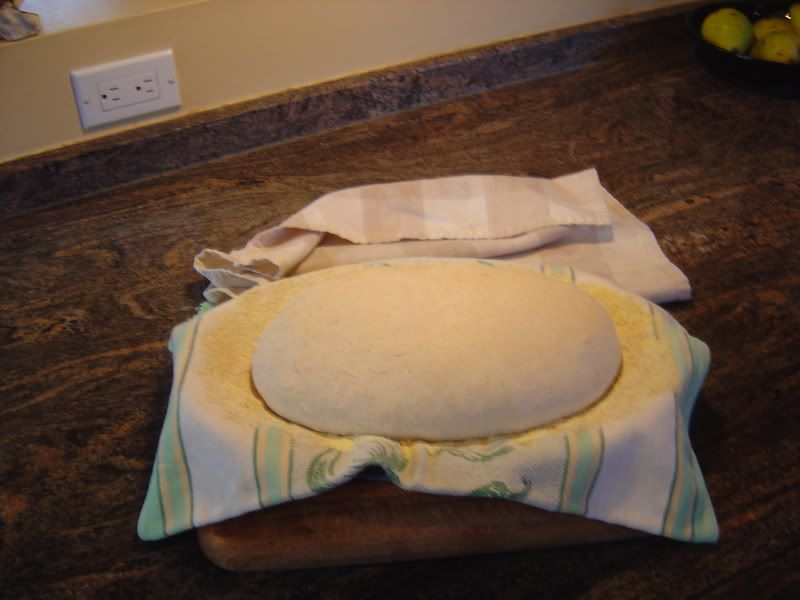
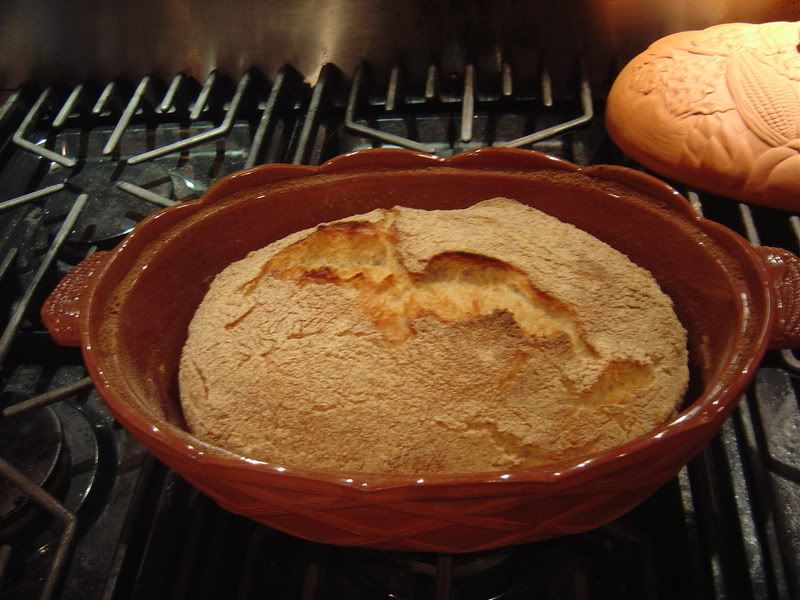
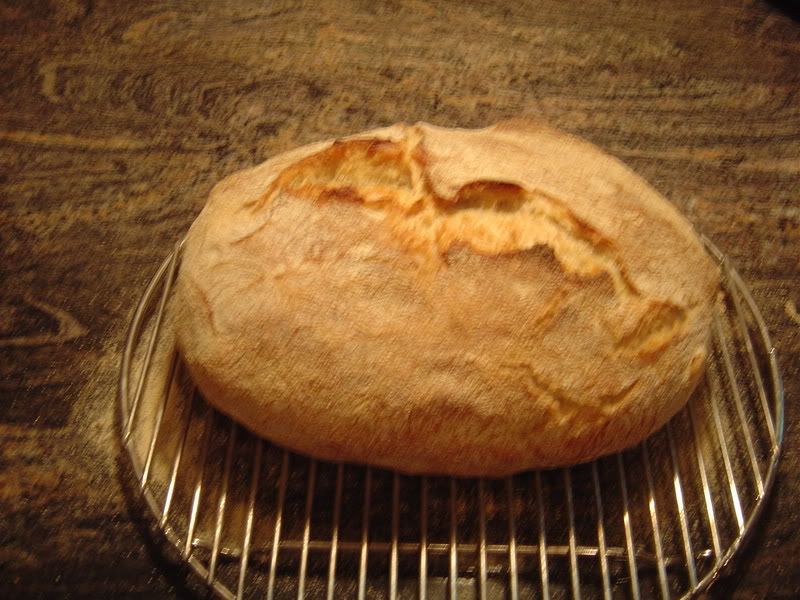
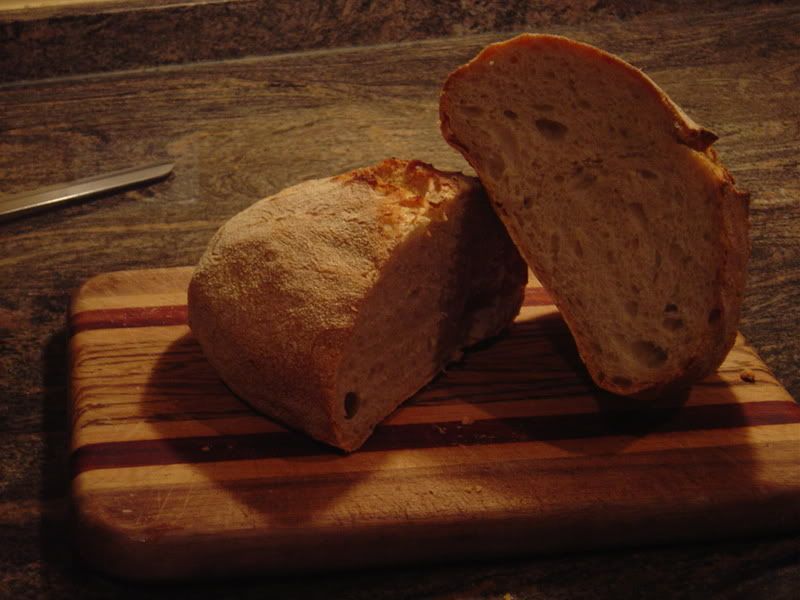
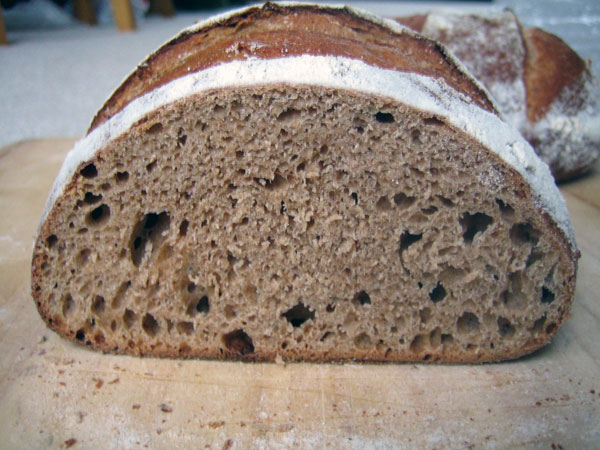
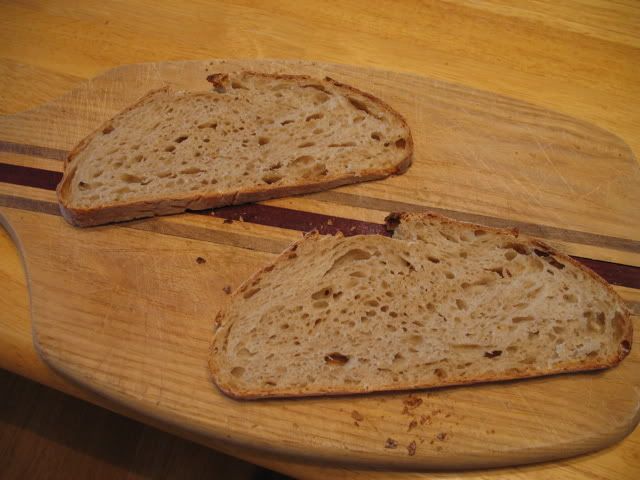
After setting the deli rye dough to bulk ferment, I started a batch of the basic sourdough bread, also from BBA.  After bulk fermenting and shaping at room temperature, the loaves went into the refrigerator.  On Sunday, after getting home from church, I pulled the dough out of the refrigerator and allowed it to finish fermenting at room temperature.  Then I baked it on a stone, with steam, starting at 500F and then dropping to 450F after 10 minutes.  When the internal temperature reached 205F (love that instant read thermometer!), took them out of the oven.  At that point, they looked like this:

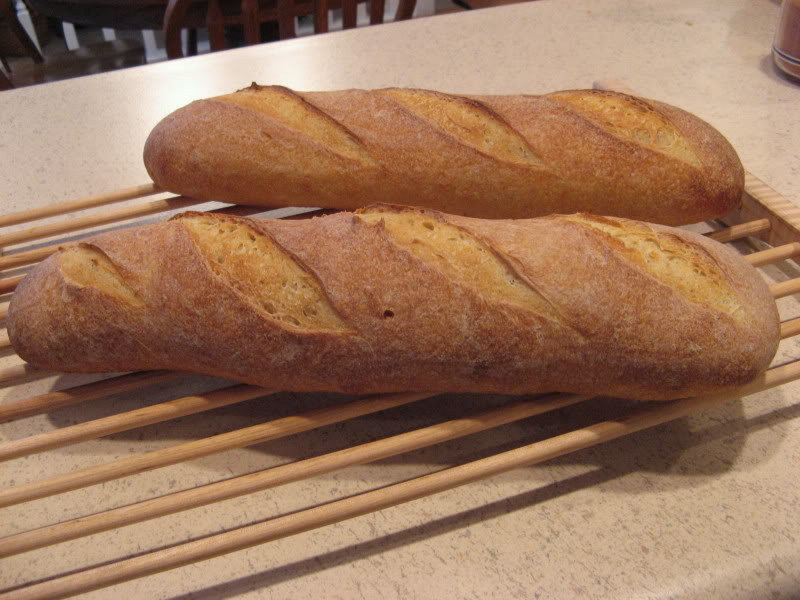
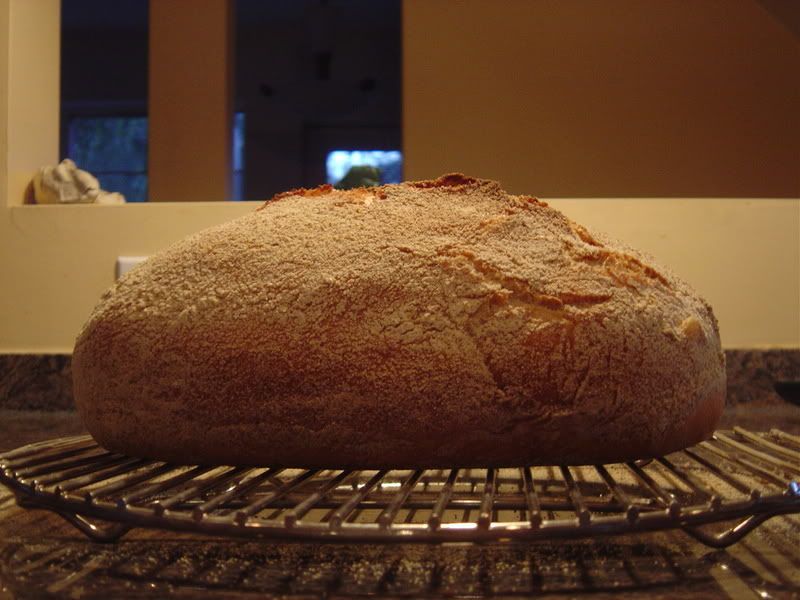
I still need to practice slashing, although one loaf came out better than the other.  They also formed small ears along the slashes.  I have no idea what the crumb looked like, since I gave them to friends.  Apparently the flavor was alright, since they reported that one loaf was half-eaten by the time they got back to their house.

It was a real treat to get that much baking in over the course of a few days, especially since a couple of recipes were new to me.  And it was a pleasure to find some new favorites.

Thegreenbaker's picture
Thegreenbaker

I wasnt to make a Rustic loaf, but my dough is always too runny.  Runny in the way that its like normal bread dough, but it spreads out no up. It rises, but not high. I tend to end up with a loaf 30cm in diameter and spreading.

I am guessing it has something to do with the spelt flour I am using.

Maybe it is my technique. By the time I decide it chould be in a loaf tin and I put it in there ti proof a bit, it doesnt want to rise.


So I mix the douch, knead it for about 5-6mins as it is Spelt not Wheat. It gets to a nice elastic stage then I put it in an oiled bowl and leave it.  It grows huge.

Last time I rose then I punched it down and it rose well again. Then I chaped it and left it to rise again............but it didnt.

This time I punched it down gently, then put it on a tray to rise again-hoping I could just put it in the oven but is just spread out again. I didnt want flat bread. So I put it in a loaf pan and it hardly rose. I put it in a preheated pre humidified oven with a tray of hot bubbling water. There wasnt any oven spring what so ever, in fact the little bit of rise I did get in the tin, flattened out. :(

 So I have theories.

I handle it too much. Maybe one rise a punch down and then put it in its mould/loaf pan to rise again. Then put it in the oven.


I'm out of Spelt flour now, and we have decided to go to wheat flour as it is soooooo much cheaper.  We have been paying almost 10 australian dollars for 1kg of spelt flour. Organic yes, but goodness. So I will have to start again.

It might be easier with Wheat. But I still wont handle it much. It might even hold its shape so that I can have a Rustic loaf!


Pedro Pan's picture
Pedro Pan

So, I've talked alot about making this bread in previous posts on the original thread but have not documented the experience as yet in photos. So here goes:

3 cups casually measured AP flour + 2 T rye flour (i read somewhere that it enhances the flavor)

1 1/2 t salt

1/4 t active dry yeast disolved in 1 5/8 cup purified water

Oven at 475, baking vessel pre-heated. Baked covered 30 mins, uncovered 15.

1. What I call the biscuit stage-- all the ingredients are dumped in the bowl, mixed just enough to bring it together:

Close-up:

2. 18 hours later:


Those yeasties have been busy-- love the pressure buble on the plastic wrap:


The Fold (actually I folded it twice in 15 min intervals):


3. The oval platter for rising and the oval clay covered roaster:


3. Shaped and put on the platter for final rise:


4. 3 Hrs 15 Mins later (running erands). Apparently there is no such thing as over-proofing?:


5. Fresh out of the oven:


6. Side view, nice oven spring. It's about 4.5 ":


7. Top View:


8. Network of fine cracks on the bottom:


9. Crumb:


Anonymous baker's picture
Anonymous baker (not verified)

I like these Italian rolls. Nice shaped and great in taste!

Pane Biove

250 g flour
8 g fresh yeast
5 g salt
20 g lard
1/2 TL honey
~130 g water

How to shape them you find on my blog: http://kochtopf.twoday.net/stories/2958191/

Floydm's picture
Floydm

Tried a whole wheat sourdough for the first time with my current starter.


Certainly not the kind of crumb I can get with regular bread flour, but not bad for something purely leavened with a starter.


Anonymous baker's picture
Anonymous baker (not verified)

I made my very first Rye loaf today, and it turned out wonderful! I used a recipe from "The Practical Encyclopedia of Baking", which someone let me borrow. The bread turned out moist and not too heavy which has been a problem with some heavy grained breads.

Anyway, the only changes I made to the recipe was to do it all by hand- without a bread machine or mixer. I prefer the way completely handmade loaves come out. The rise is usually better and the taste is extremely superior.

Here is the recipe, as well as pictures should any of you like to try it out =)

rye


3 cups Whole-wheat flour

2 cups Rye flour

1 cup unbleached, enriched flour

1 1/2 teaspoons salt

2 Tablespoons caraway seeds

2 cups warm water

2 teaspoon active dry yeast

2 Tablespoons molasses*

1. Put the flours and salt in a bowl. Set aside 1 teaspoon of the caraway seeds, and add the rest to the bowl.

2. Put HALF of the water in a bowl with the yeast, let sit until frothy.

3. Mix yeast mixture and molasses into the flour mixture. I used my hands to mix until it was shaggy.

4. Knead for five minutes or so until it is smooth and elastic. It is a heavy bread so the texture will be slightly grainy. Let rise until doubled.

5. Divide dough into two pieces and roll into two 9 inch logs with slightly flattened tops. Place on a greased baking sheet or stone. Brush lightly with water and sprinkle with the remaining caraway.

6. Cover and let rise until well-risen (app. 40 minutes) Place in a preheated 450 degree oven and bake for 30 minutes until they sounds hollow.

* I used unsulphured, organic black-strap molasses. You probably could use regular molasses, but the flavor might be slightly different.

</break>

JMonkey's picture
JMonkey

Well, my first attempt with 100% whole wheat flour was pretty much a bust. But I thought I'd give it one more shot with sourdough and regular bread flour.

Wow. As you can see, my daugther is proud of her work (she helped me mix, which, with this technique, is about 75% of the work):
Sourdough bread

I've never had an "ear" like that on a loaf, and I've never had such a wonderful, crunchy crispy crust. Here's a shot of the crumb:
Crumb shot
Nice and open, but without big "mouse holes." As for flavor, it was a mild to medium sourdough flavor, buttery with a slight tang and a long aftertaste. Crumb was chewy and light. Very nice.

Here's how I made it. My formula:
Final dough of 90% white bread flour, 5% whole rye, 5% whole wheat, 1.9% salt, 72% hydration.
5% of the flour was prefermented sourdough starter at 100% hydration.

Below are the actual weights of ingredients I used to get 1.1 kilograms of dough (strange, I know, but I was trying get the right size to fit my cloche): Mix together:

  • 569 grams bread flour
  • 32 grams whole rye flour
  • 12 grams salt
  • Dissolve 63 grams whole wheat starter at 100% hydration into
  • 424 grams water. Pour the water into the flour mix, and stir until it comes together into a dough.
    Cover and let it sit for 17-18 hours at room temperature.
    Flour a board copiously and then give the dough one stretch and fold. Wrap it in a well-floured towel or sheet of baker's linen and let it sit for two hours.
    Pre-heat the oven about one hour before baking to 500 degrees. Make sure that the covered pot, dutch oven or cloche is in the oven to warm up. I used a cloche. They're not cheap. With shipping, they'll run you north of $60, but that's a lot less expensive than most dutch ovens, which seem to run $175+ for a big one of decent quality. I was given the cloche as a gift and don't have a dutch oven or a big covered cassarole.
    Slash the dough if you like, though it may be too wet. Luckily, mine was perfect for slashing.
    Carefully open the container to flop the dough inside, seam or slash side up. Close the oven door and lower the heat to 450.
    Bake for 30 minutes covered and 10-20 minutes uncovered. (I baked mine for 15 minutes).
    Let it cool on a rack for about an hour.

    I don't make white-flour bread very often, but when I do, this will be the technique I'll use, though I may actually shape it next time. The dough had surprising strength and, after the fermentation, though the dough was sticky, it was by no means a batter. It kept its shape well. Amazing bread.
  • beanfromex's picture
    beanfromex

    This last batch of the NYT bread has worked out wonderfully for me. Kitchen temp a brisk 26C.

    I used 3 cups AP flour and 1 cup WW.

    1 1/4 tsp salt

    1/4 tsp yeast

    1 7/8 cups of room temp water.

    Mixed as per the video,then into oiled bowl and covered with plastic and refrigerated 24 hours. 

    Removed from fridge and brought to room temp for three hours.  

    Folded twice at 1.5 hour intervals., after the above 3 hour climatizing.

    Preheat the oven to 550F. Place dough onto cormeal covered baking sheet (non stick). Minimal shaping. Bake for 15 minutes, brush with melted butter. Return to oven bake another 10 at 450 F and then 20 minutes at 350F. Remove to rack and cool before cutting.

    The bottom crust was crunchy and wonderful. The top crust was the best browining I have had in awhile due to butter, and temperatures that I am able to get now in my oven since the gas people removed a blockage. Previously 425F was the best I could hope for, and that was unstable and did not last. The oven spring was great.

    The bread was full of holes and reminded me of a crumpet taste and texture.

    Ramona, my husband and myself really enjoyed this version and will continue to make it. I found the ration of WW and white to be perfect . 


     Hasta luego..

    Pages

    Subscribe to RSS - blogs