The Fresh Loaf

A Community of Amateur Bakers and Artisan Bread Enthusiasts.

WatertownNewbie's blog

WatertownNewbie's picture
WatertownNewbie

Having found a good source for solod (the fermented red rye malt), I have been baking several different rye loaves recently.  This one is a Lithuanian bread based on a recipe from Stanley Ginsberg (http://theryebaker.com/black-rye-breadjuoda-rugine-duona-lithuania/).

As I described in another post, this dough did not behave well for me when I tried mixing it with a stand mixer (per Stan's recipe), but mixing by hand works perfectly fine (along the lines of what Rus Brot does with a Borodinsky dough).  So far I have used a mix of medium rye and dark rye flour, but the next time I might go with all dark rye flour.

Here is a top view of today's bake.

This loaf is going to a friend, so I will not have a photo of the crumb, but here is one from my preceding bake of this bread.

WatertownNewbie's picture
WatertownNewbie

Recently I posted about baking the Borodinsky 1940 bread.  This bake is the Borodinsky Supreme based on the recipe in a TFL post from February 2014.

Our kitchen was 72F yesterday, and the whole process took a bit longer than in the original post.  Nonetheless the final result was pleasing (although I am still struggling with the gelatinization of cornstarch and did not get the glaze I was seeking).  Perhaps the inclusion of molasses rather than malt extract made the taste different from the Borodinsky 1940 version, but this bread seemed a little sweeter and not as sour.  I intend to bake both types of Borodinsky in the future.

Here is a view from the top.

And here is the crumb.

My wife really liked the flavor of the top crust with the coriander seeds.  Although rye is a dense bread, this loaf is springy too and not at all a brick.

WatertownNewbie's picture
WatertownNewbie

Yesterday I baked a Borodinsky loaf using the 1940 formula in the video by Rus Brot (thanks, Ilya, for posting that link in your blog).  In the final dough, I combined 100 grams of all-purpose flour with 50 grams of whole wheat flour (a substitution mentioned by Rus Brot) and otherwise pretty much followed the approach in the video.

Although there are some large time gaps in the process, I was kept busy at times cleaning up from the preceding step and preparing for the next step.  I wonder how they made this bread in the old country?

The final result was pleasing.  This was the first time I ever gelatinized cornstarch, and I could have waited a bit more toward the end of the bake to do that (which would have made the gelatin a little runnier when I brushed it on), but the shine is on the crust.  There was a crack in the top and another about two inches long on one lower side, but the appearance seemed good overall.  The crumb is dense, but not a brick.  The crust is a little tough but nicely chewy.  Over the next several days I am curious about whether the flavor will develop.

Here is the crumb.

If anyone wants to bake this and save themselves the trouble of writing down all of the ingredients and steps from the Rus Brot video, let me know.  (But definitely watch that video -- several times perhaps -- if you are going to make this bread.)

Happy baking.

WatertownNewbie's picture
WatertownNewbie

Inspired by one of Ilya's recent posts about a rye bread, I decided to try a recipe from Maurizio Leo's site (The Perfect Loaf) for a rye bread with some seeds.  The night before the bake I prepared the levain, which consists of mature starter (47 g), rye flour (234 g of King Arthur White Rye Flour), and water (234 g).  At the same time I put roasted unsalted sunflower seeds (65 g), roasted unsalted pumpkin seeds (65 g), and whole flaxseed (30 g) in a bowl and added enough hot tap water (214 g) to submerge the seeds.  Both the levain and the soaker were covered with plastic wrap and left on the counter overnight.

The next morning the levain had tripled after about twelve hours.  First I put water (322 g) into a large bowl and added the levain, which I stirred until it dissolved.  To that I added dark rye flour (176 g), spelt flour (176 g), sea salt (12 g), and the soaker (after draining through a mesh sieve).  I used a dough scraper to mix everything, which had the consistency of cake batter, took the temperature (75 F), and then covered the bowl and let it sit for a half hour.

Maurizio used a Pullman loaf pan in his bake, but I don't have one of those and instead used a 9"x5"x3" loaf pan, which I sprayed lightly with oil.  Using a spatula, I then scooped the dough into the loaf pan, smoothed the top, and covered the pan with plastic wrap for the proofing.  After ninety minutes the dough had risen to about a half inch below the rim, and I then put the loaf into a 400 F oven that had been steamed in my usual way (lava rocks in aluminum pie pans).

After thirty-five minutes I reduced the oven temperature to 350 F and then continued the bake for another ninety minutes.  In the meantime the loaf rose nicely and took on a dark brown color.  A crack formed around the upper perimeter just below the top crust (something Maurizio mentioned in his description of the recipe), but was more cosmetic than anything else.  By the end of the bake the internal temperature of the loaf was 209 F.  I put the pan on a cooling rack for a little over an hour and then removed the loaf, which I weighed (1215 g) and then wrapped in a tea towel and left on the counter.

Maurizio says to leave the loaf wrapped for 24-48 hours to avoid having a gummy crumb from slicing too early.  I opted for about twenty-five hours and then curiosity got the better of me.  Here is the loaf after being unwrapped.

Here are two photos of the crumb.

The bread has a crisp crust and is easily sliced.  The crumb is moist but not gummy.  The seeds provide a nice addition to the flavor of the three different flours.

This is an extremely simple bread to make and offers a lot of flexibility.  You could vary the types of flours and types of seeds and really play around with the possibilities.  The presence of white rye and spelt makes the crumb lighter than a totally dark rye bread and is not dense at all.  Consider this bread if you are looking for something that combines rye and seeds.

WatertownNewbie's picture
WatertownNewbie

Abe recently posted about a bread he put together from some flour and seeds, and the combination appealed to me as a change of pace from the usual breads that I bake.  Here is my version (pretty much following his steps).

     The ingredients in my version of his bread are:

Spelt Flour -- 400 g

Whole Rye Flour -- 100 g

Salt -- 8 g

Pumpkin Seeds -- 15 g

Sunflower Seeds -- 20 g

Flaxseeds -- 10 g

Sesame Seeds (white) -- 15 g

Starter -- 23 g

Water -- 420 g

As Abe described, I mixed the flour, seeds, and salt and made a well, into which I added the starter (which had been fed about five hours earlier).  I then poured in 350 g of water and mixed a bit until that water was absorbed.  More water was needed, and I added a little more until the consistency felt right (sticky, but holding together).  In all, I used 420 g of water.  I mixed the dough some more while feeling a bit of gluten development.  The dough temperature was 76 F, and I covered it for the first of the thirty-minute periods between four stretch-and-fold sessions.

After the fourth S&F the dough went into the refrigerator, and then about five hours later I took it out for an overnight bulk fermentation at room temperature.  In the morning, the dough had sat for a tad over ten hours (but had not expanded much).  I wet my hand and worked the dough gently to feel some resistance in it, shaped the dough into a log, and put it into a 4-1/2" x 8-1/2" loaf pan that I had greased with butter.  The loaf pan then went into a plastic bag for a little over an hour-and-a-half while the dough proofed.

Meanwhile I heated the oven to 450 F.  After the proofing, during which the dough expanded noticeably, I put the loaf pan into the oven and left it there for 47 minutes (rotating after twenty minutes).  After thirty minutes the internal temperature was only 179 F, which did not surprise me because of the hydration level, but by the end the internal temperature was about 208 F.  The loaf split on its own along one side (no scoring).

The crust is very crispy and crunchy in a good way.  The crumb is a little dense, but not heavy like a pure rye bread.  Instead, the crumb is soft and allows the various seeds to be tasted.

This is a neat bread.  My wife is not a fan of spelt, but she really liked this bread.  It is simple to make, and I will do so again sometime. If you are looking for a bread with spelt and rye and some seeds, you will enjoy this one.  Thanks, Abe, for your post about this bread.

Happy baking.  Stay safe and stay healthy.

Ted

WatertownNewbie's picture
WatertownNewbie

This is for all of the new bakers who want to tackle a Tartine recipe and get a sense of what to expect and look for during the various stages.

The Tartine Bread book begins with the Basic Country Bread, which is 90% all-purpose flour and 10% whole wheat flour.  With a 75% hydration, this can be a challenge for those who have not handled much dough, but the recipe is manageable, and making this bread will give you experience in recognizing the signs for when to move on from step-to-step (and when to be patient too).

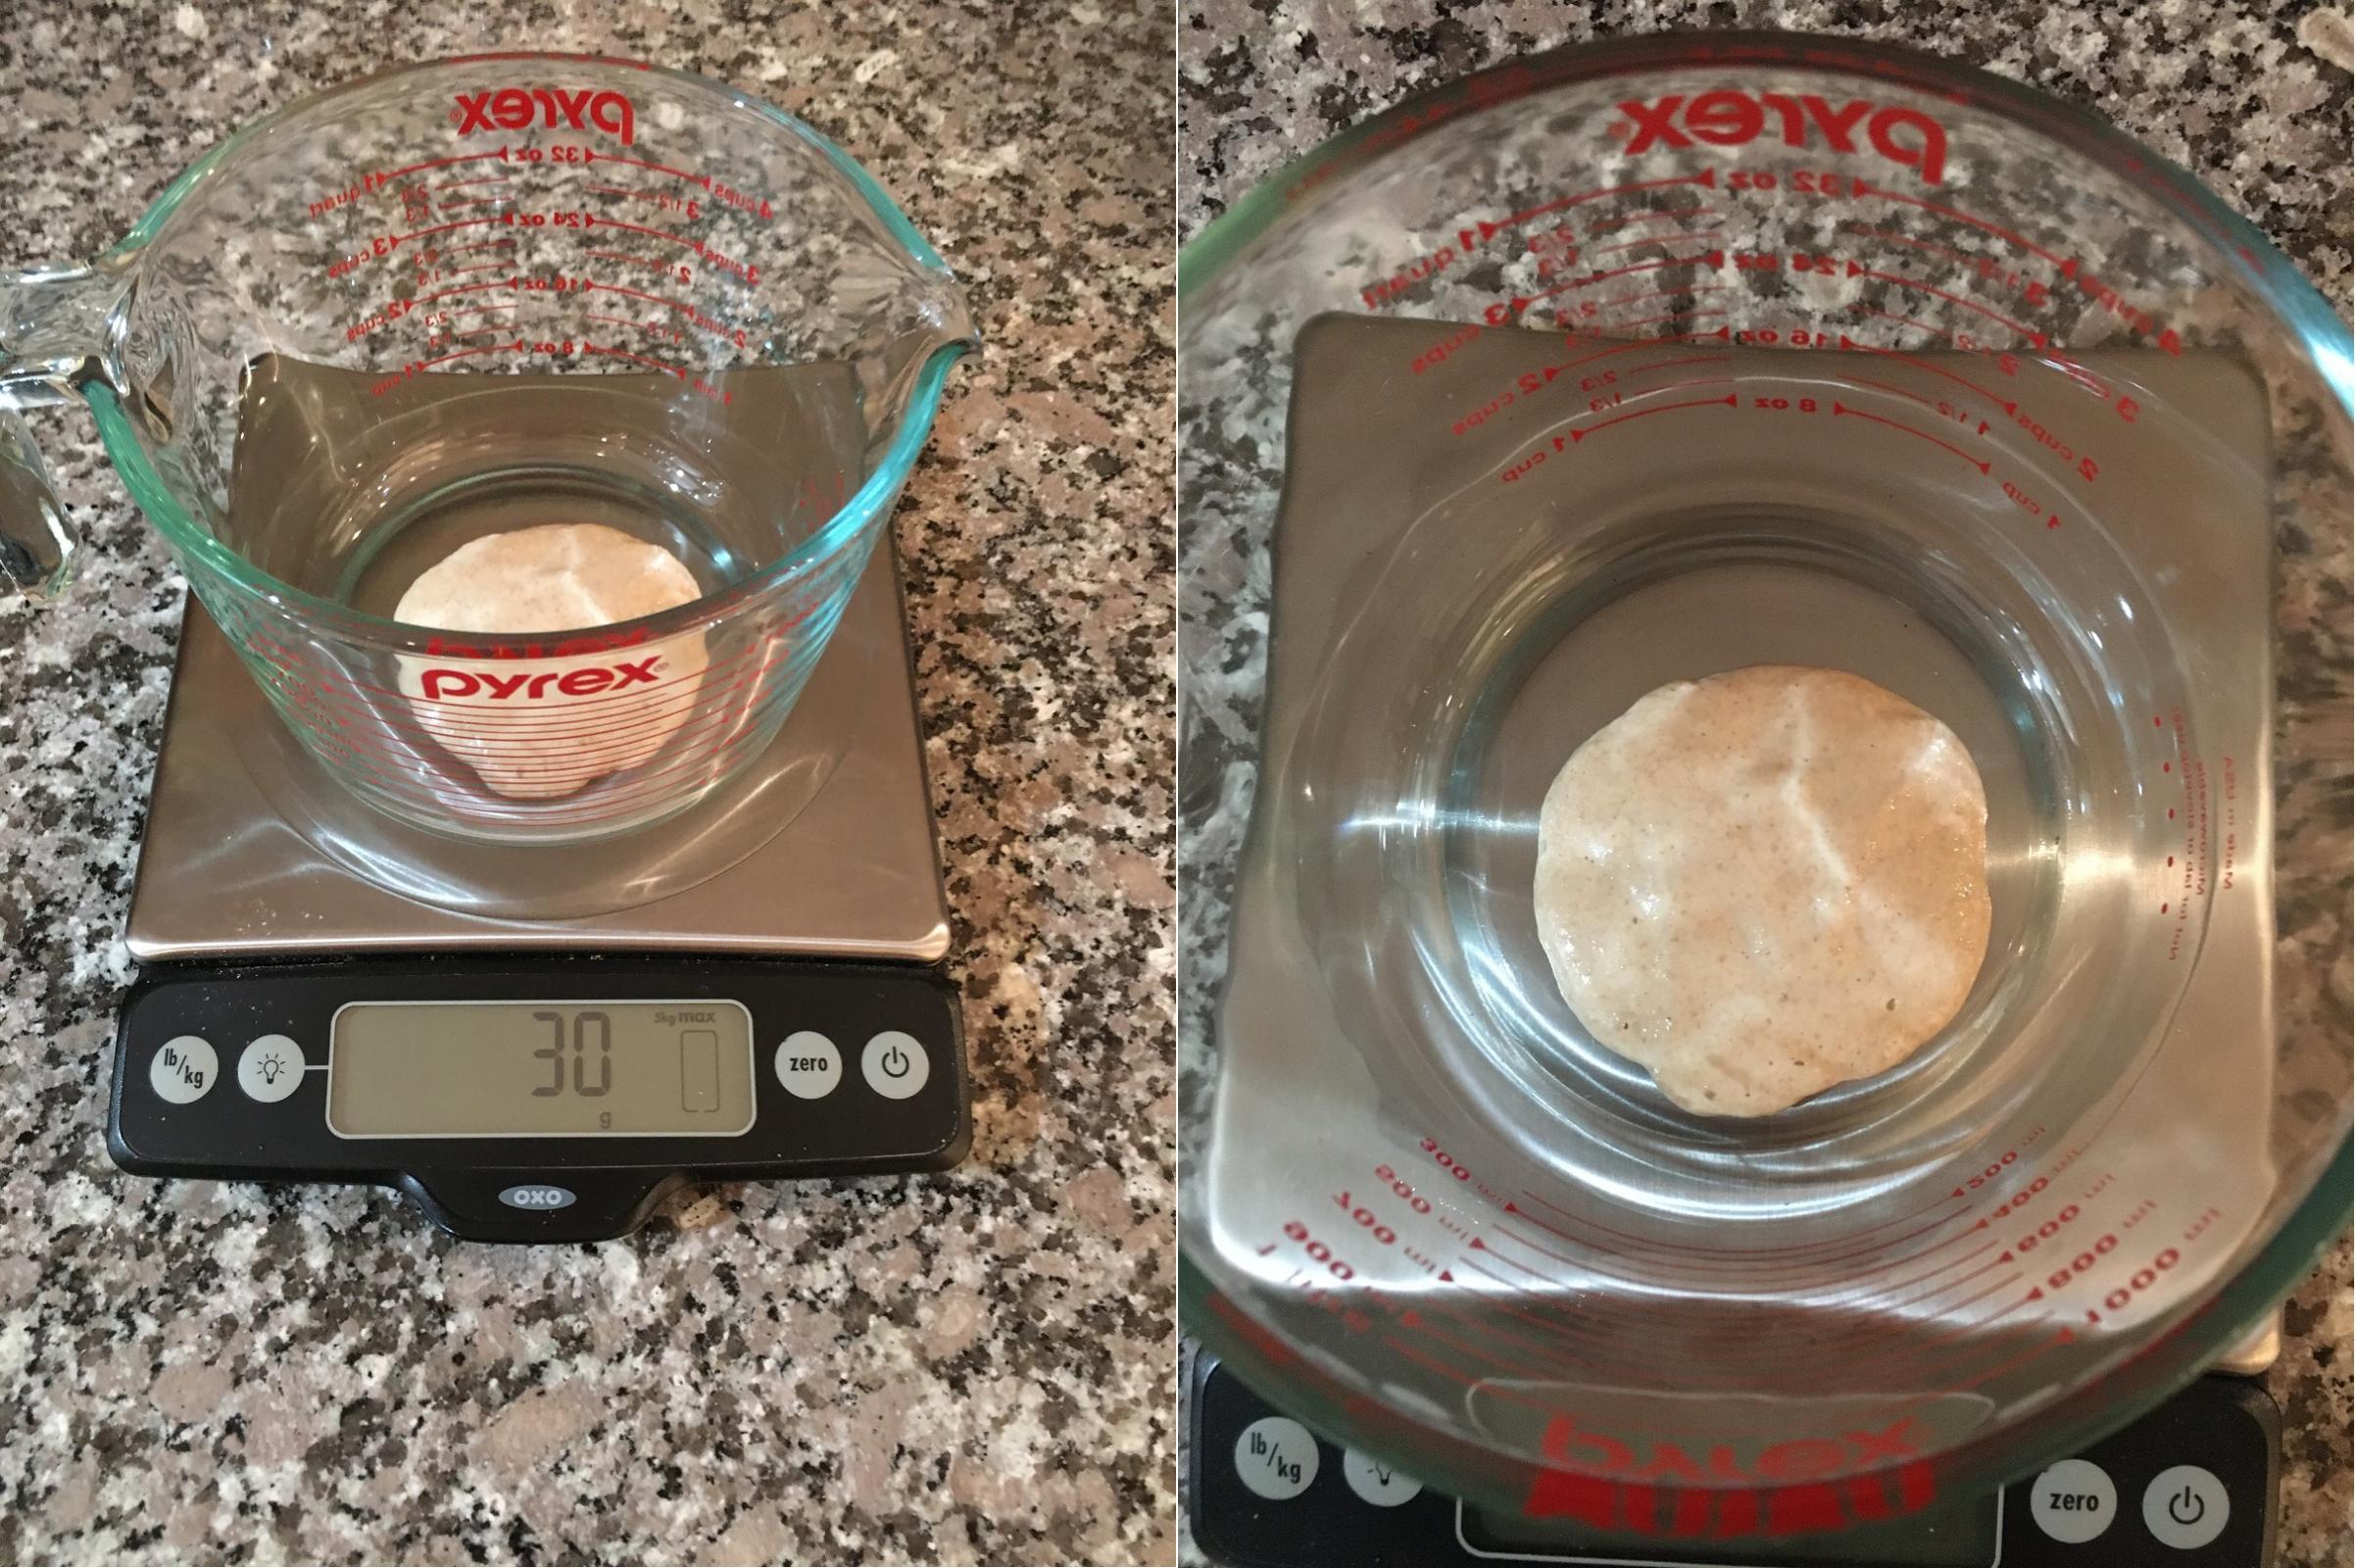
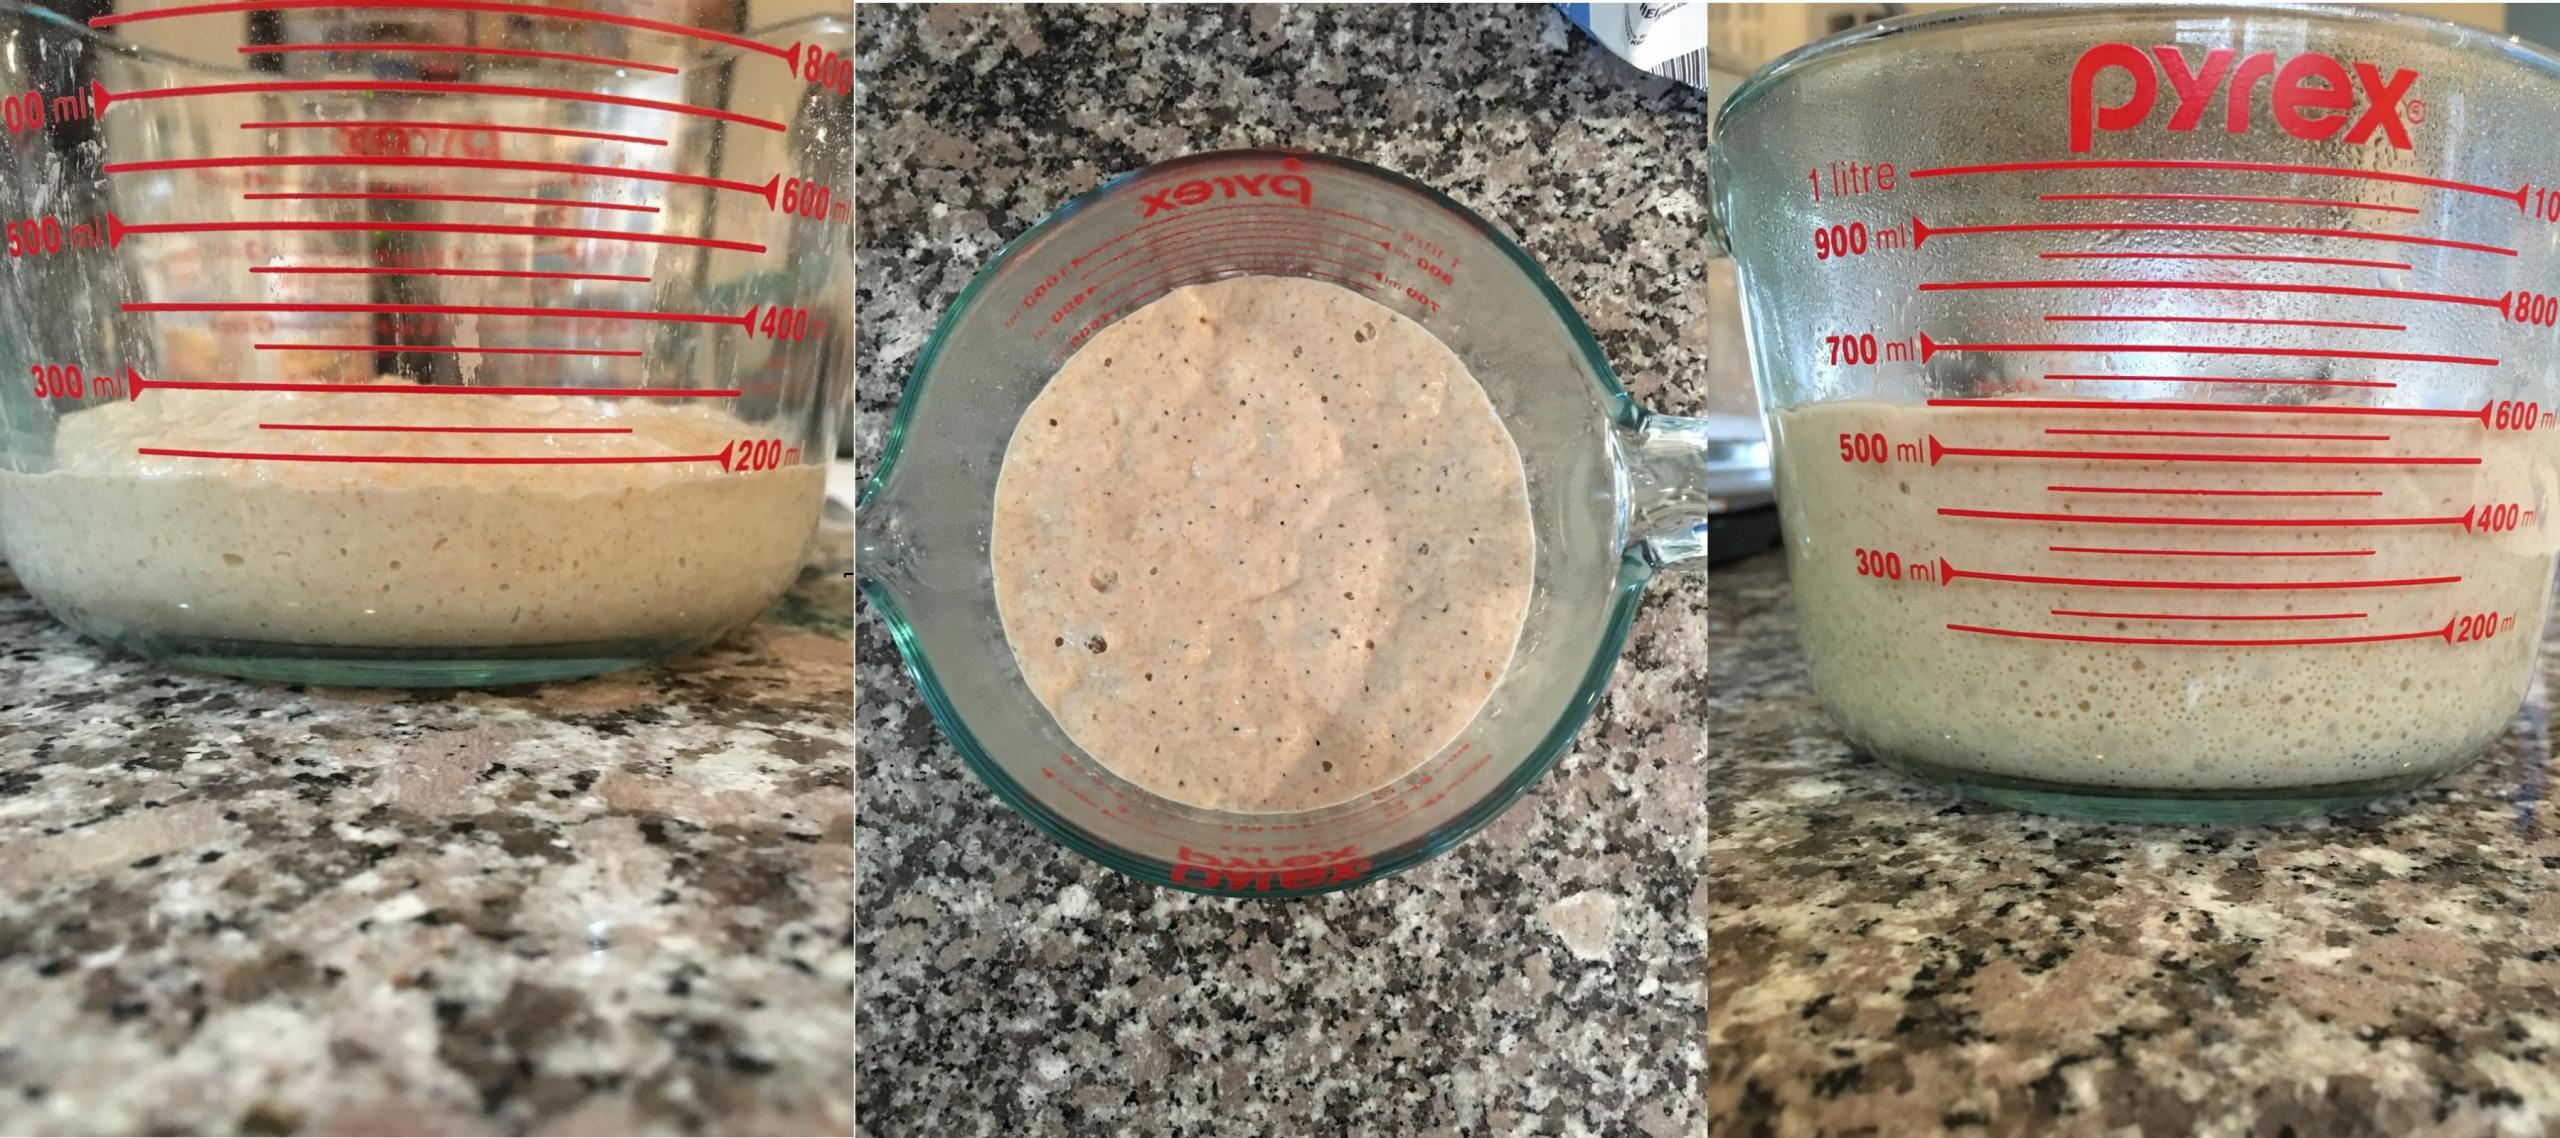
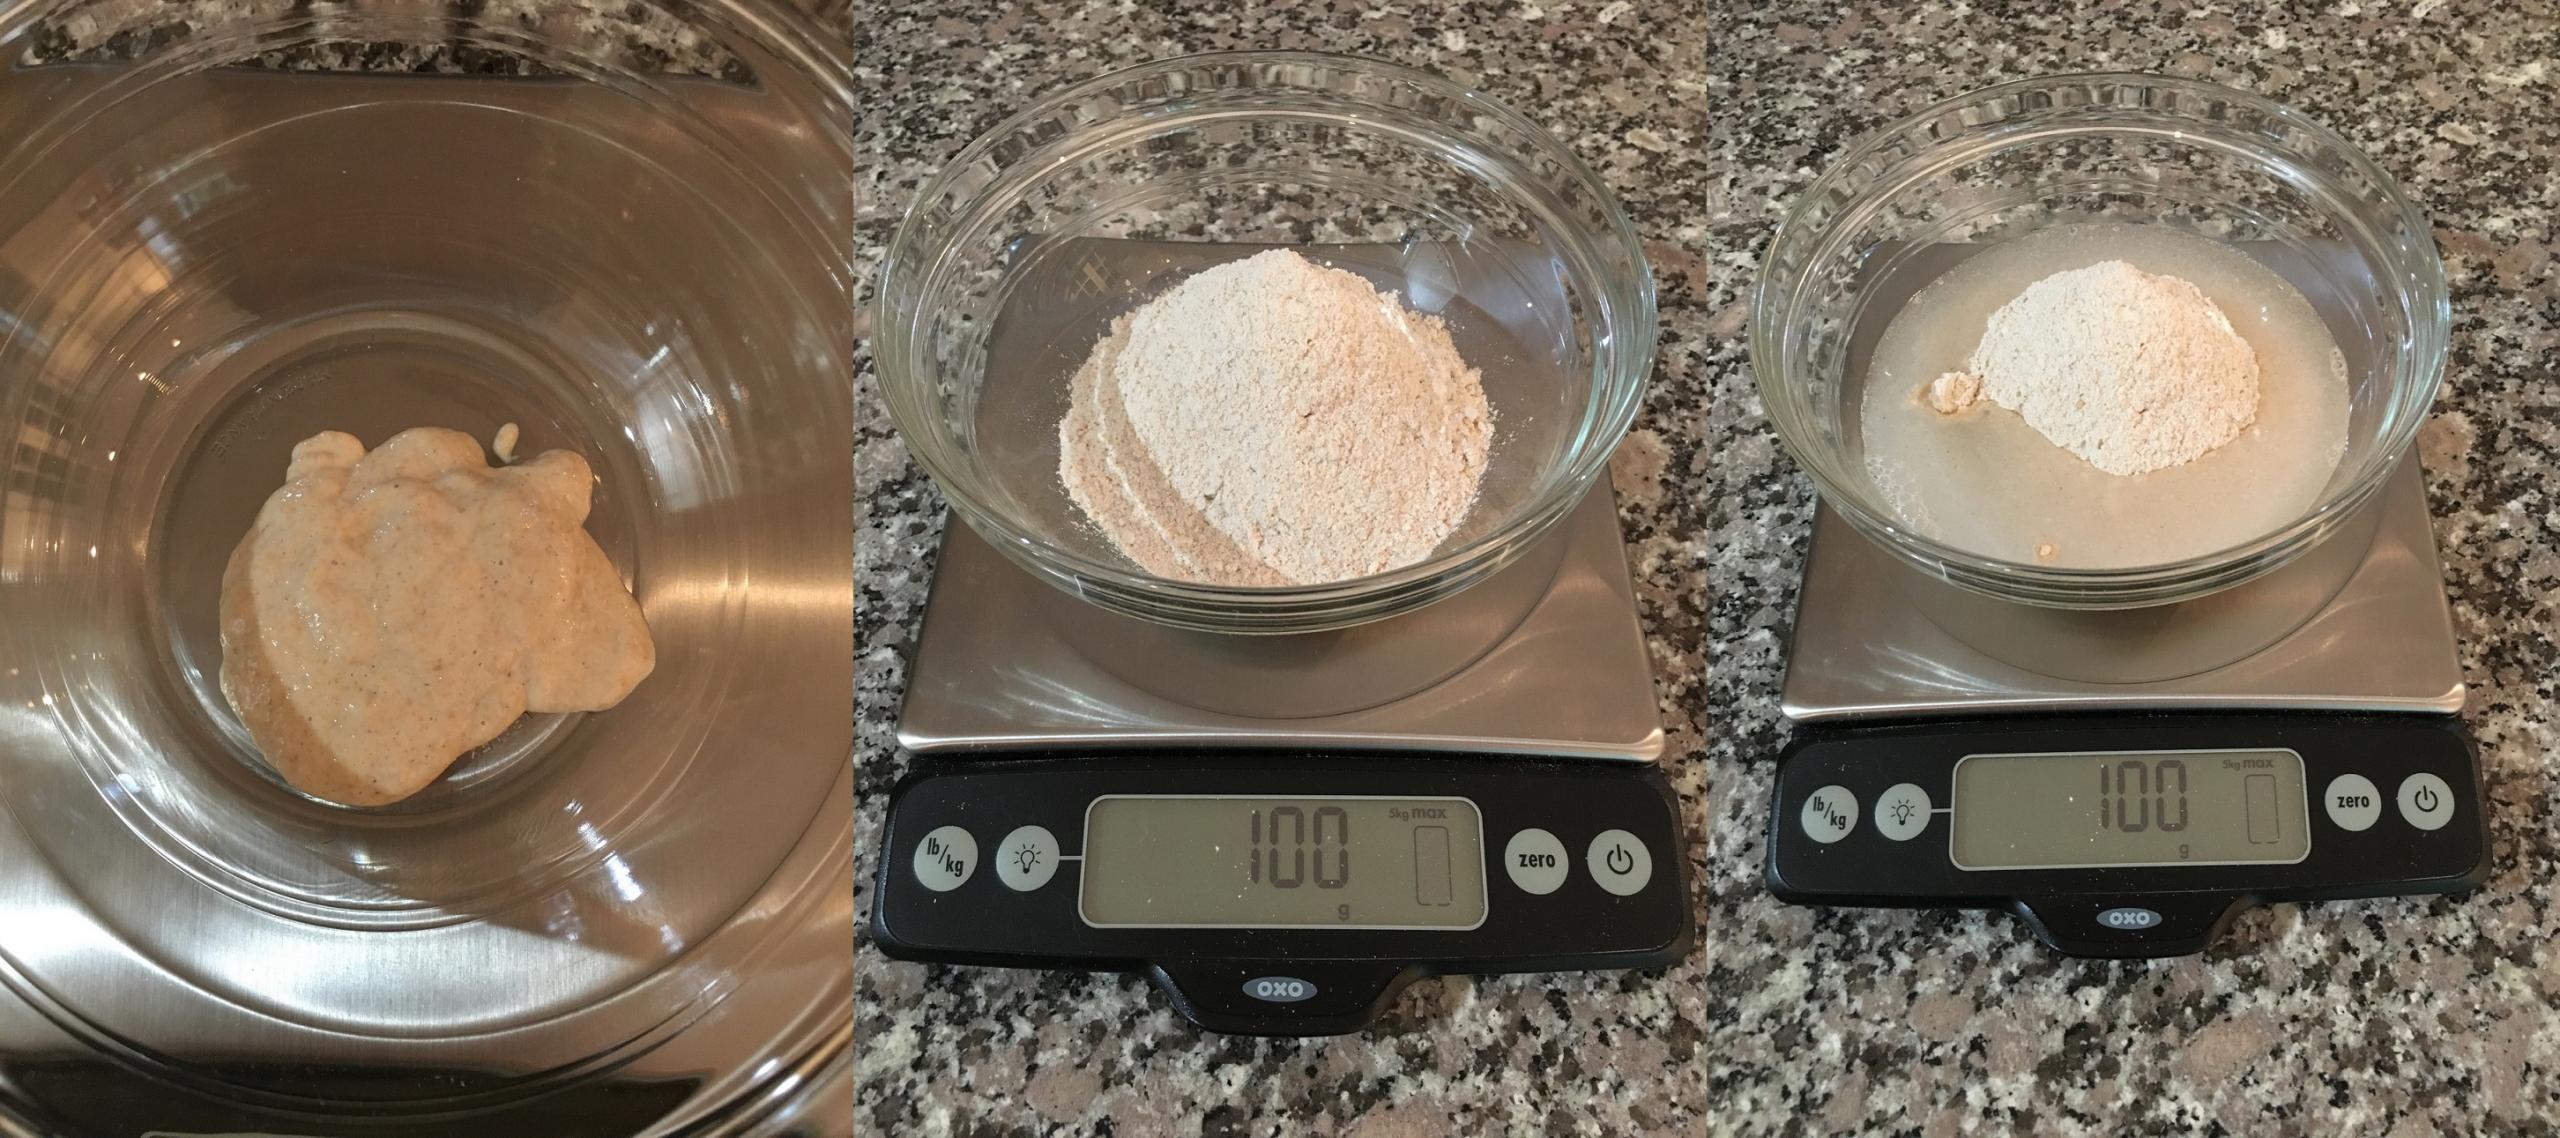
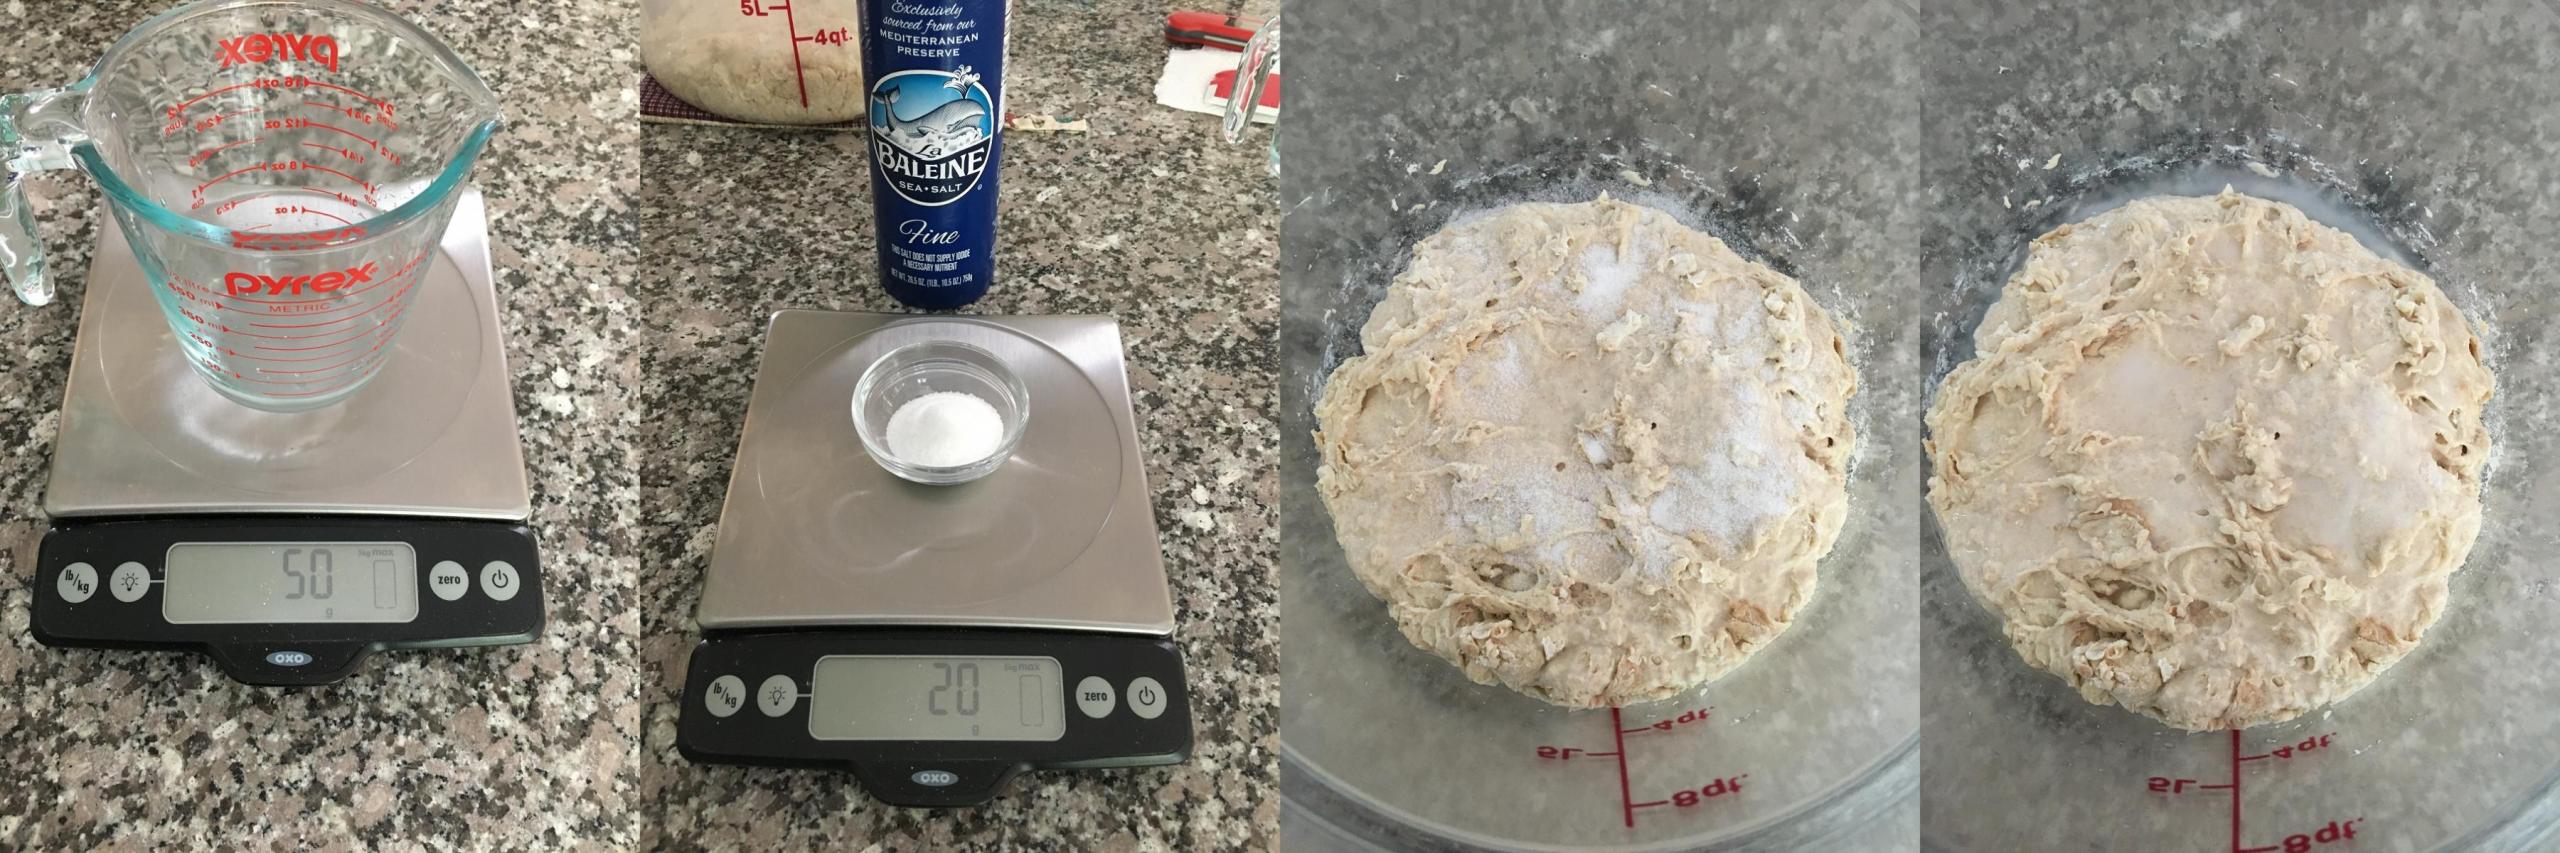
The night before, I mixed 20 grams of starter with 100 grams of 50/50 all-purpose/whole wheat flour and 100 grams of water.  It is amazing that all of the lift is provided by this little amount of starter.  After all, 20 grams is less than three-quarters of an ounce, and there will be over two pounds of flour in the dough.

These ingredients were stirred until thoroughly mixed and then the container was covered for the overnight period.  By the next morning the leaven had expanded nicely.

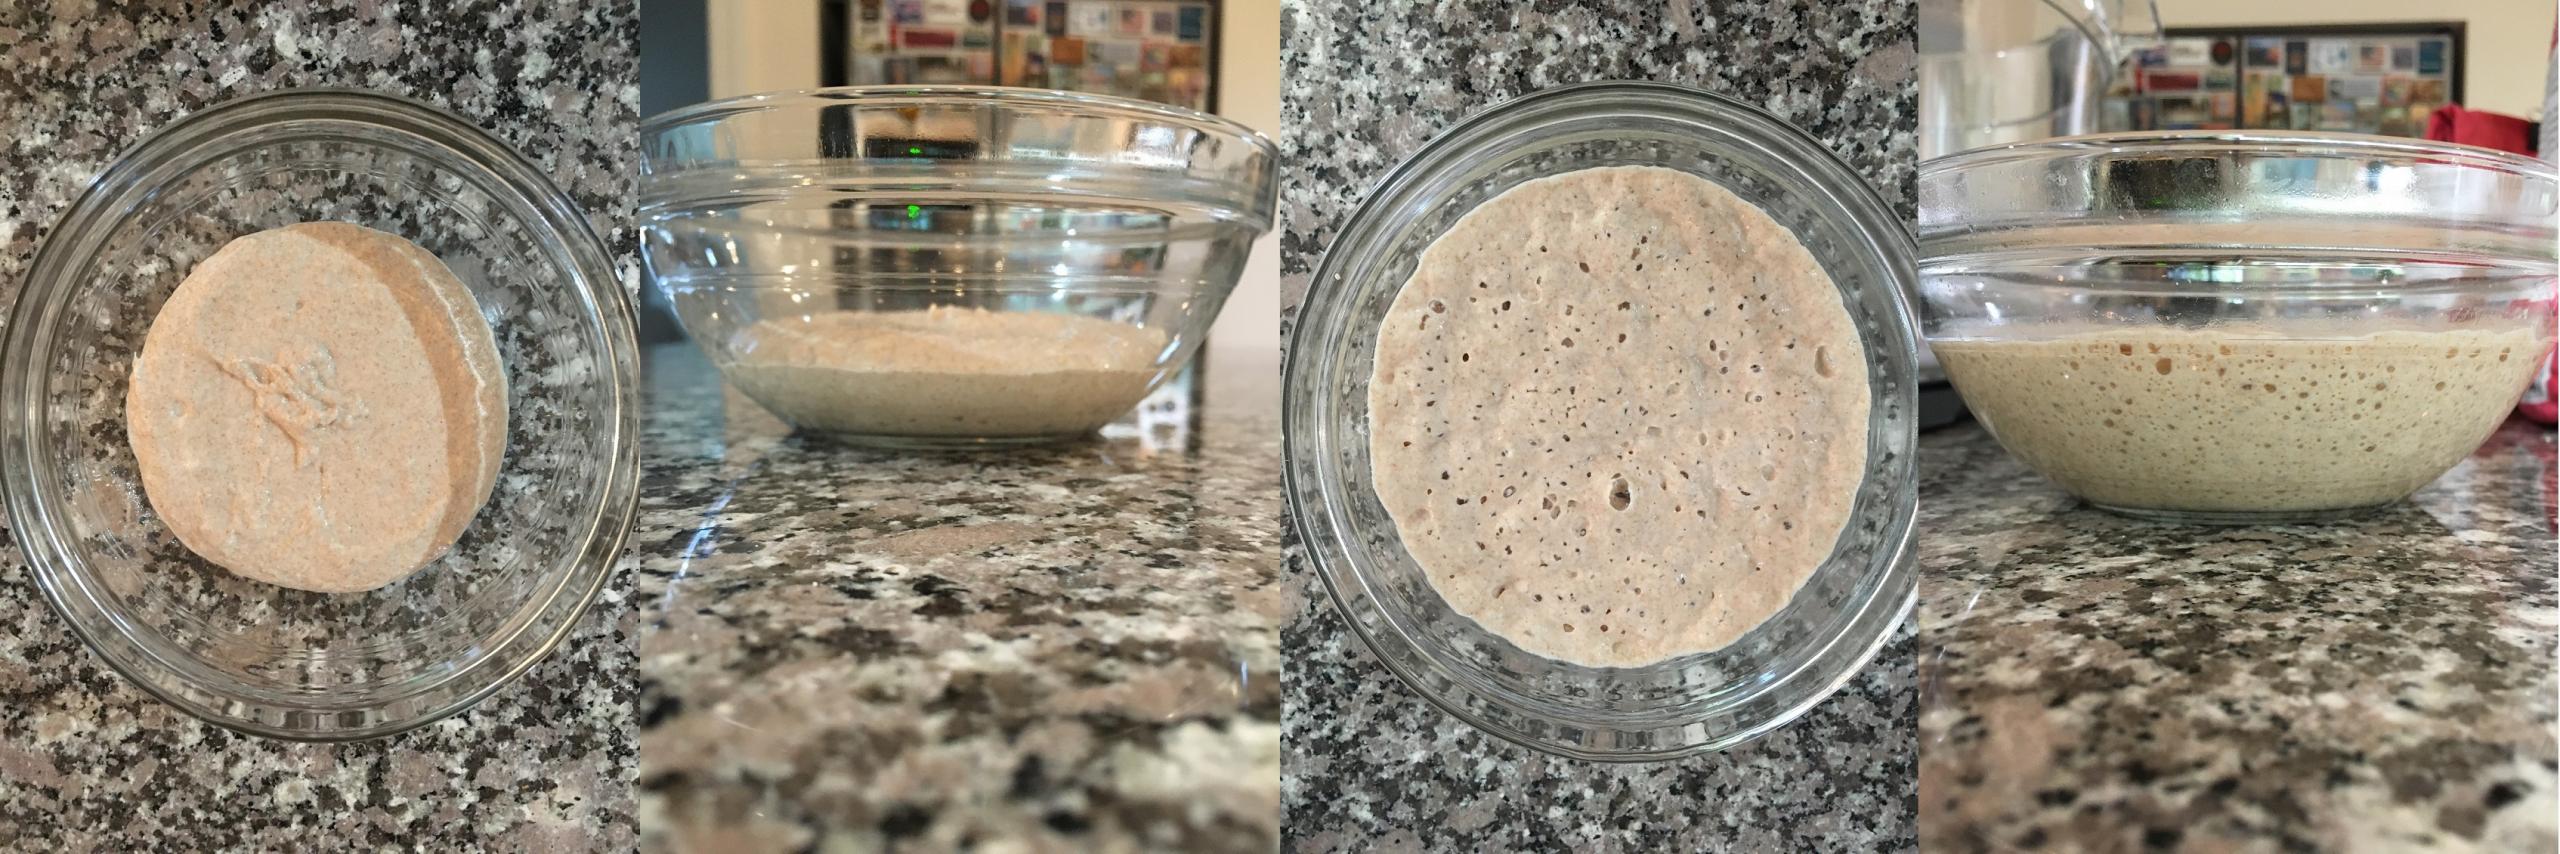
On the left are top and side views of the leaven just after being mixed, and on the right are similar views from the next morning.  Note the bubbles on the surface and side of the container.  This is a healthy, vigorous starter.

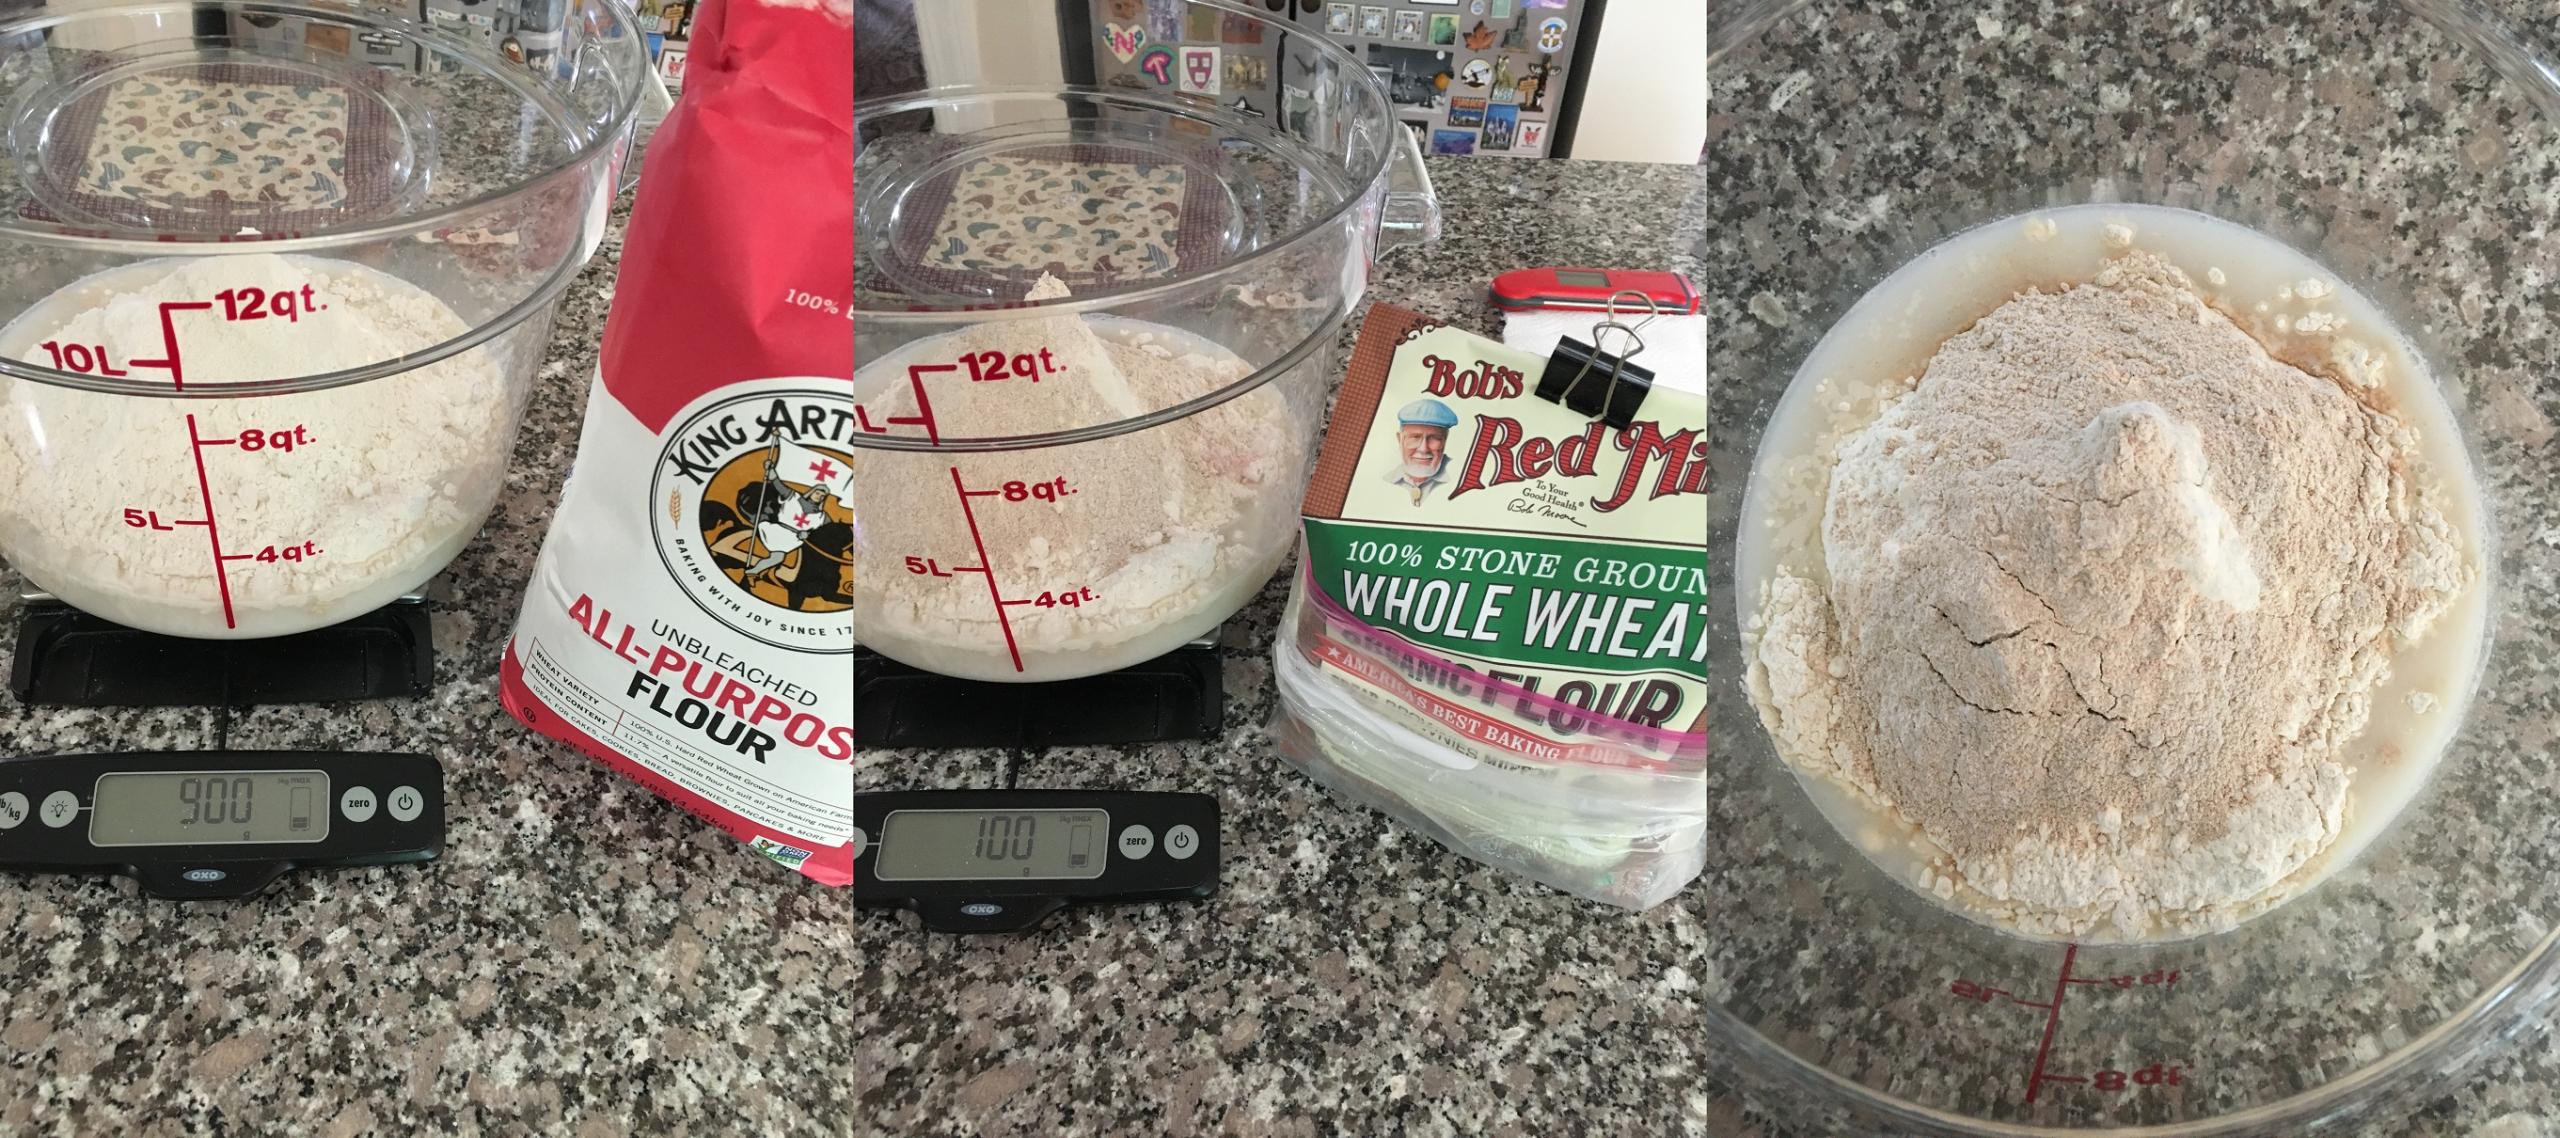
Tartine calls for mixing the water and leaven before adding the flours.  There is 700 grams of water (my kitchen was a bit chilly, so I used pretty warm water) and 200 grams of leaven.  After adding the leaven to the water (I let it drop out of the container into the water while I watched the scale and used a spatula near the end to get the amount right), I stirred the leaven into the water, which helped distribute it before any flour was added.

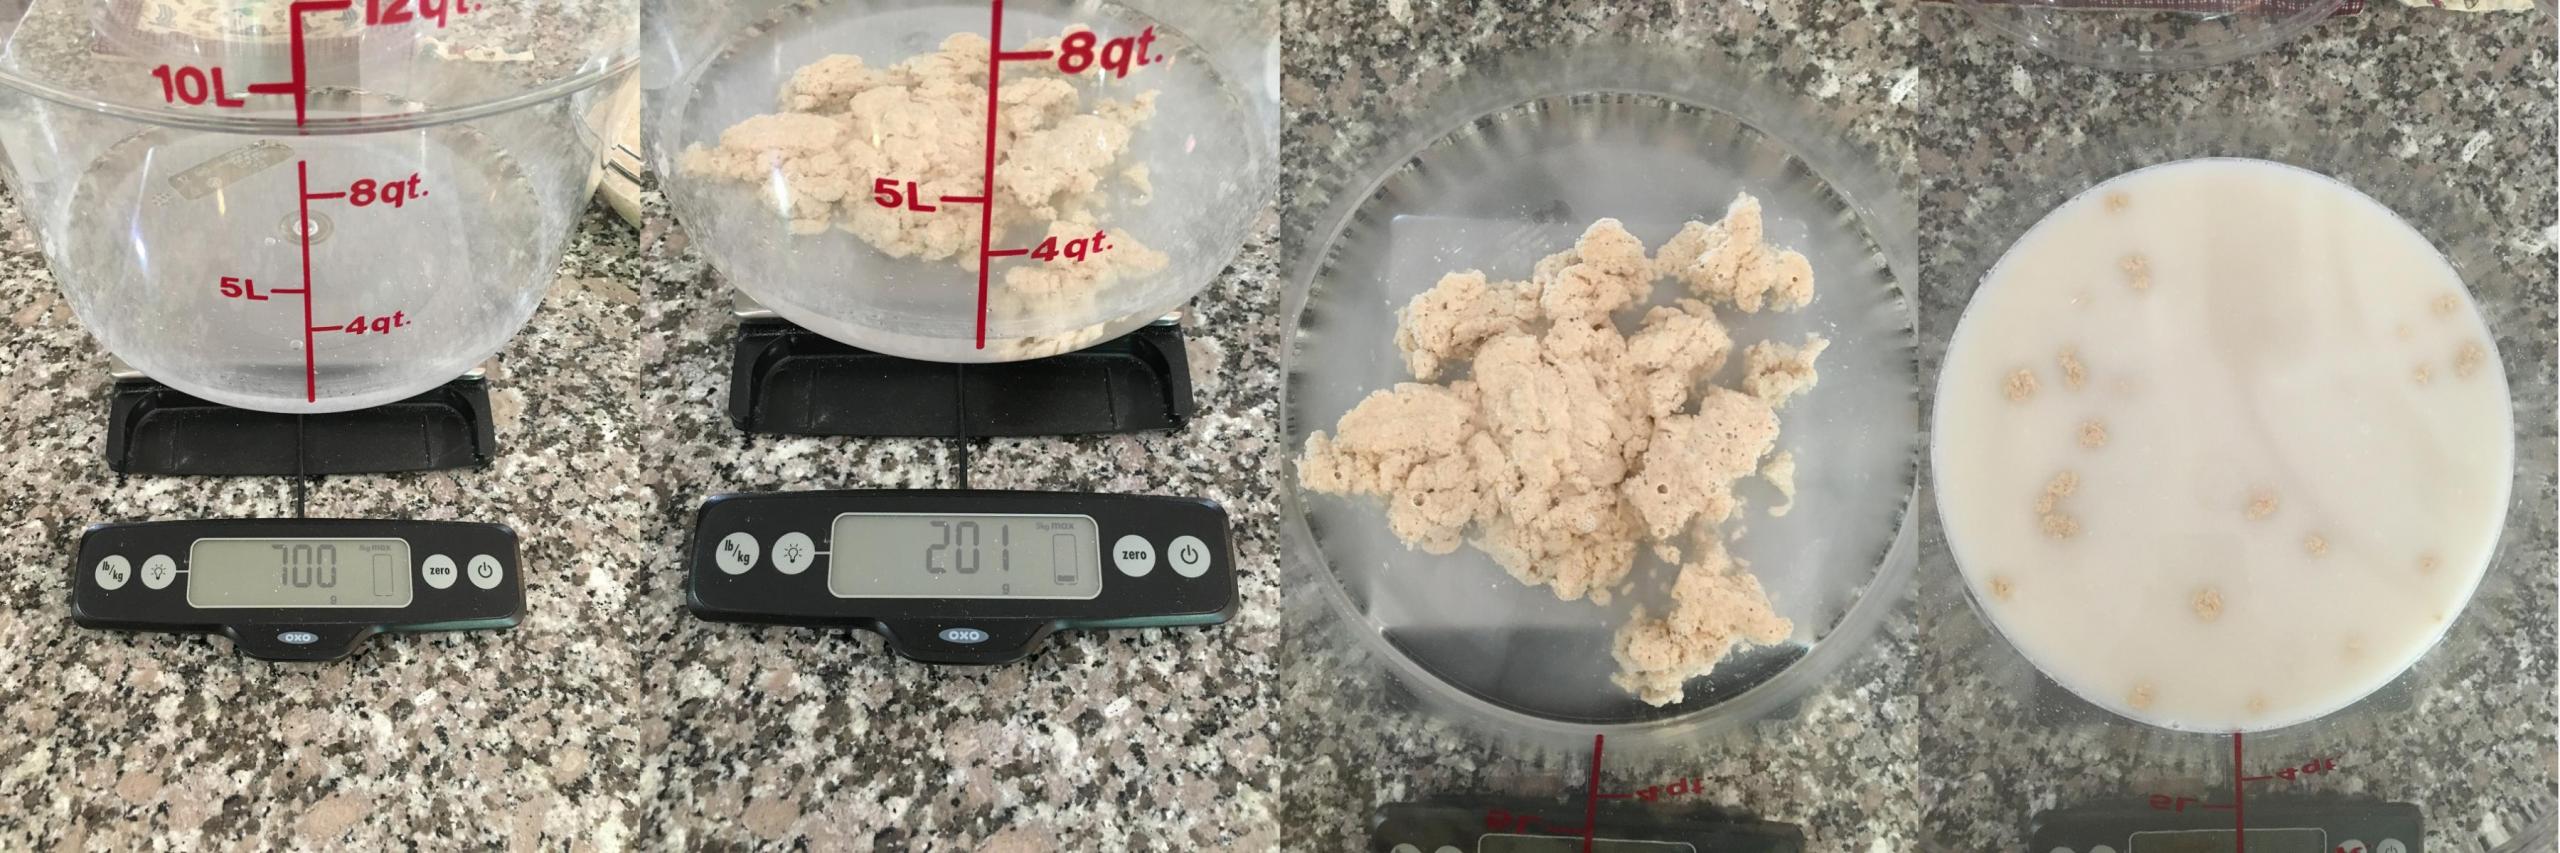
Next the flour went in, and the mixing was about to start.

The goal now was simply to make sure that there was no dry flour.  I used a dough scraper (which I will point out in one of the photos that follow below) to help integrate the water and flours, and eventually I used my hand to move the dough around enough to get everything moist.  Then the container was covered for the autolyse session, which lasted forty minutes.

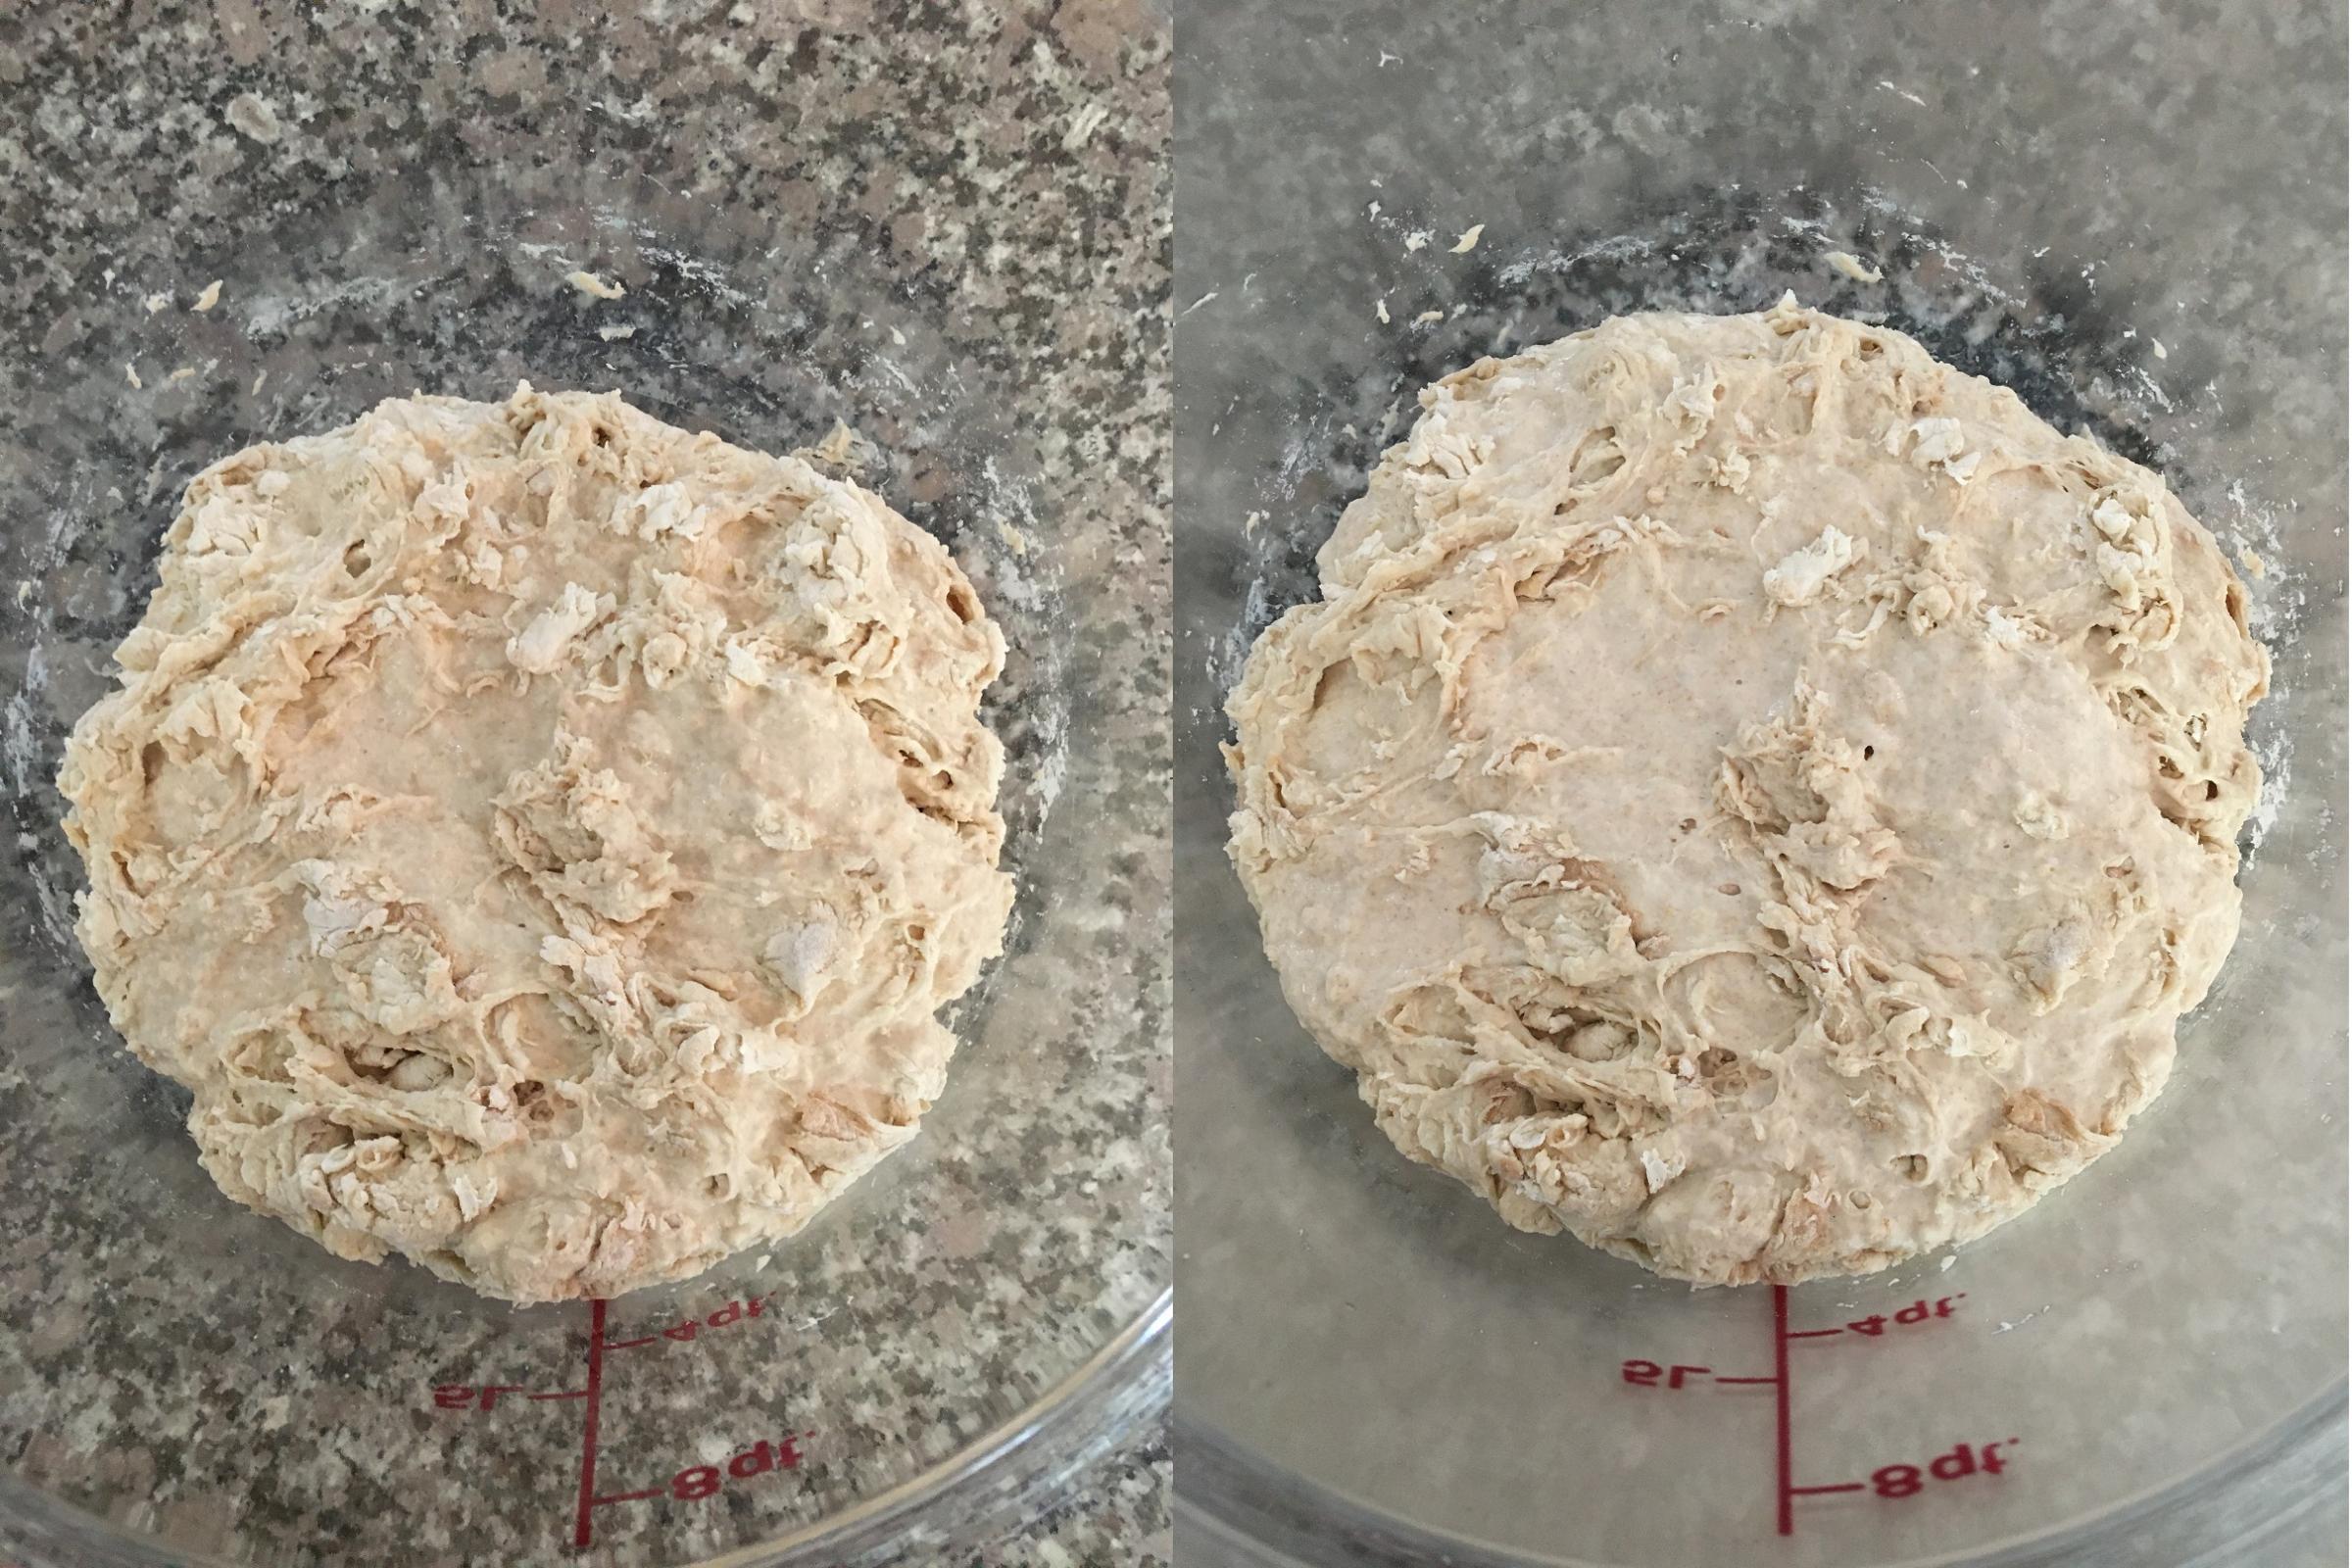
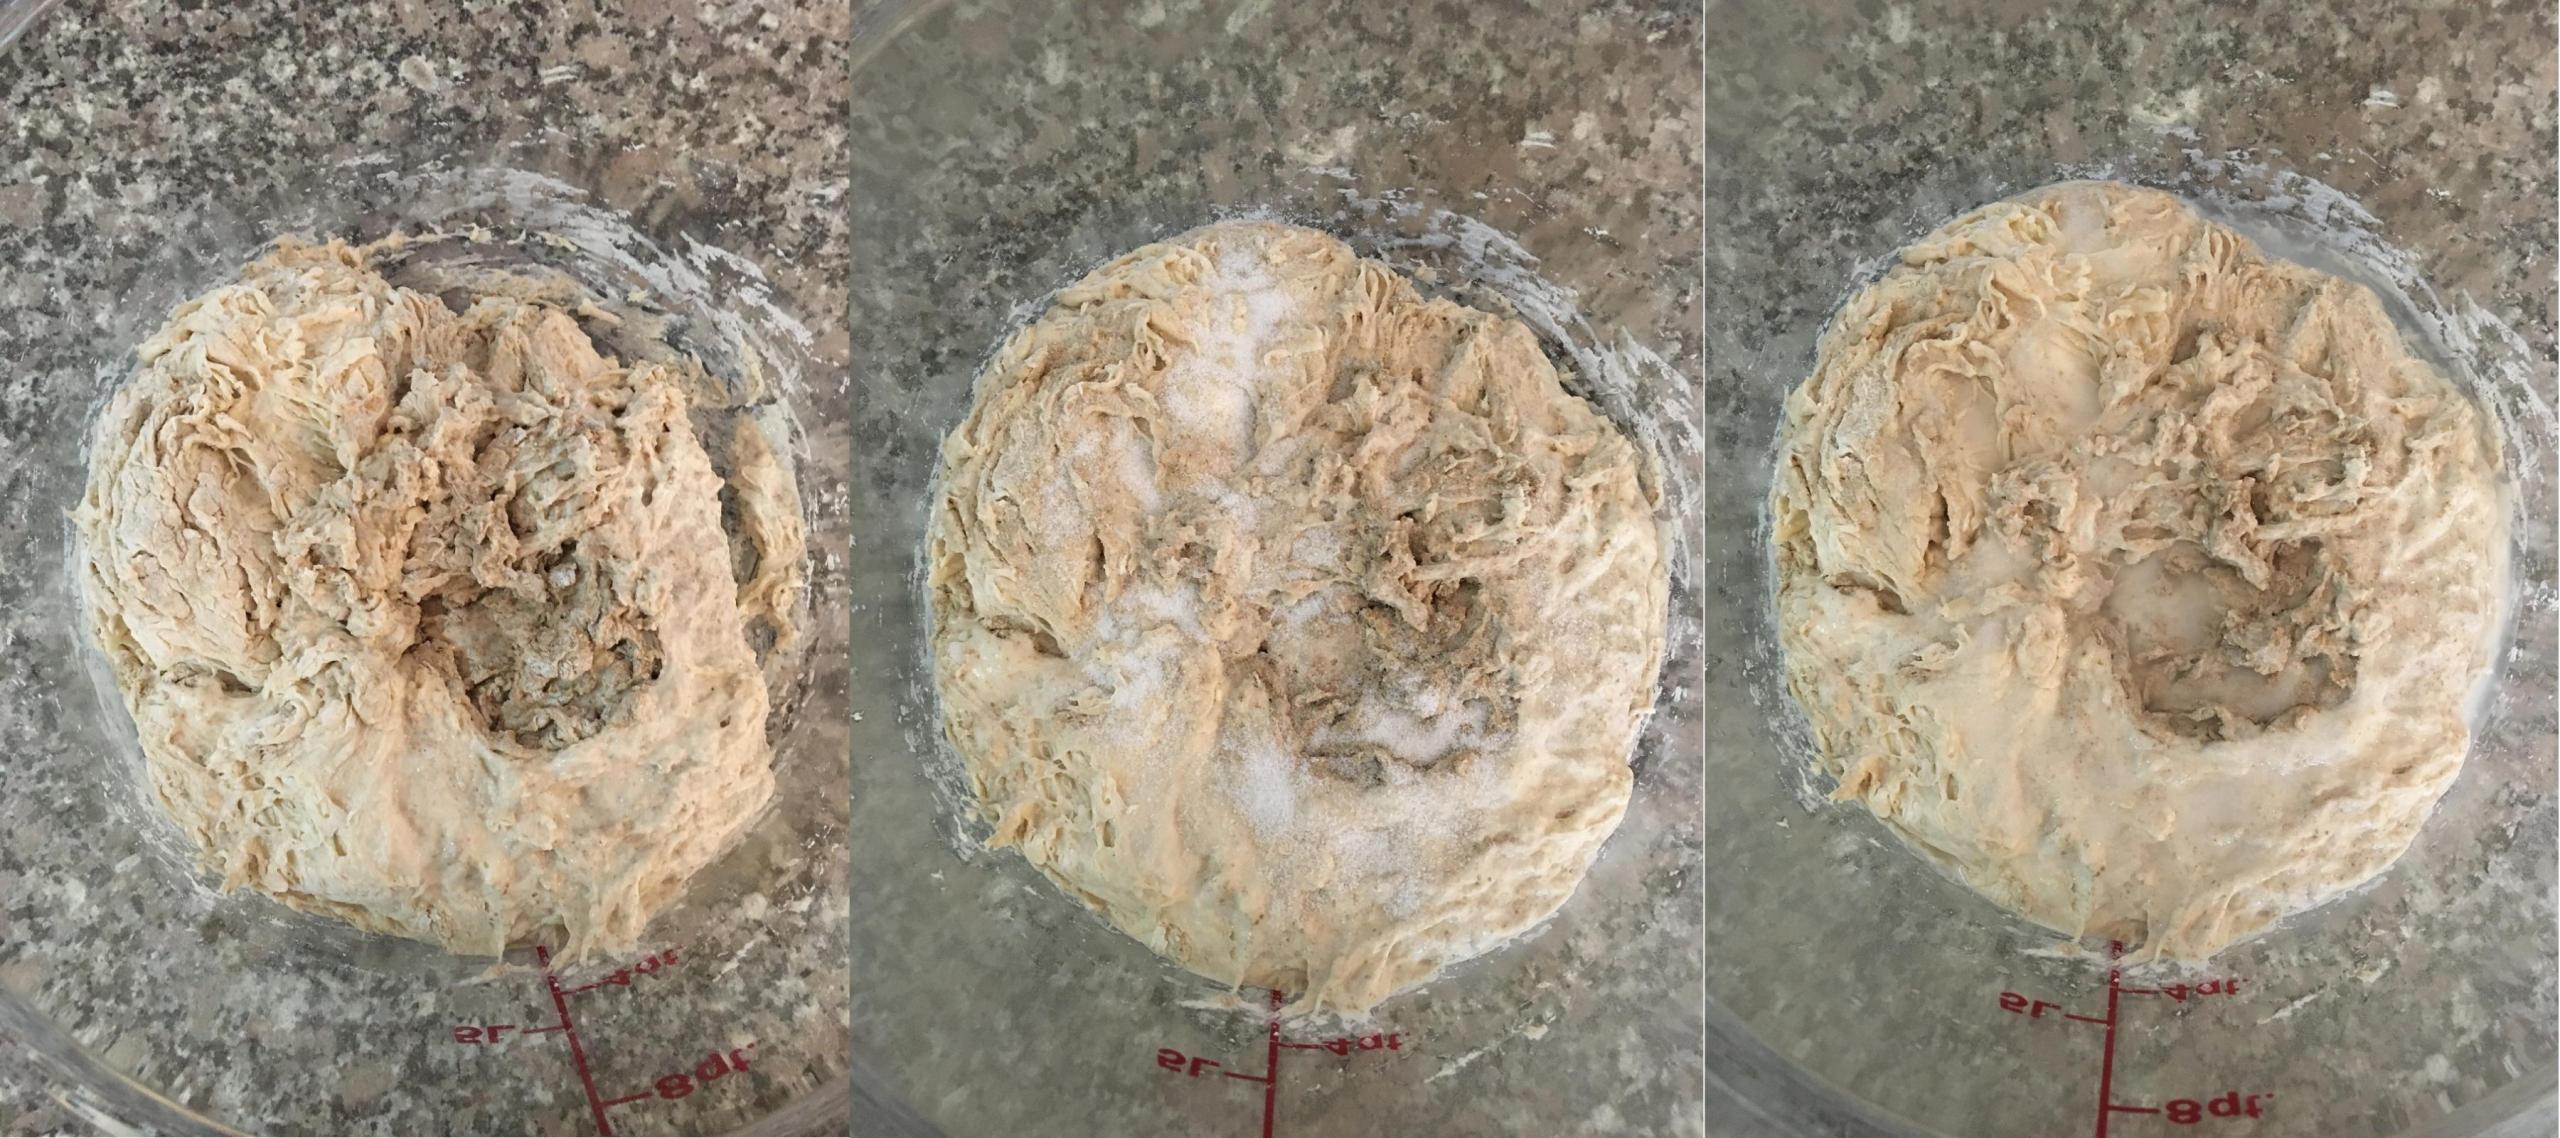
As you can see, from outward appearances not much happened during the forty minutes, but in fact there was the beginning of gluten development.  With the autolyse completed, it was time to add the salt and some water to help dissolve the salt.  First I sprinkled the salt around to distribute it, and then I sprinkled the water around.  Now the fun began.

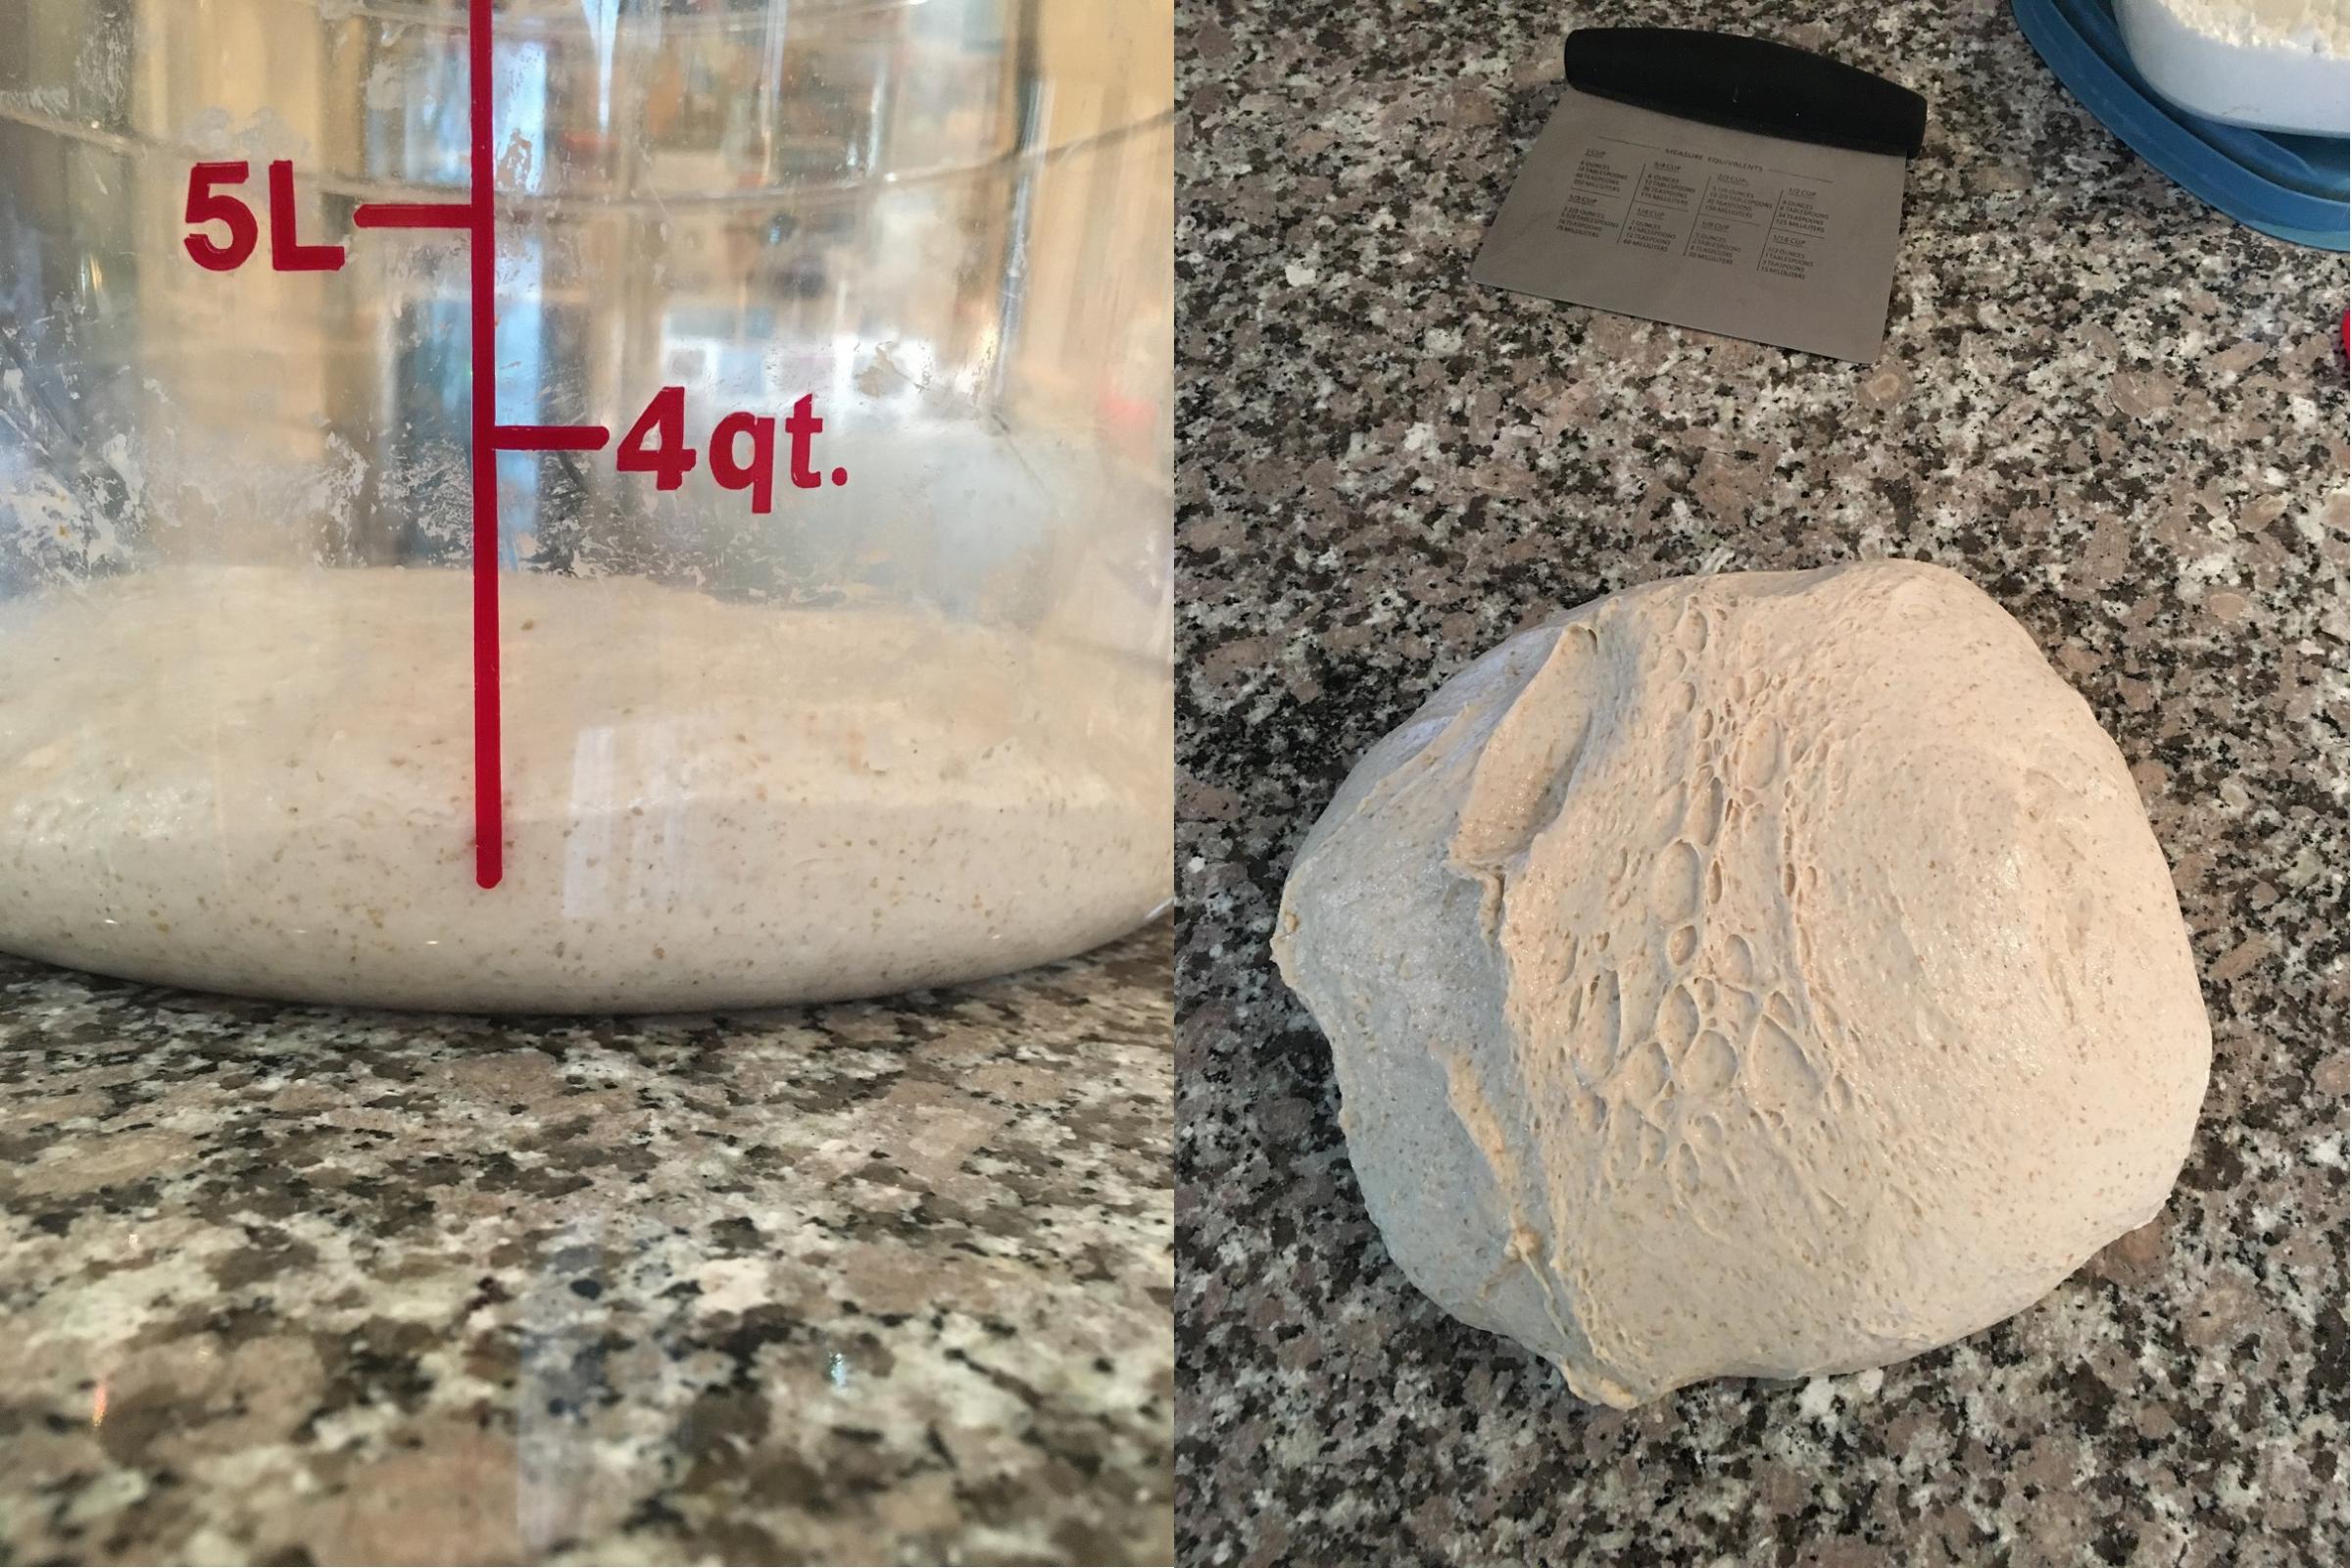
Still working with the dough in the Cambro container, I moved it around to absorb the additional water (essentially massaging the dough and turning it to expose any dryer portions) and mix in the salt.  When the water had been absorbed (perhaps five minutes), I dumped the mass of dough onto our granite countertop.

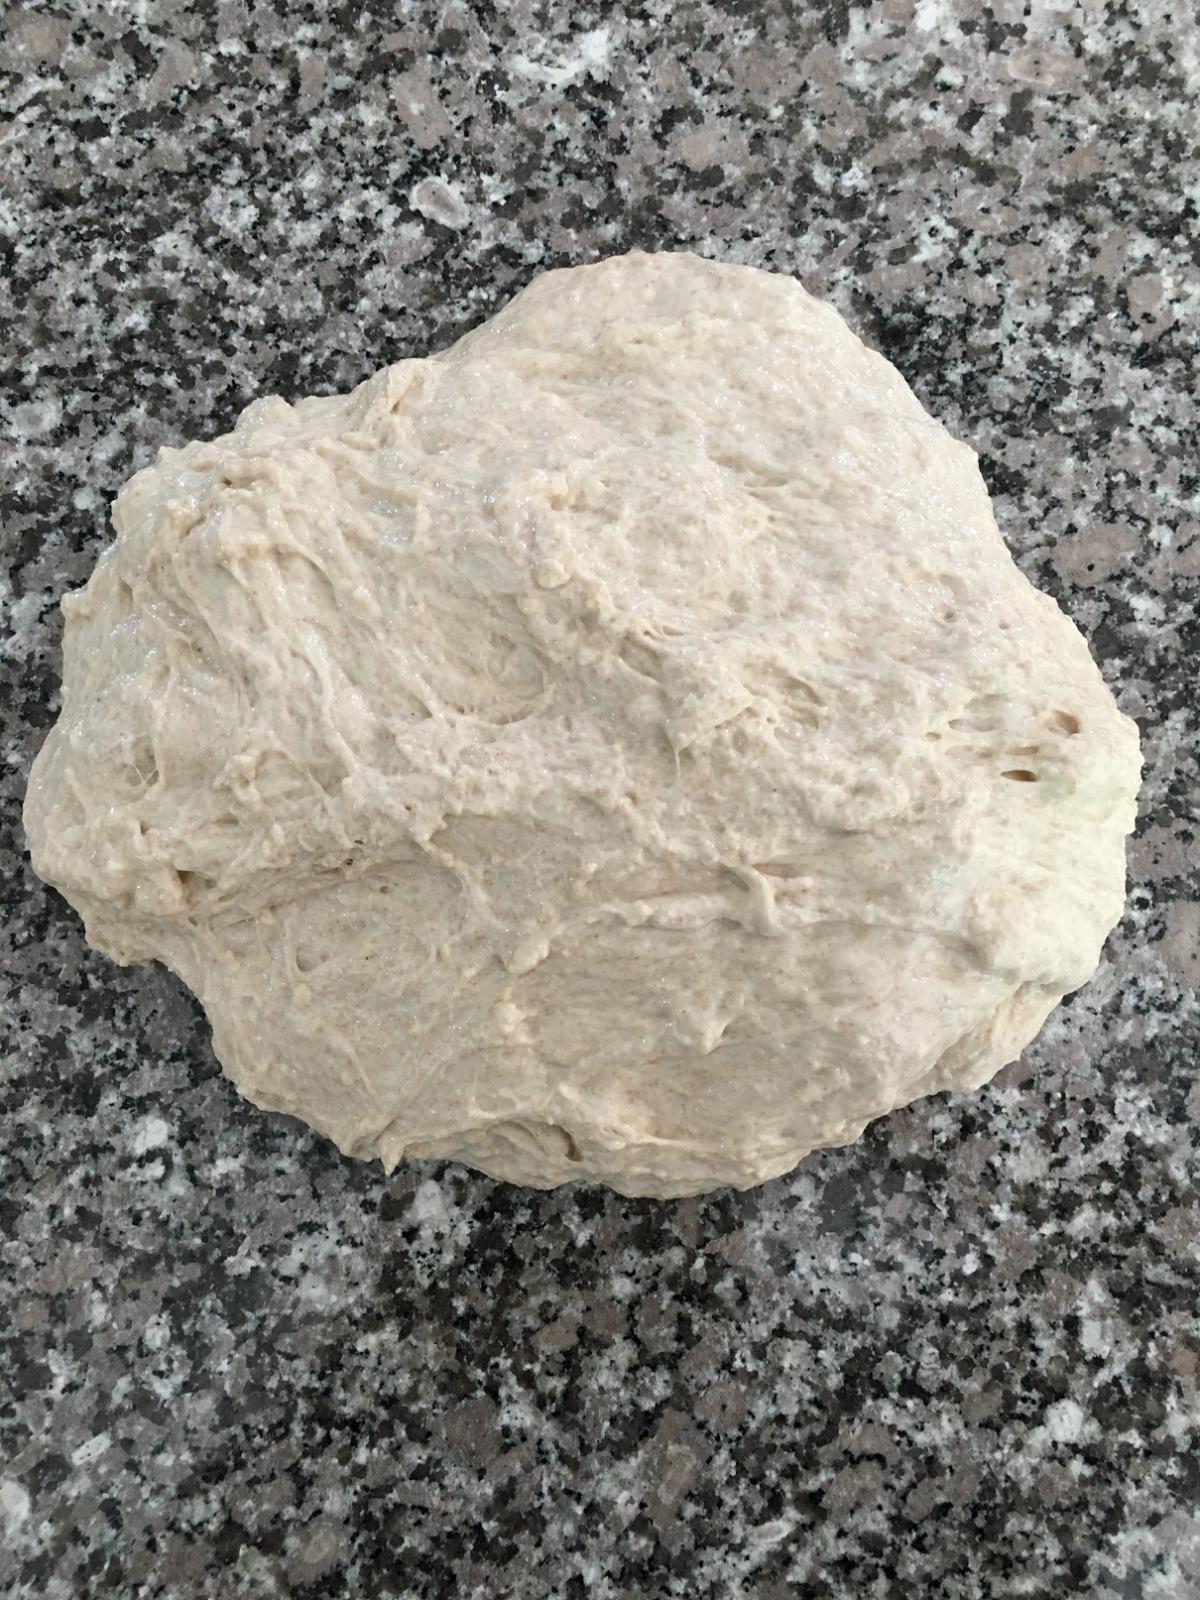
In the past I have typically continued to work the dough by hand in the Cambro tub, and that produces fine results, but this time I decided to do some slap-and-folds (aka French folds) for the initial mixing.  If you prefer to mix the dough in your container, I heartily recommend the videos of Trevor J. Wilson on his Breadwerx site, where he demonstrates a simple way to create nice doughs.  It took me awhile to include French folds in my set of techniques, so do not feel any need to venture there yet, especially if you are new to bread making.

After five hundred French folds, I had a dough mass with some great gluten development and a smooth surface.  (By contrast, I recently baked a Jeff Hamelman bread that uses bread flour and has a 65% hydration, and the dough came together fairly quickly and required many fewer French folds, but that illustrates a difference between all-purpose and bread flours and 75% v. 65% hydration.)  I always check the temperature of my dough at the end of the inital mixing because that gives me a sense of what to expect during the bulk fermentation.  (Also, note the red dough scraper -- mentioned above -- in the background.)

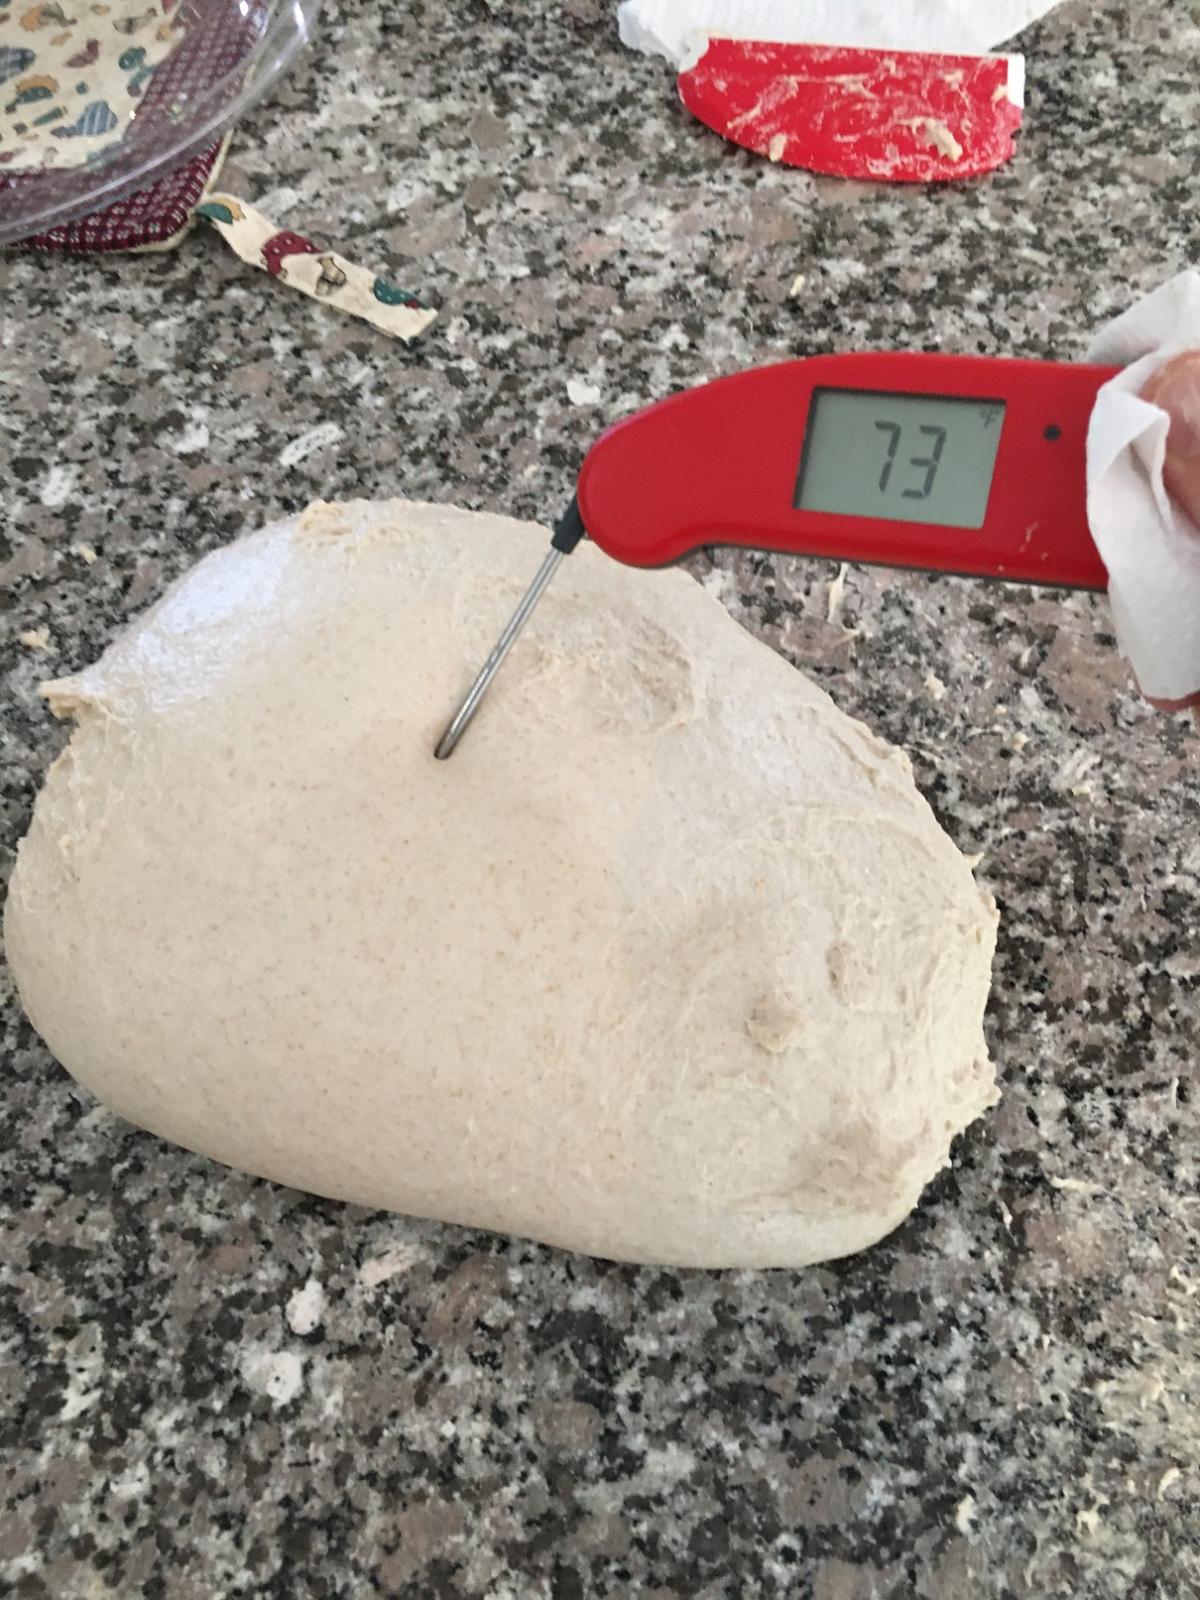
The 73F temperature told me that the dough was going to take a little longer for bulk fermentation than if the target temperature of 78-82F as described in Tartine Bread had been reached.  That was fine, because good bread takes patience, and the reward is good flavor.

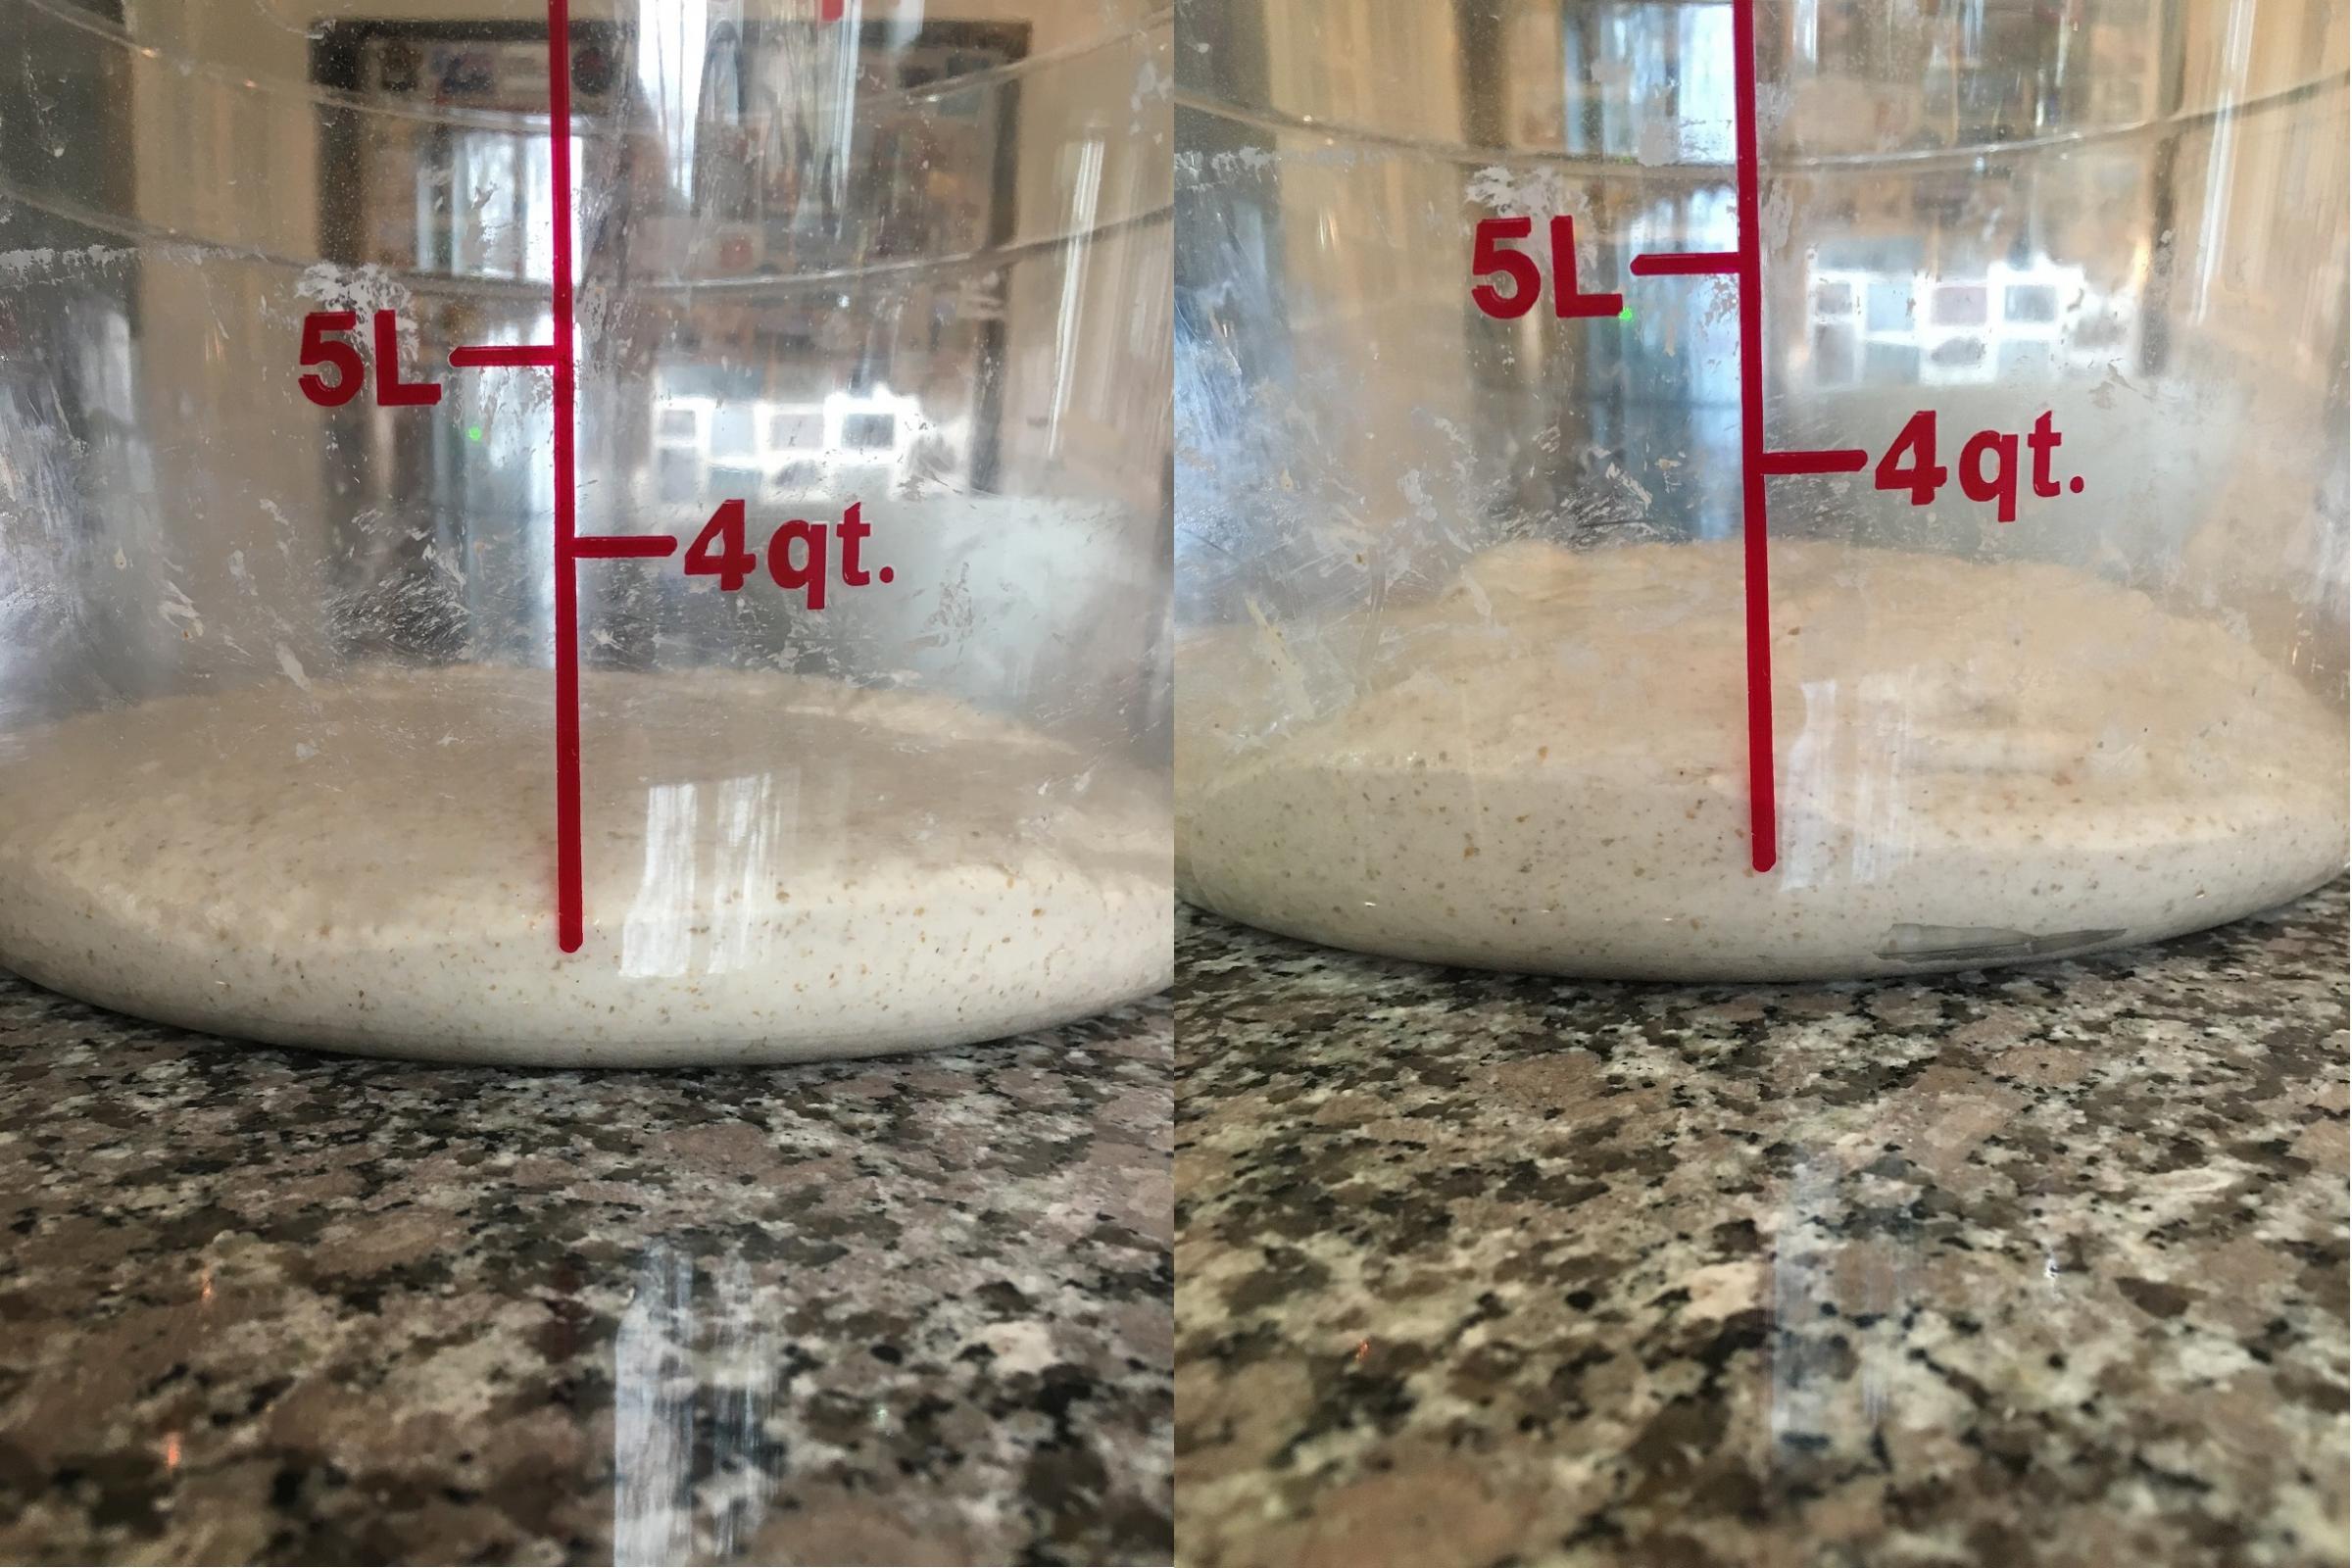
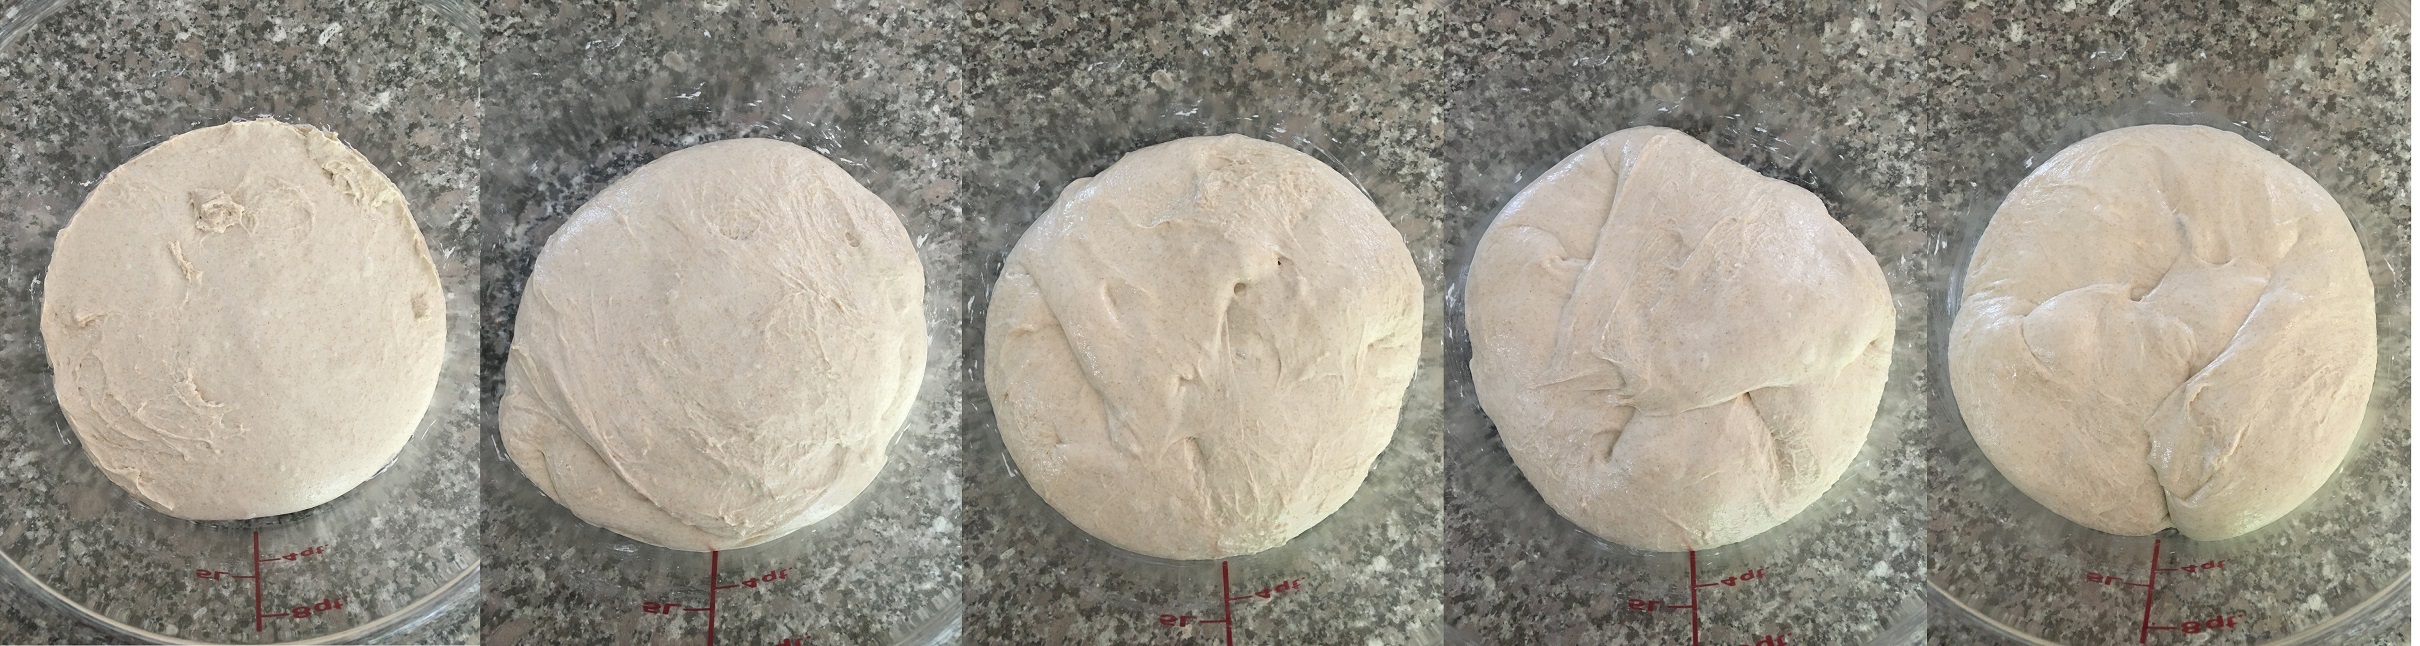
The recipe calls for four stretch-and-fold sessions spaced thirty minutes apart beginning thirty minutes after the initial mixing.  Thereafter the Tartine Bread book says to monitor the dough and give a stretch-and-fold as needed until the bulk fermentation stage ends.  I did the four S&F sessions and then another an hour after the fourth.  This composite photo shows the dough just before each of those five S&F sessions and then at the end of the bulk fermentation.

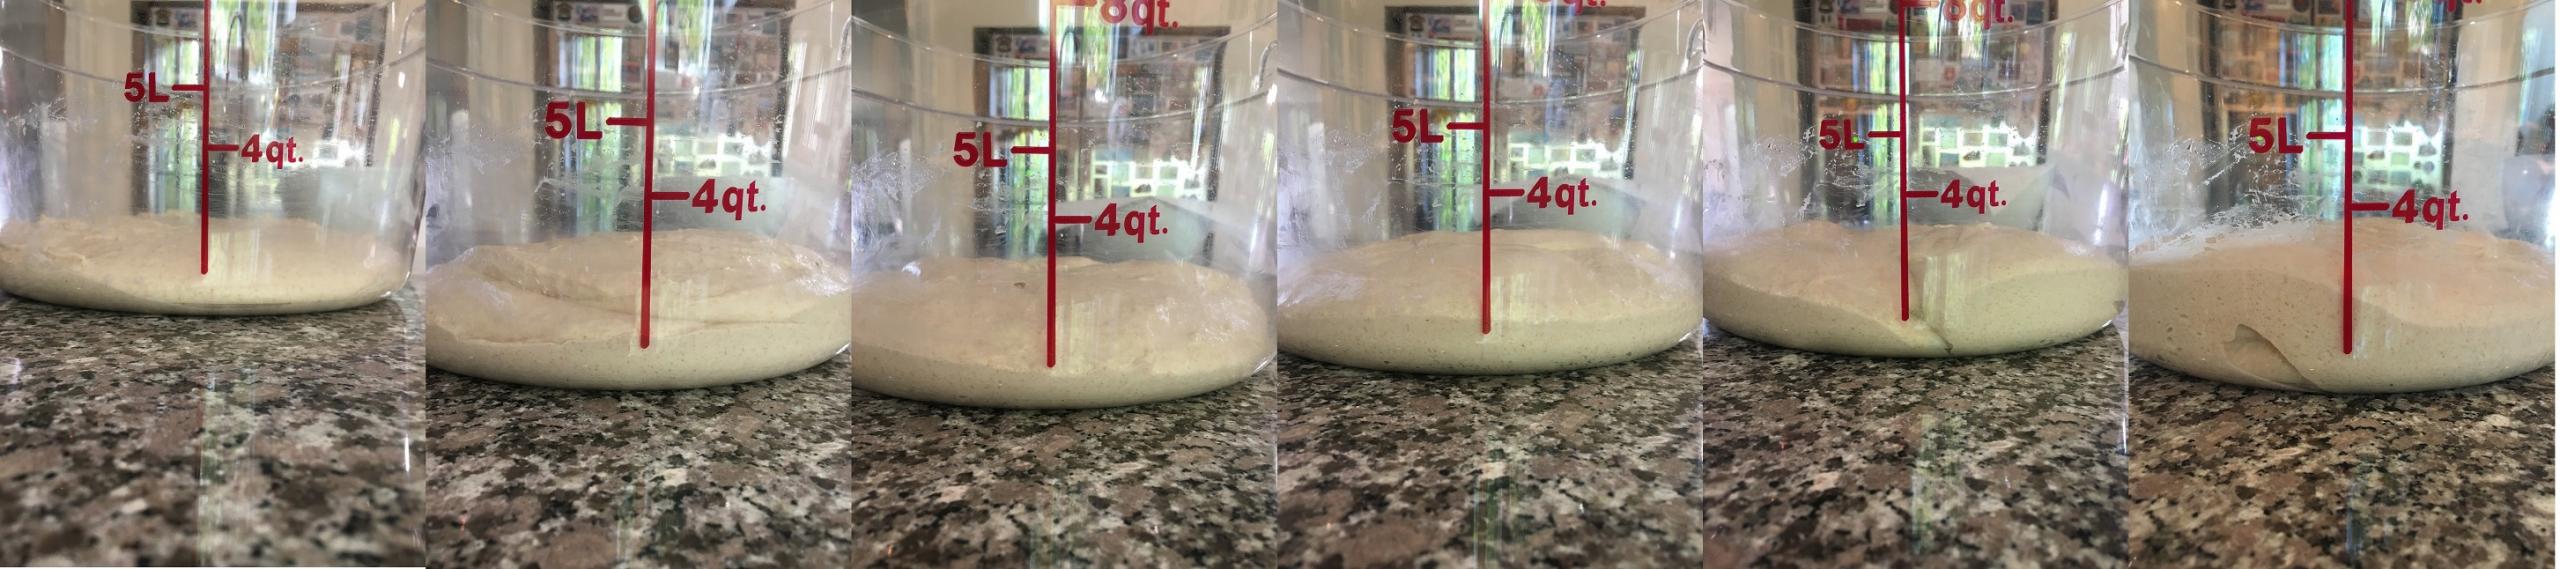
My Cambro tub holds 12 quarts, so the dough sits near the bottom as it spreads to the sides, but a discernible expansion occurred, especially in the final two photos.  Another way to monitor the bulk fermentation is to note changes from the top, and the following composite photo shows the state of the dough just before each of the five S&F sessions.

Note that as the bulk fermentation progresses, the dough tends to retain the shape from its previous S&F, which is a sign of growing strength.  Similarly, as the dough does gain strength, it spreads less and also shows that strength during the S&F (when I could feel the dough gaining in resistance).  The following composite photo shows the state of the dough just after each of the five S&F sessions.

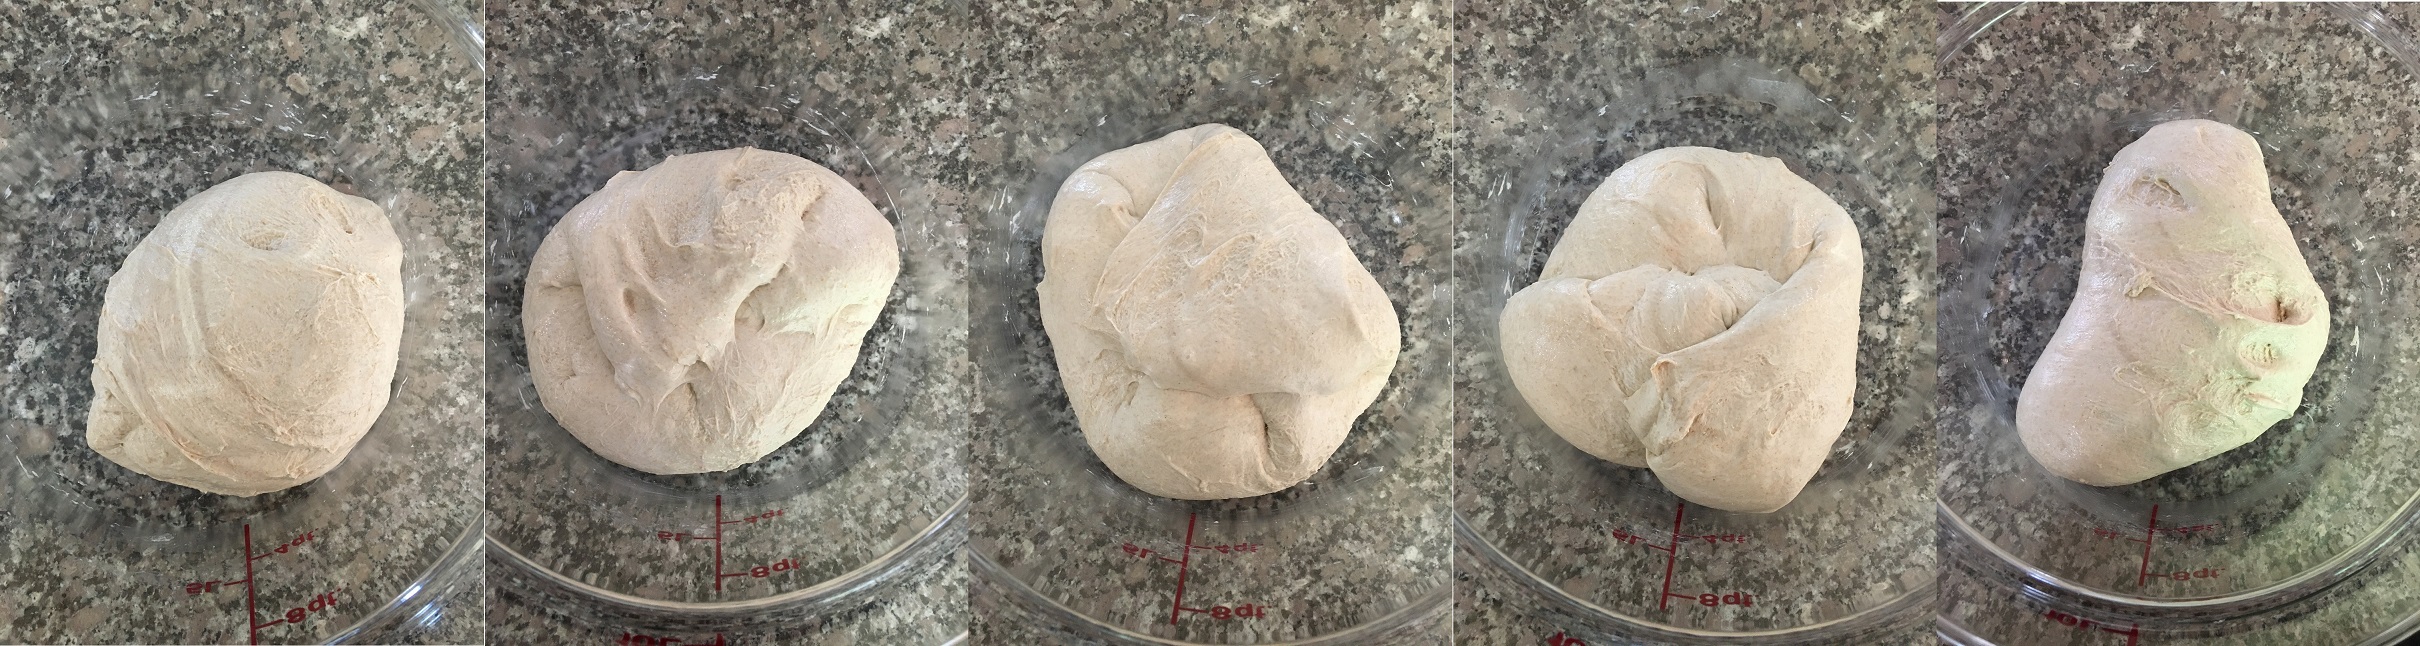
Note how it is possible to bring the dough together much better as the bulk fermentation goes along.  (Also, I should add that each S&F is done a bit more gently than the preceding one so as not to deflate or damage the dough.)  Sometimes I end up doing another S&F before the bulk fermentation stage concludes, but in this case I saw that the dough was ready to be divided.  This photo shows the dough just before being dumped onto the countertop.

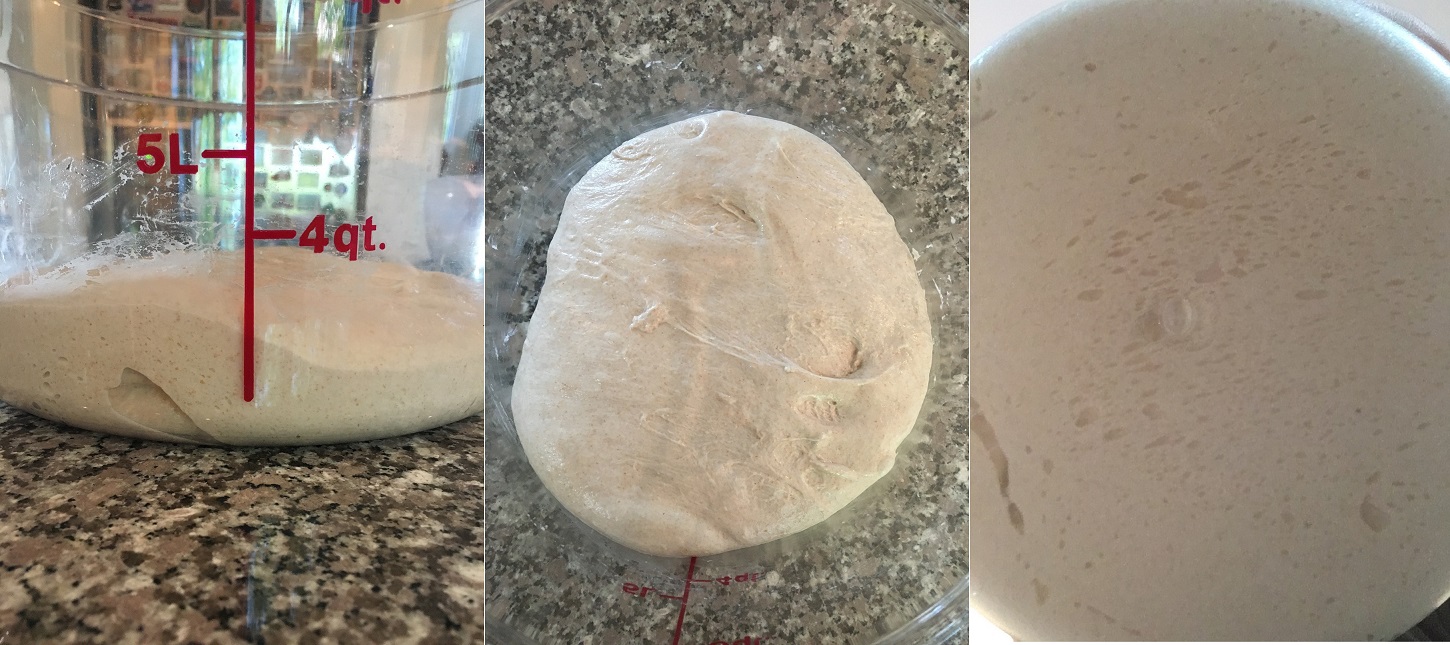
My experience with this dough in particular and doughs in general led me to note several factors, and I point these out mainly for those who are new and want some clues and signs to watch for.  The dough had billowed, which showed up in the expanded volume, but also in the feel during the final S&F.  There were numerous bubbles on the side and bottom of the container.  (I often lift the Cambro tub and look at the underside, and if there are no bubbles I know that the bulk fermentation stage needs to continue, whereas here it was ready to end.)  During the last S&F session the dough did not cling to the side as much, indicating the further development of gluten and the transformation of the dough into a unified mass.  When I lightly jiggled the container, the dough wiggled gently back-and-forth a bit.

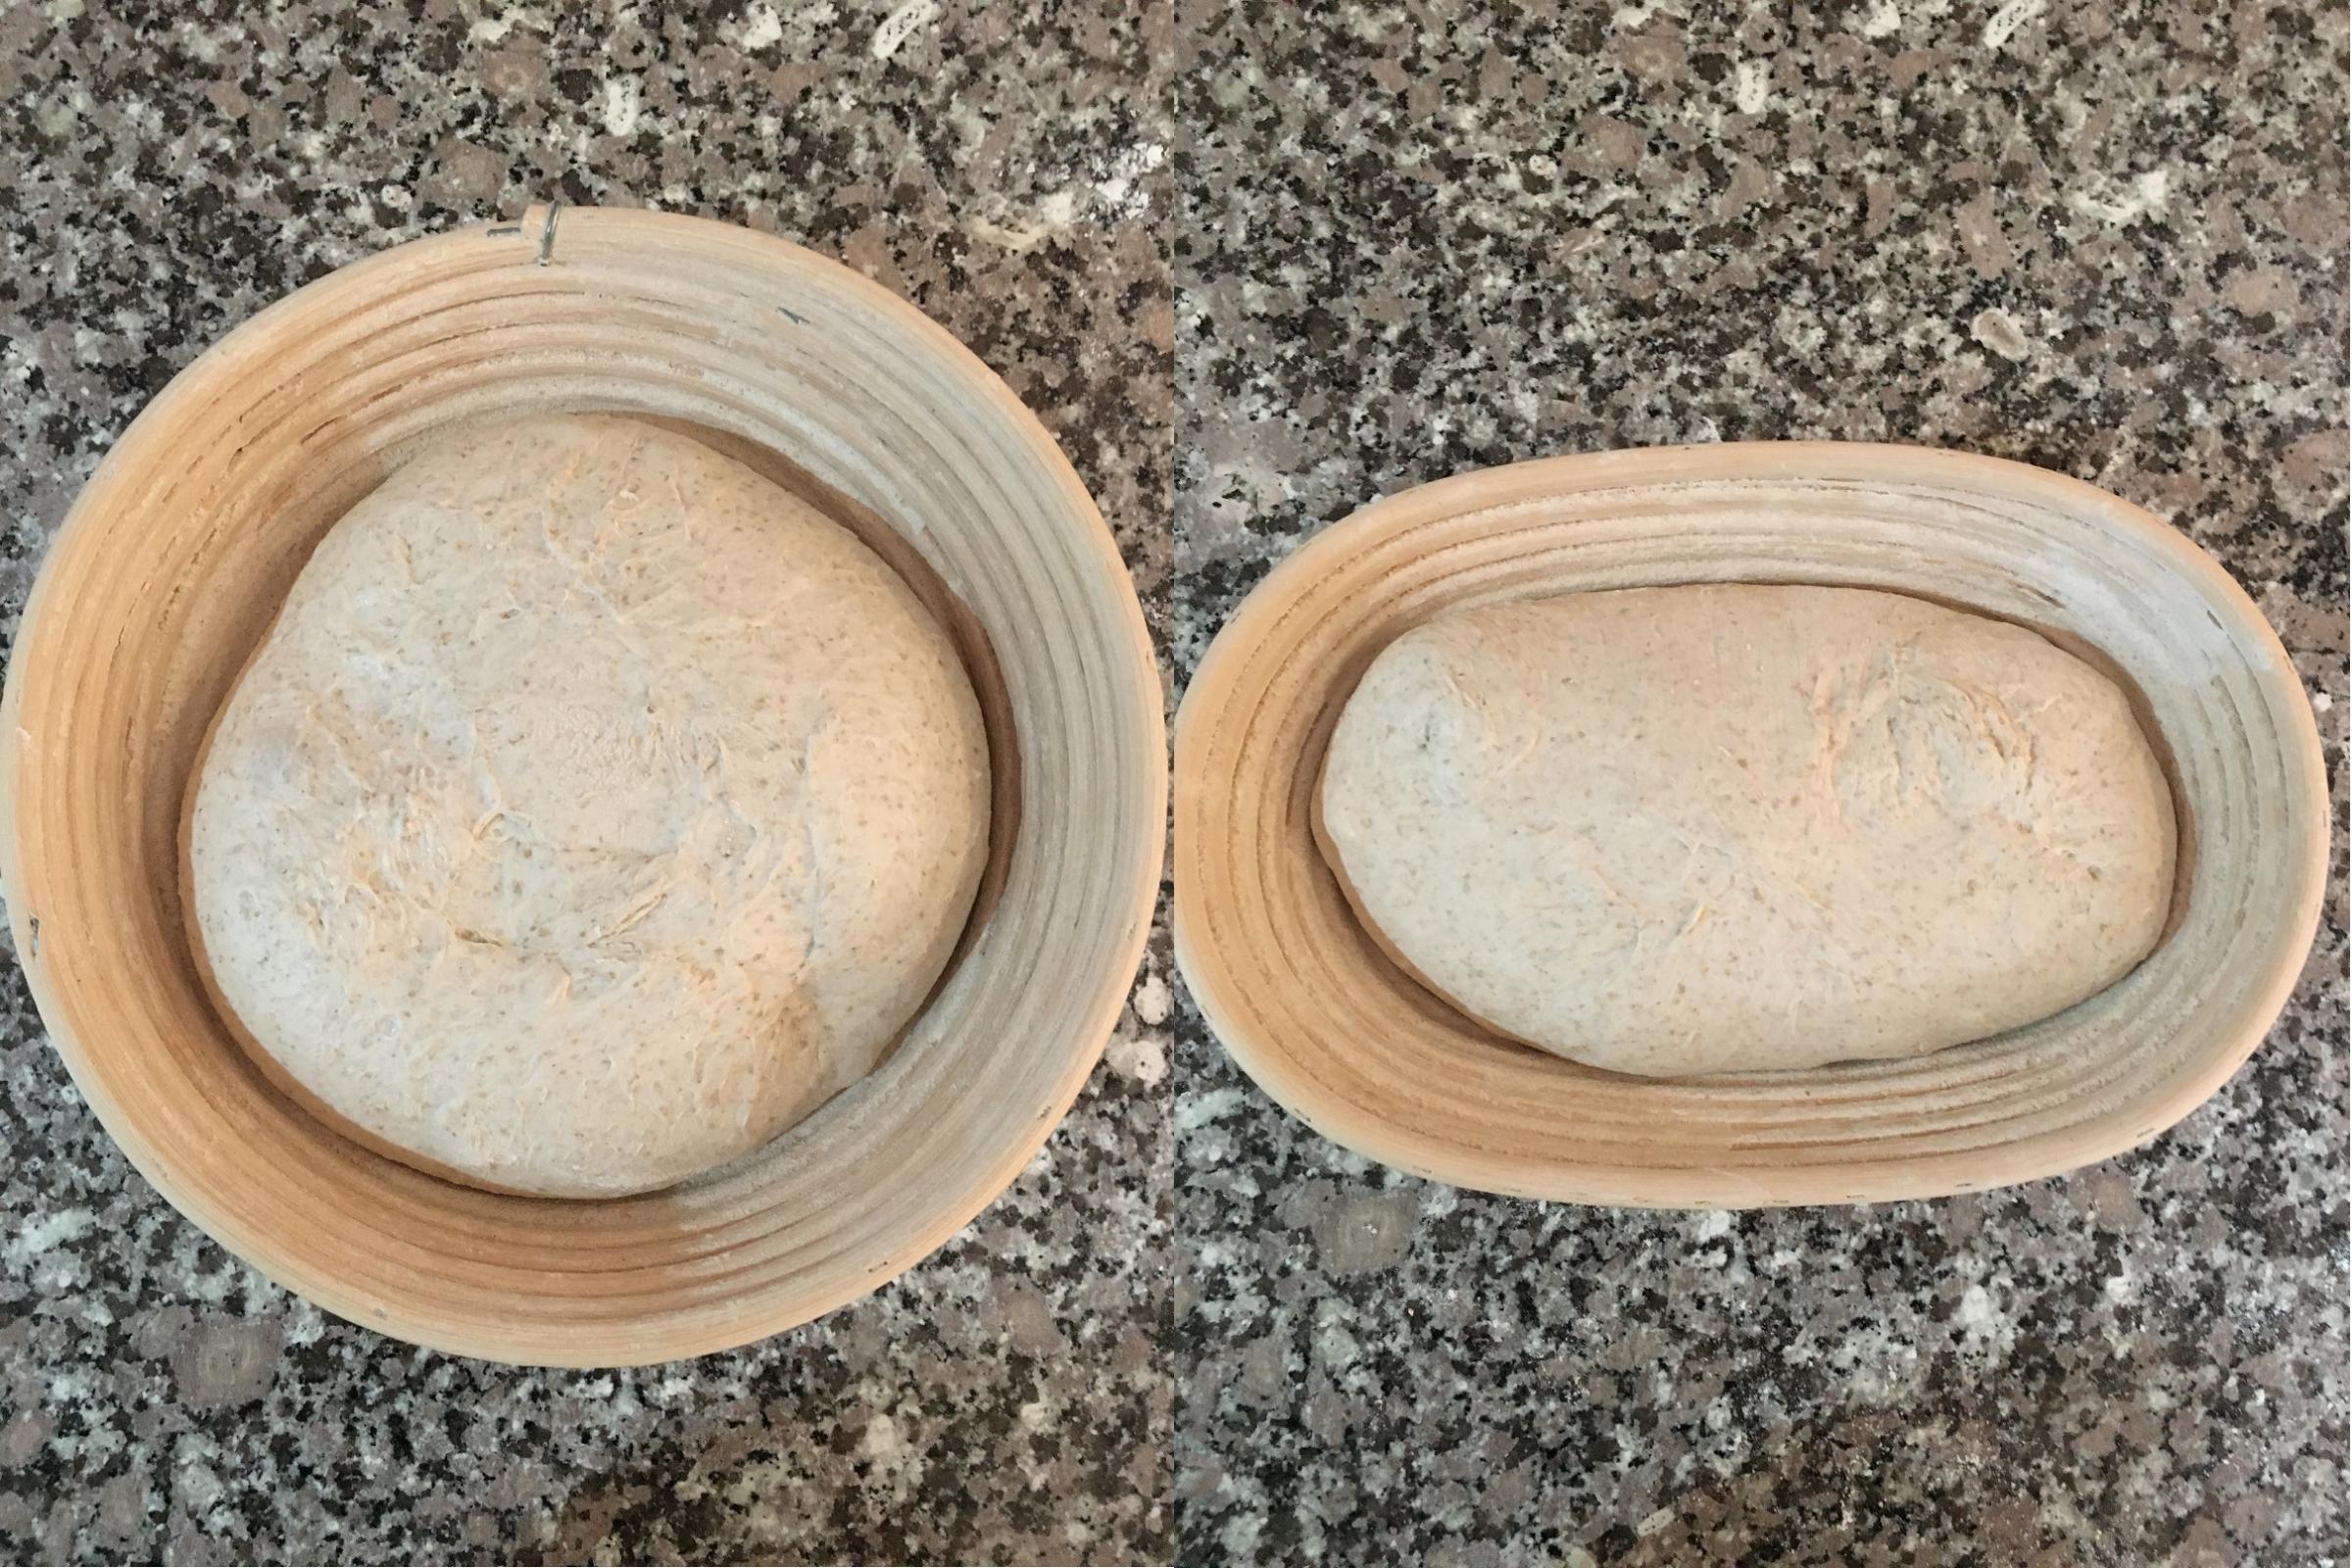
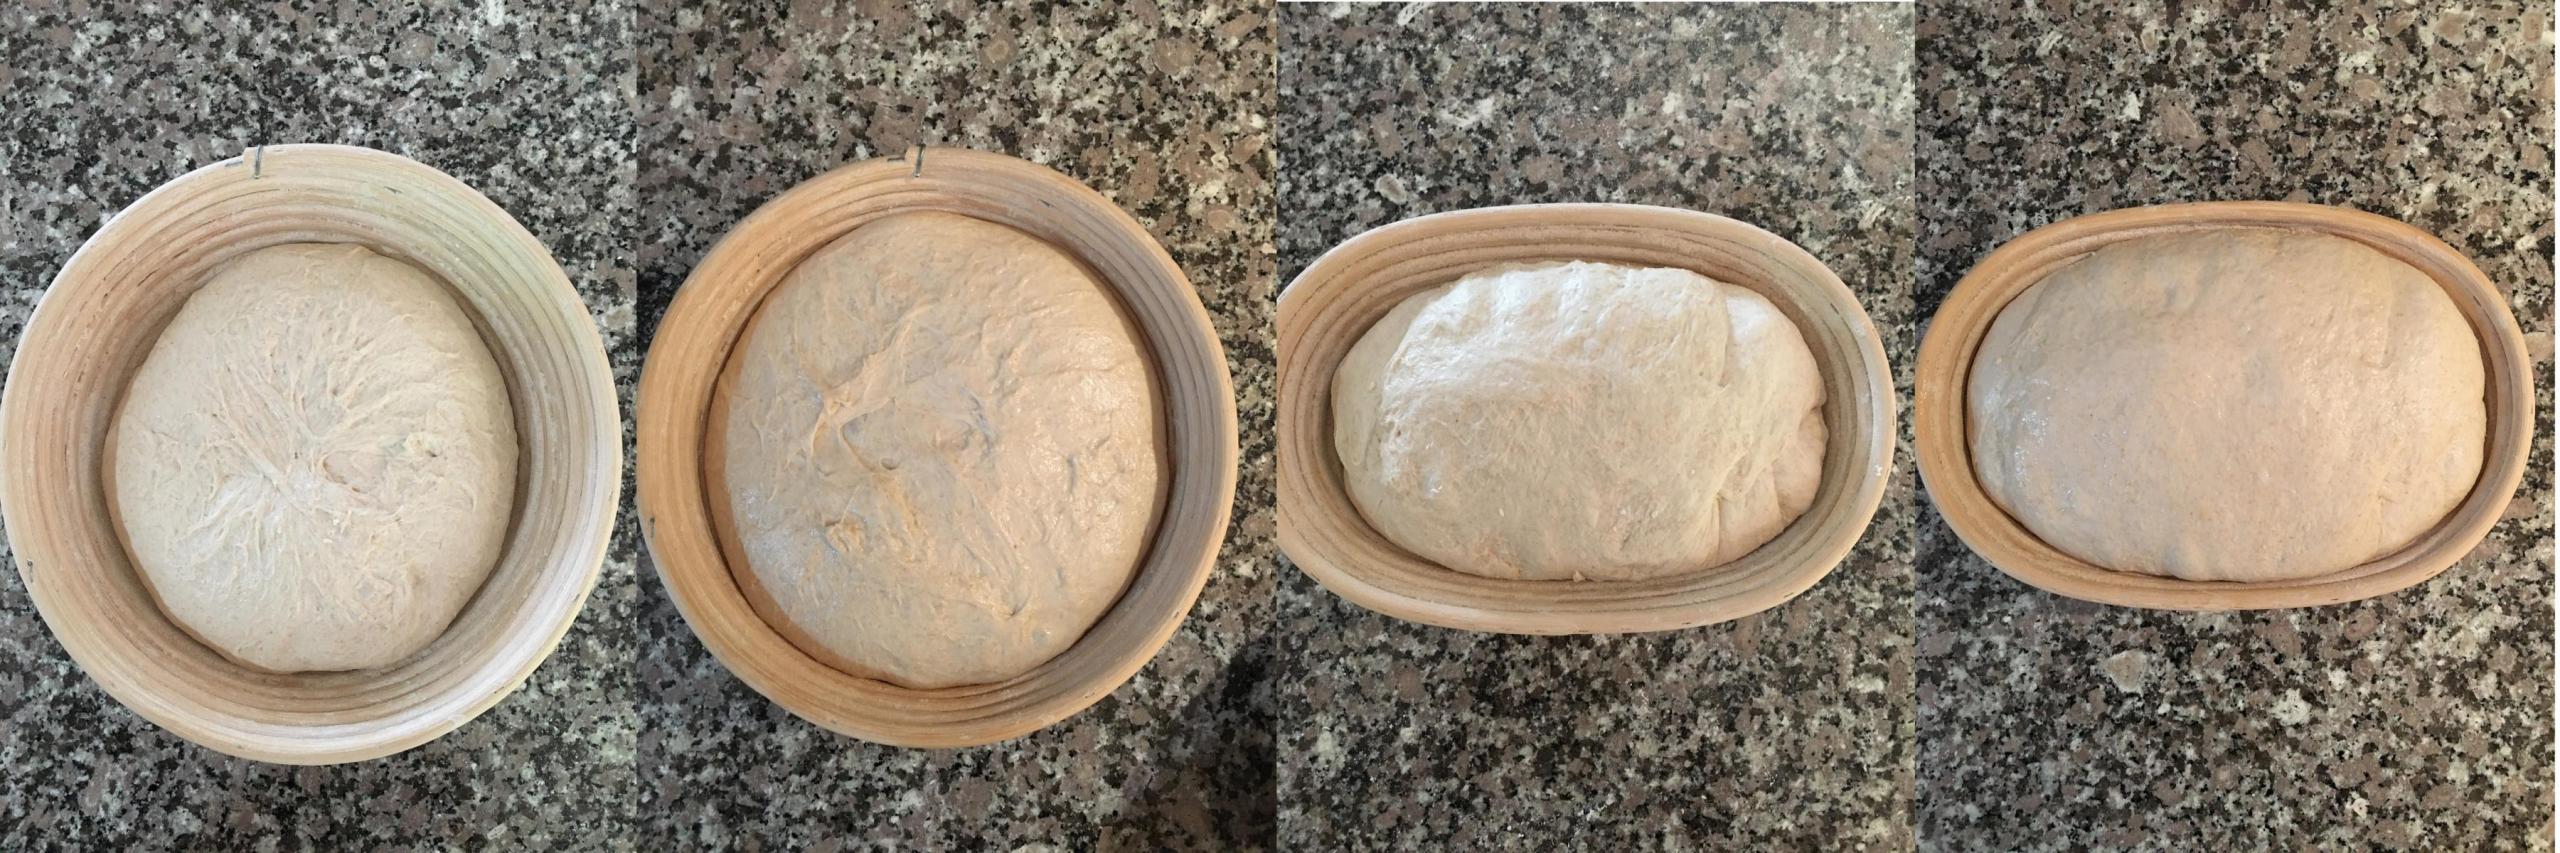
The next step was to get the dough onto the counter, divide the dough, and do the pre-shape.  Then came the bench rest, which was thirty minutes.  This composite photo shows the dough just out of the tub and the two portions just before and just after the bench rest.

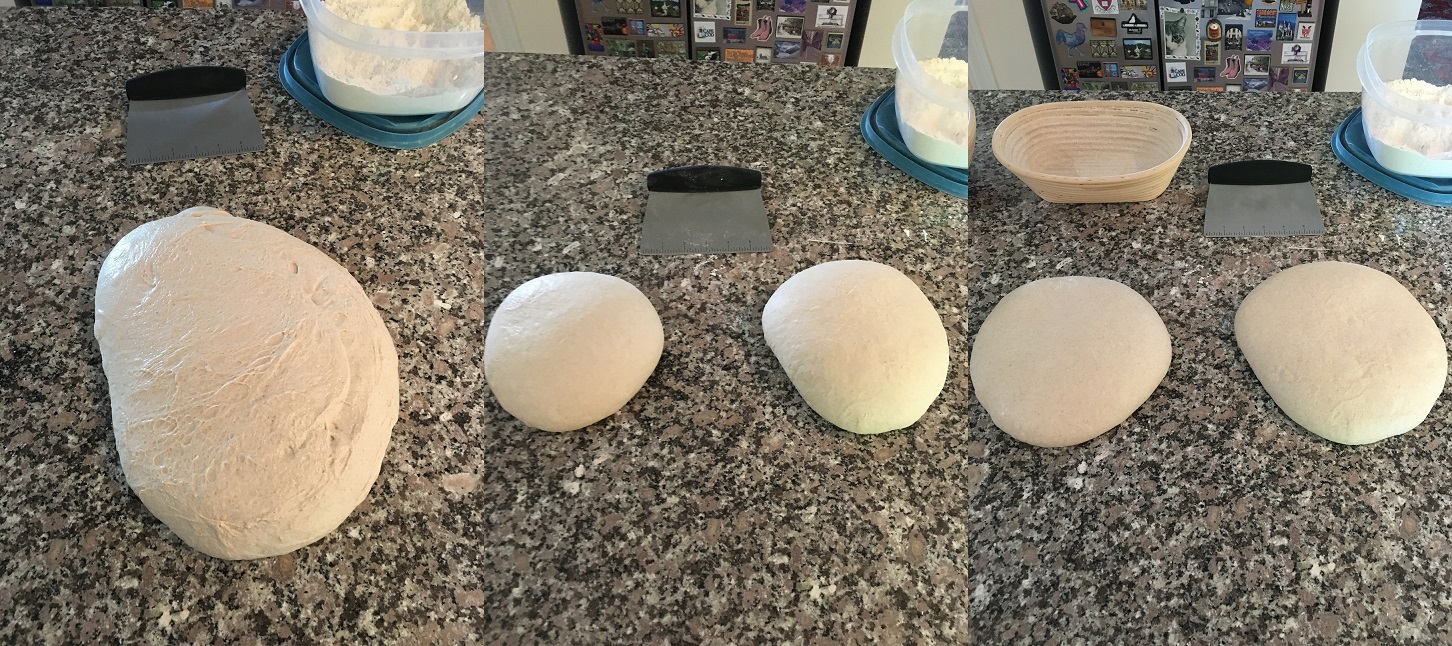
Note the bench scraper and container of flour in the background.  Once the mass of dough was on the counter, I sprinkled some flour on top and lightly spread it around with my hand across the top surface to cover any sticky areas.  Then I used the bench scraper to divide the dough into two portions.  This was not a sawing action, but rather a cut straight down and then a short slide to one side to separate the cut.  I usually do that three times to divide a mass of dough this size.  Then I slid the bench scraper under a dough portion around its perimeter to make sure it was not sticking somewhere onto the counter.  Then I flipped each portion over so that the floured side was now on the counter.  I used a stitching process to pull sides of the dough up and toward the center and then pressed down gently to adhere the part pulled up. This created some surface tension on the part that was now the underside.  After I pulled from all directions toward the center, I used the bench scraper to flip the portion back over.  Using the bench scraper along the side of the portion and my hand as a guide, I slid the portion on the dry countertop and created further surface tension.  (King Arthur as well as the San Francisco Baking Institute have excellent videos on pre-shaping and shaping dough, and I recommend watching those.)  During the bench rest I lightly draped a tea towel over the dough.  As you can see, the dough had enough strength to retain its general shape during the thirty minutes, but enough extensibility to spread a bit too.

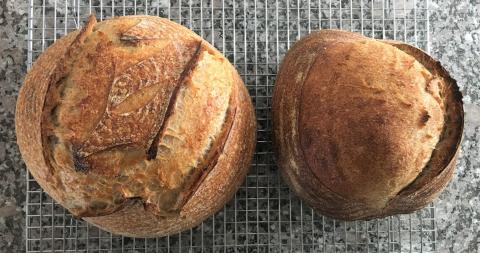
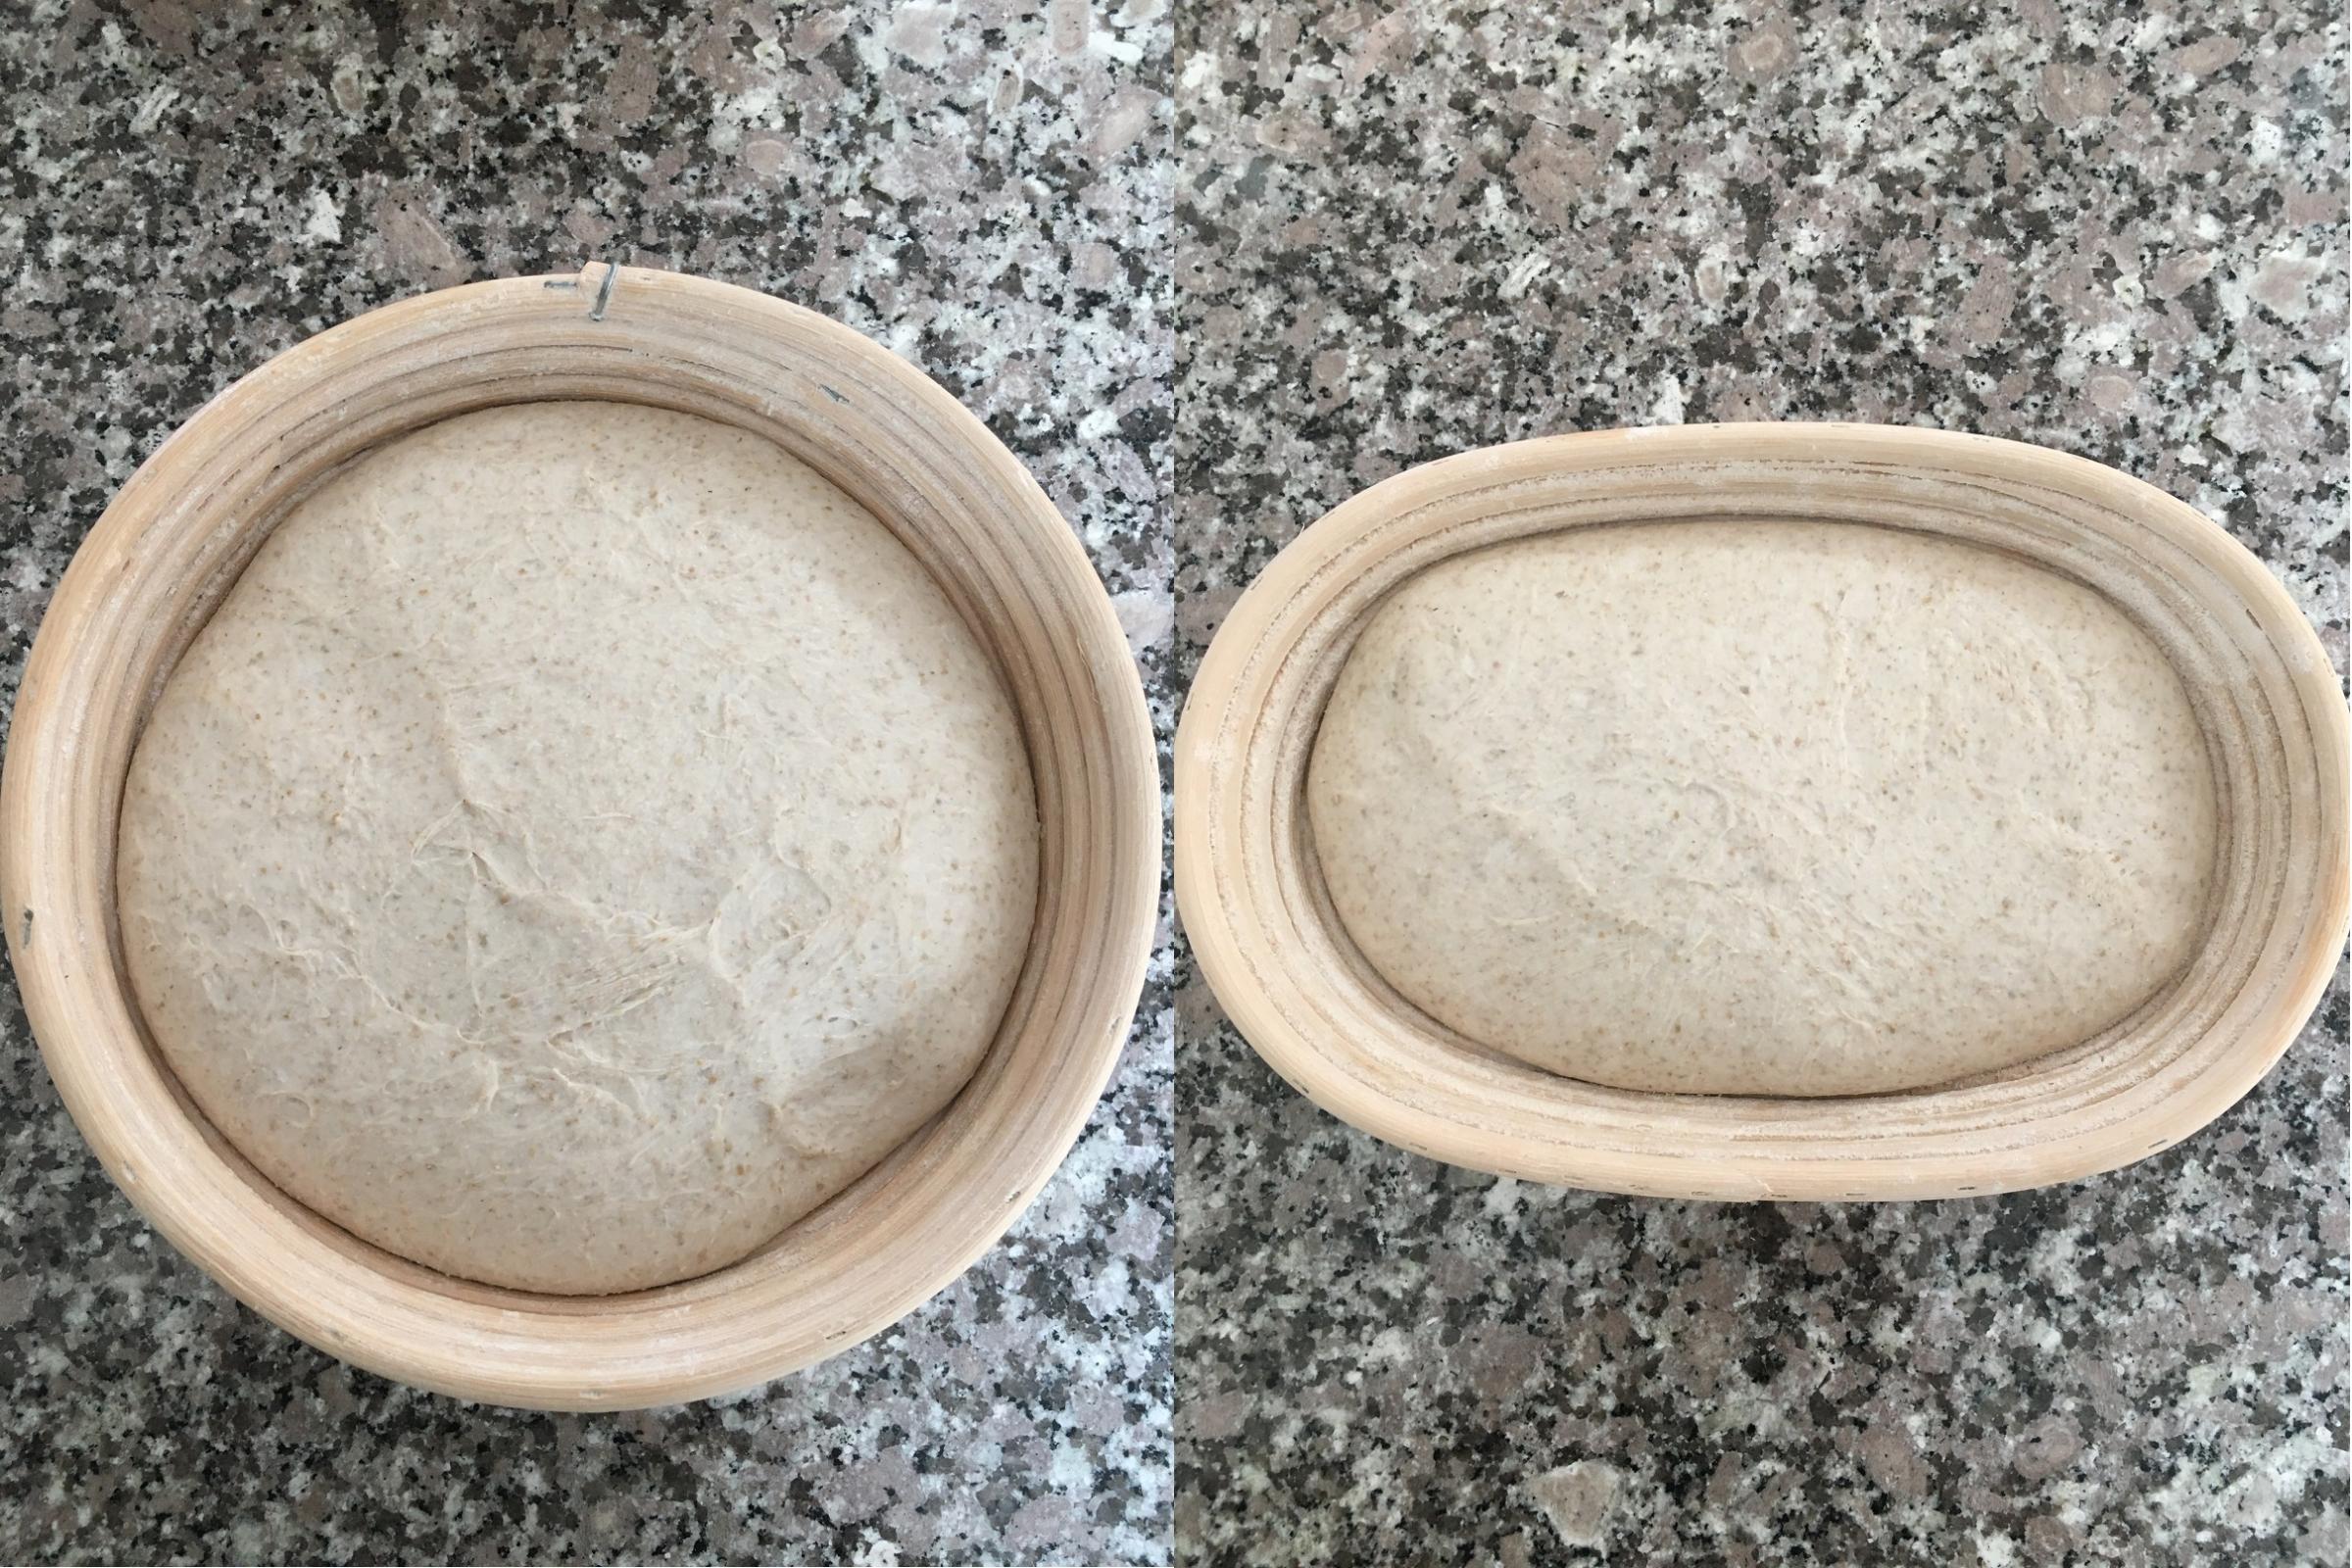
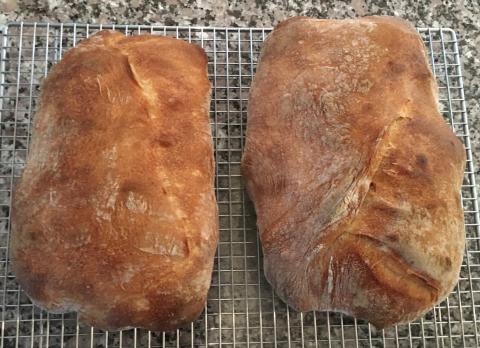
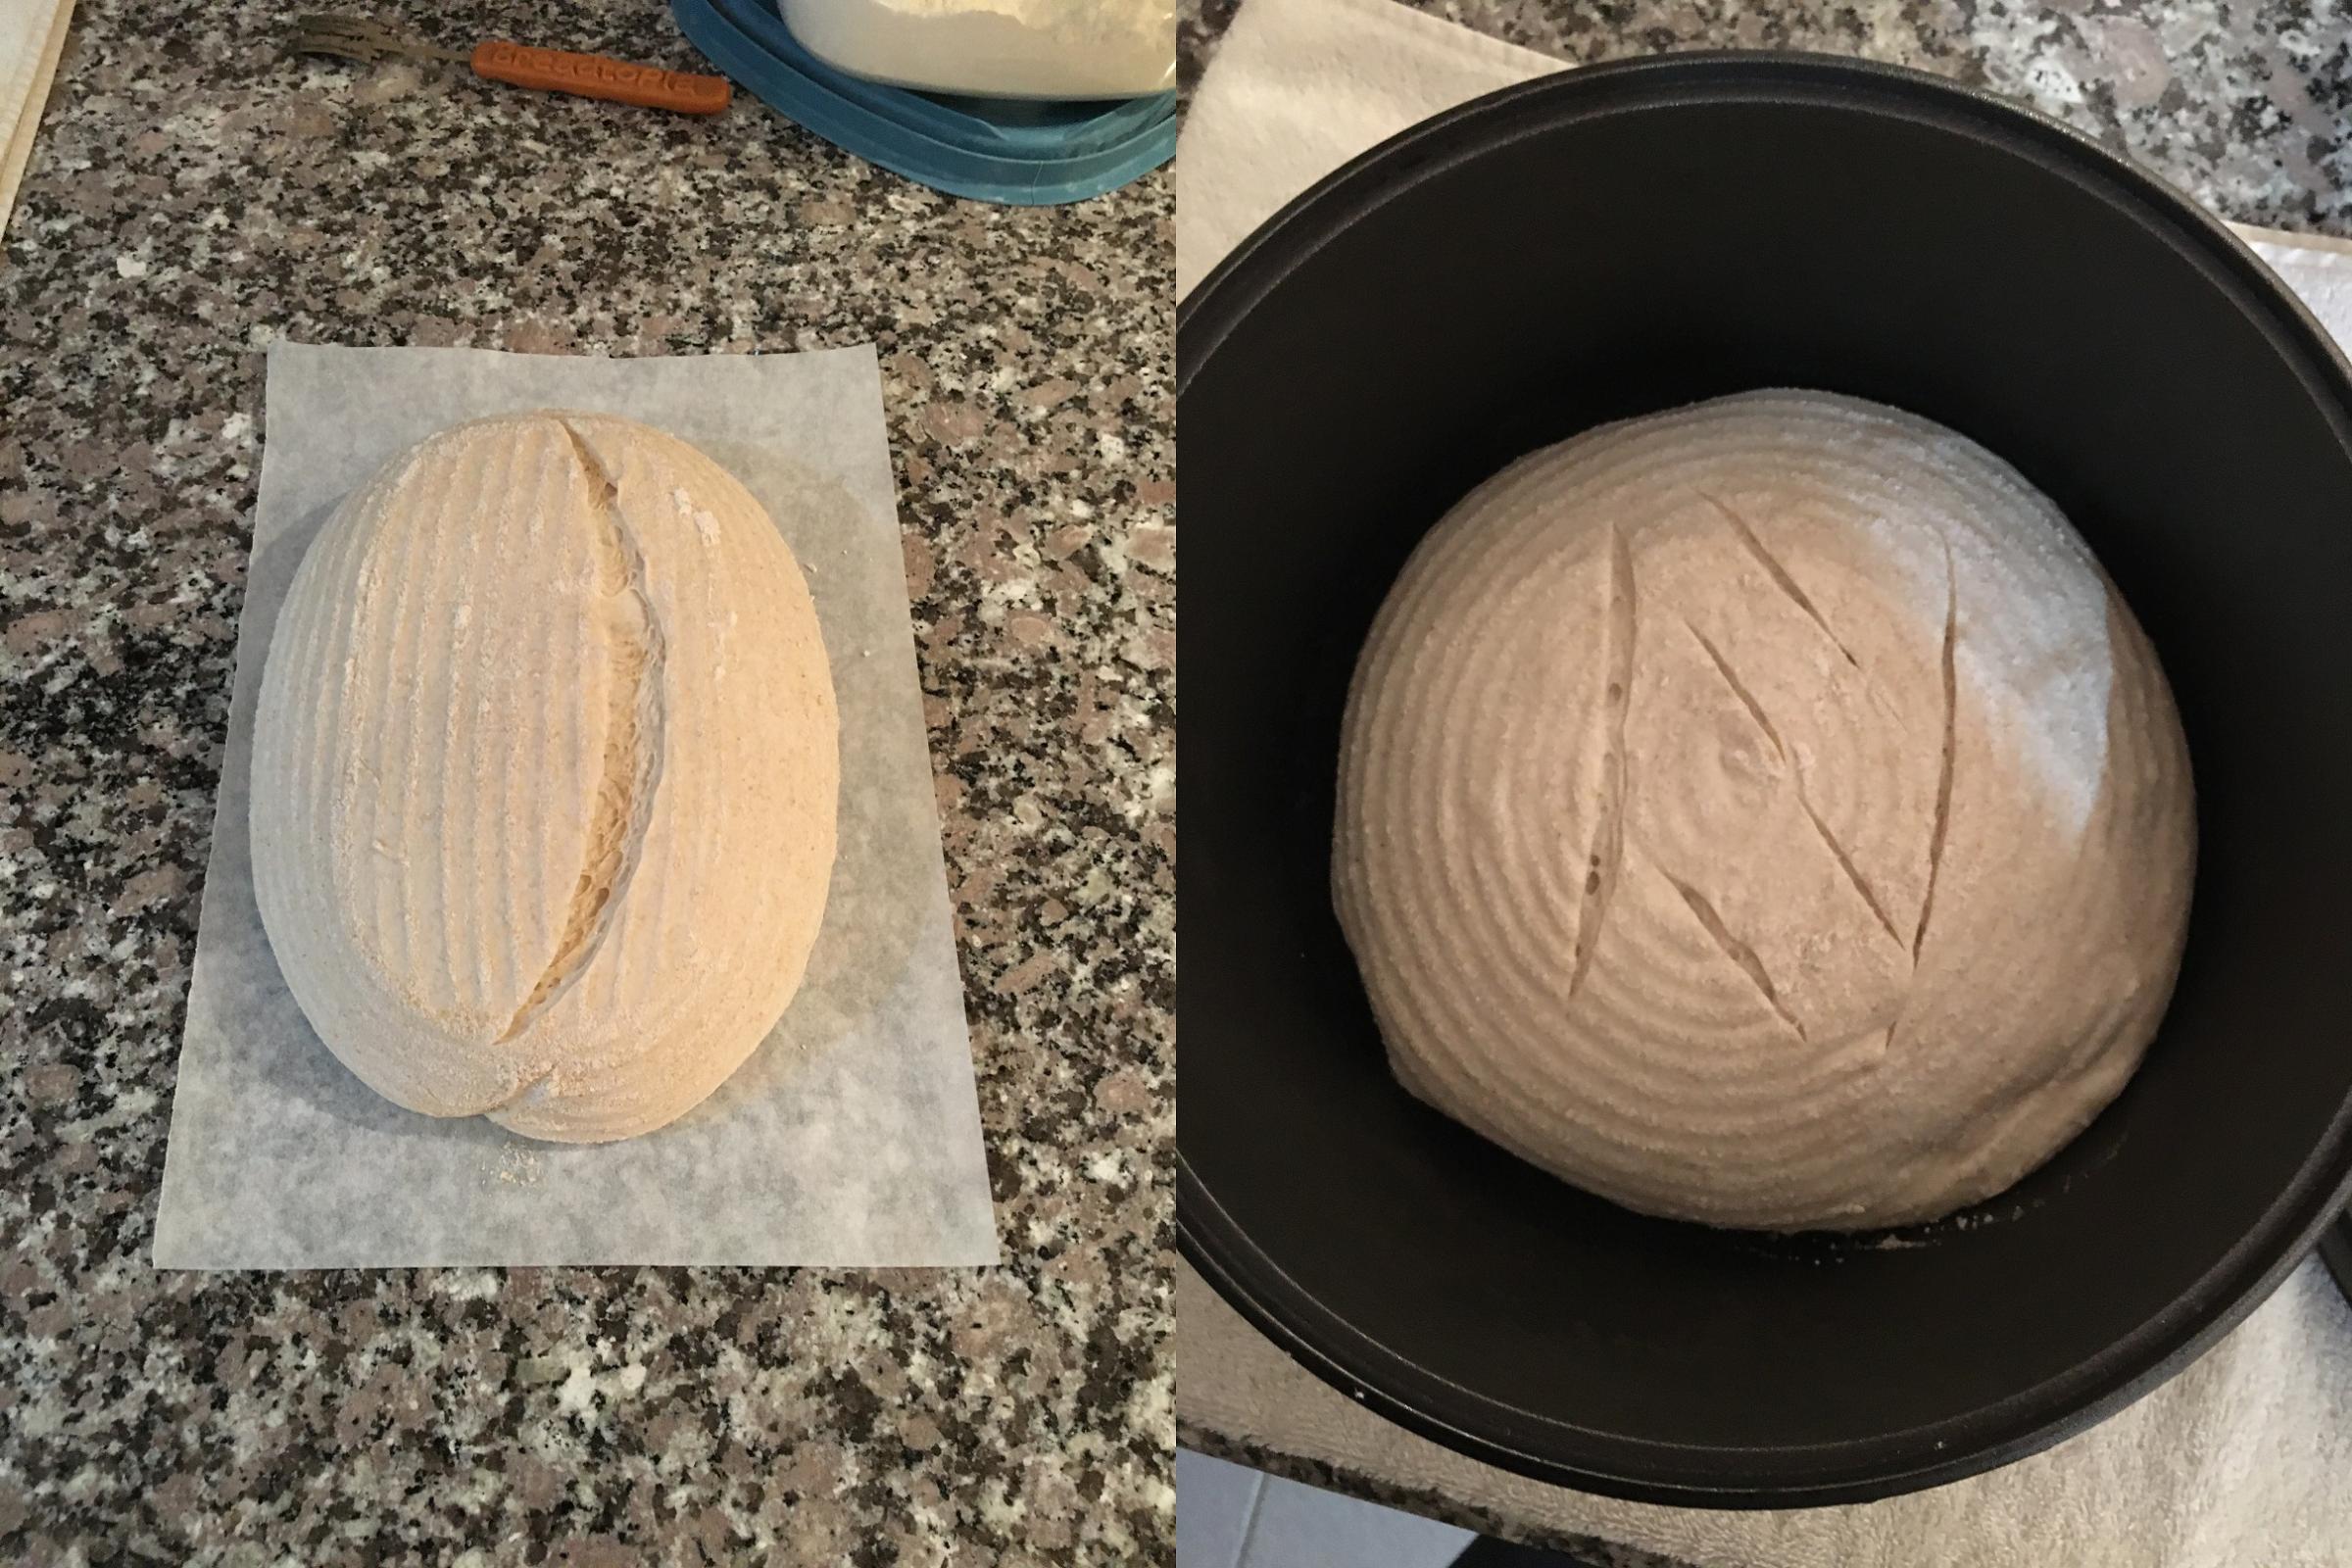
Next came the final shaping, and I opted for a boule and a batard.  My original plan had been to keep the bannetons in the refrigerator overnight, but during the final shaping I sensed that this dough had moved along, and I would be wise to monitor it.  Dough that enters the fridge does not immediately drop to 37F and instead takes awhile to reach that temperature.  During that time the fermentation continues.  This dough ended up spending a bit over six hours in the refrigerator before being put into the oven.  This composite photo shows the two loaves just before going into and just after coming out of the refrigerator.

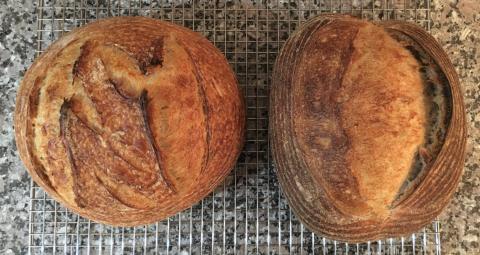
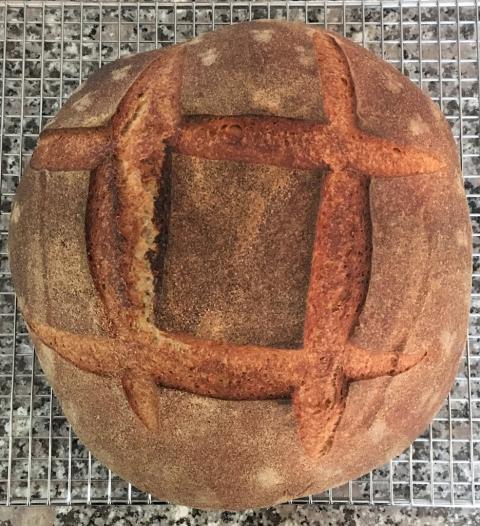
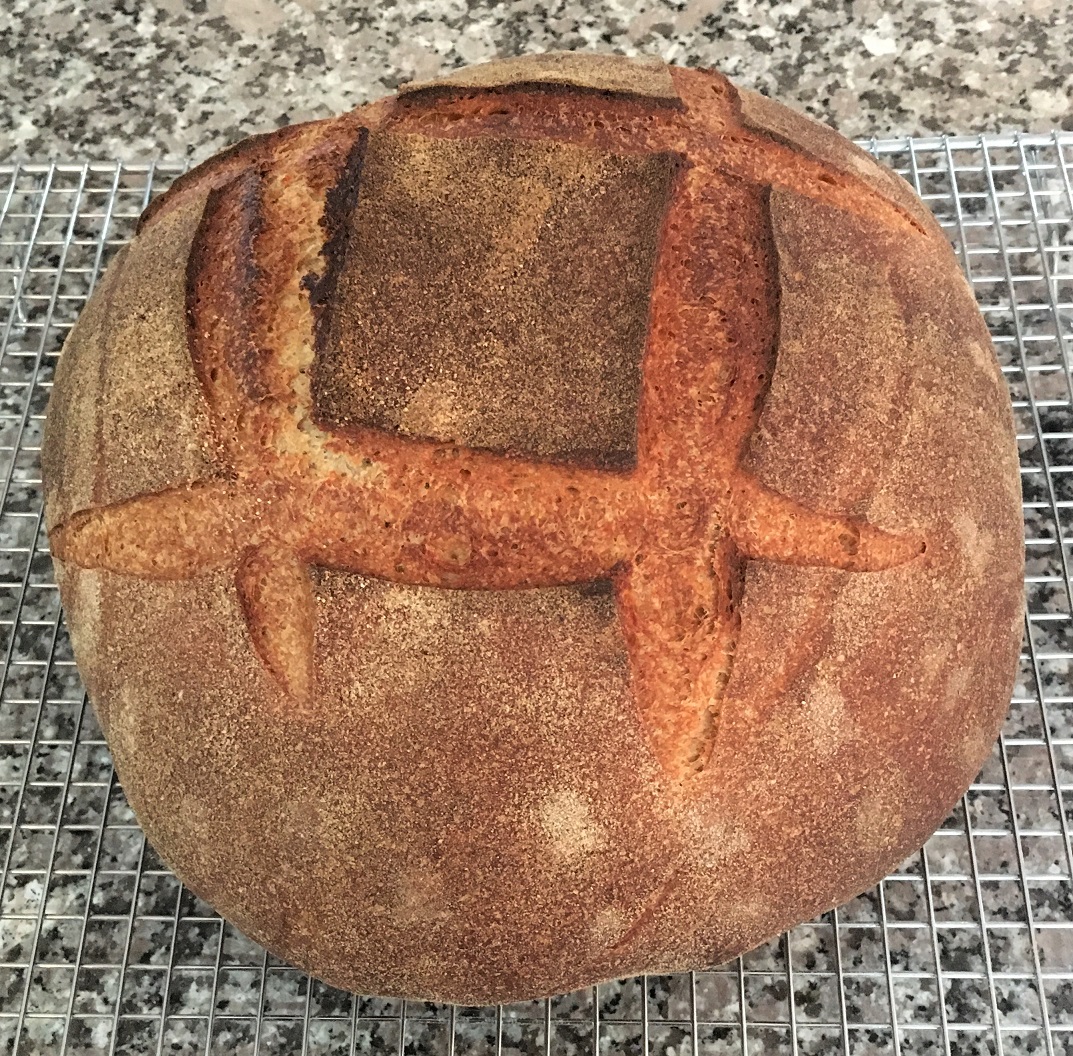
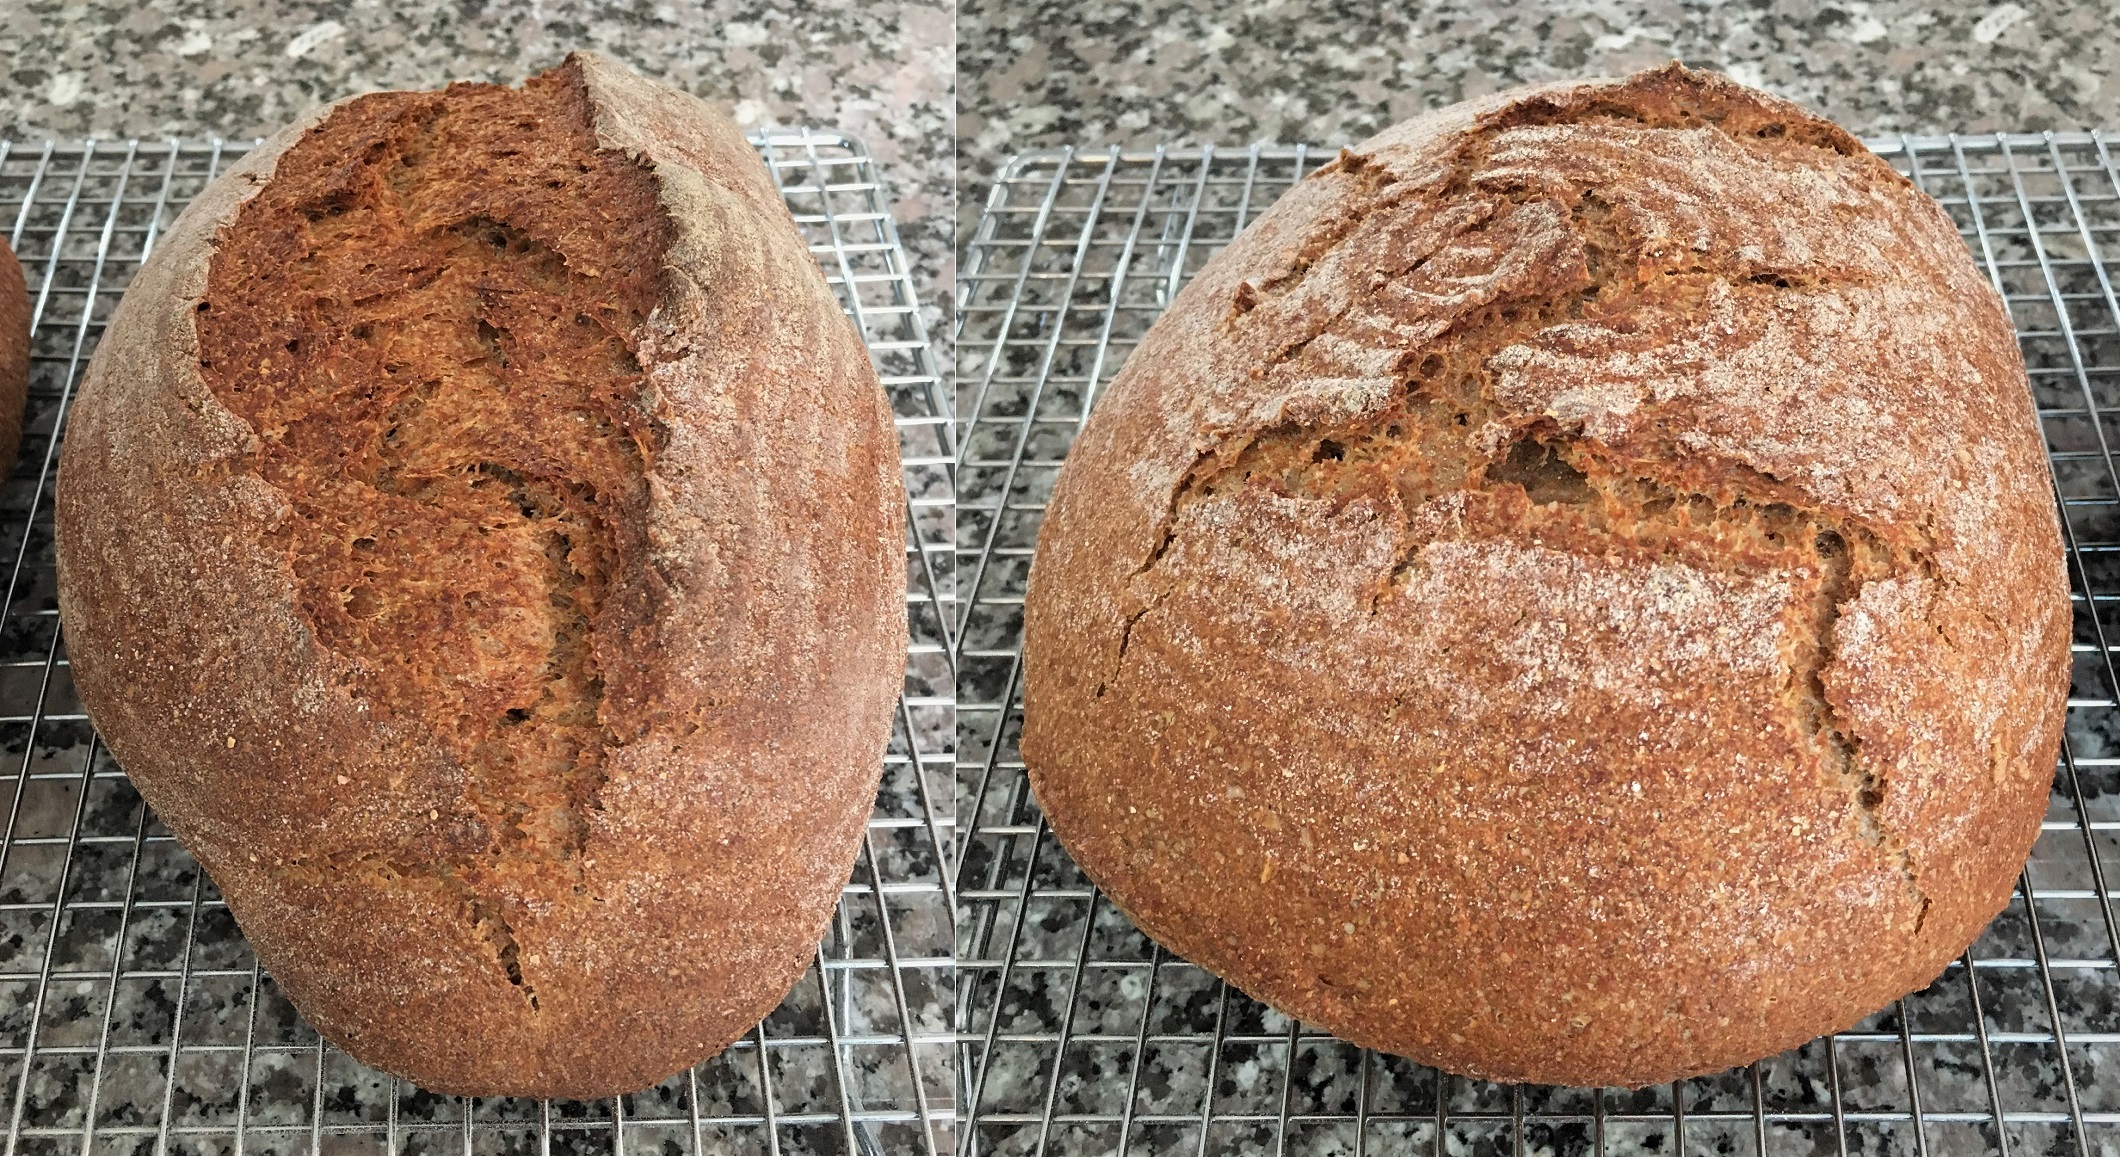
I scored the two loaves before they went into the oven (the boule in a Dutch oven and the batard on a baking stone).

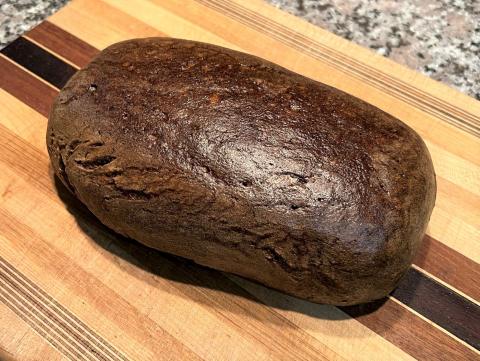
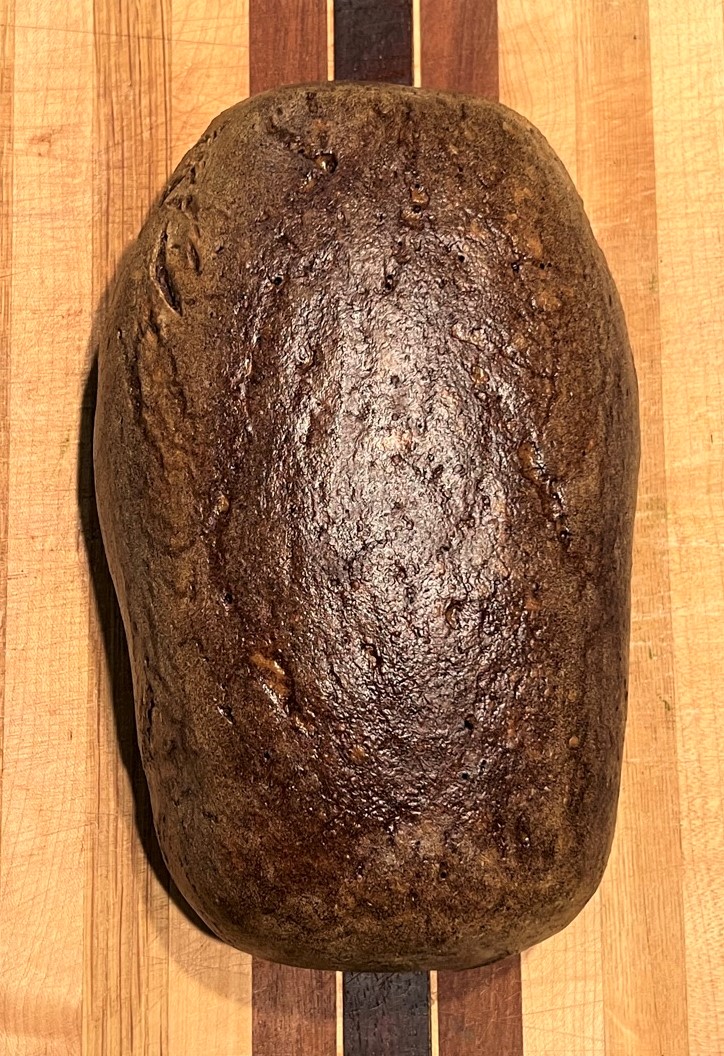
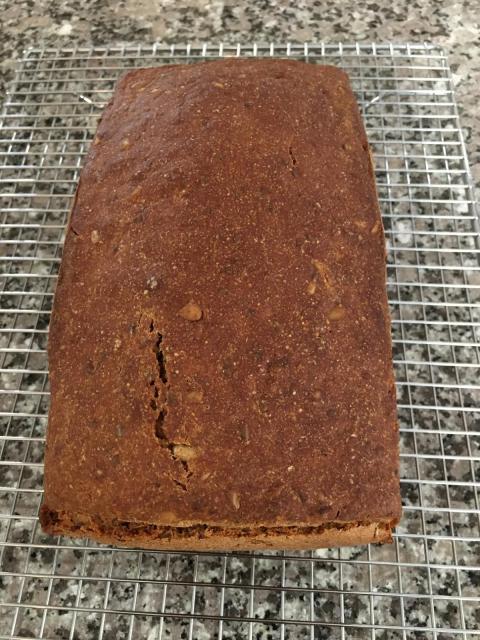
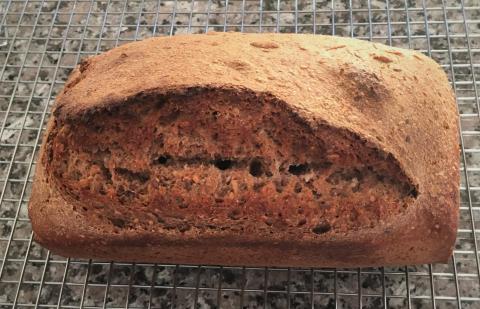
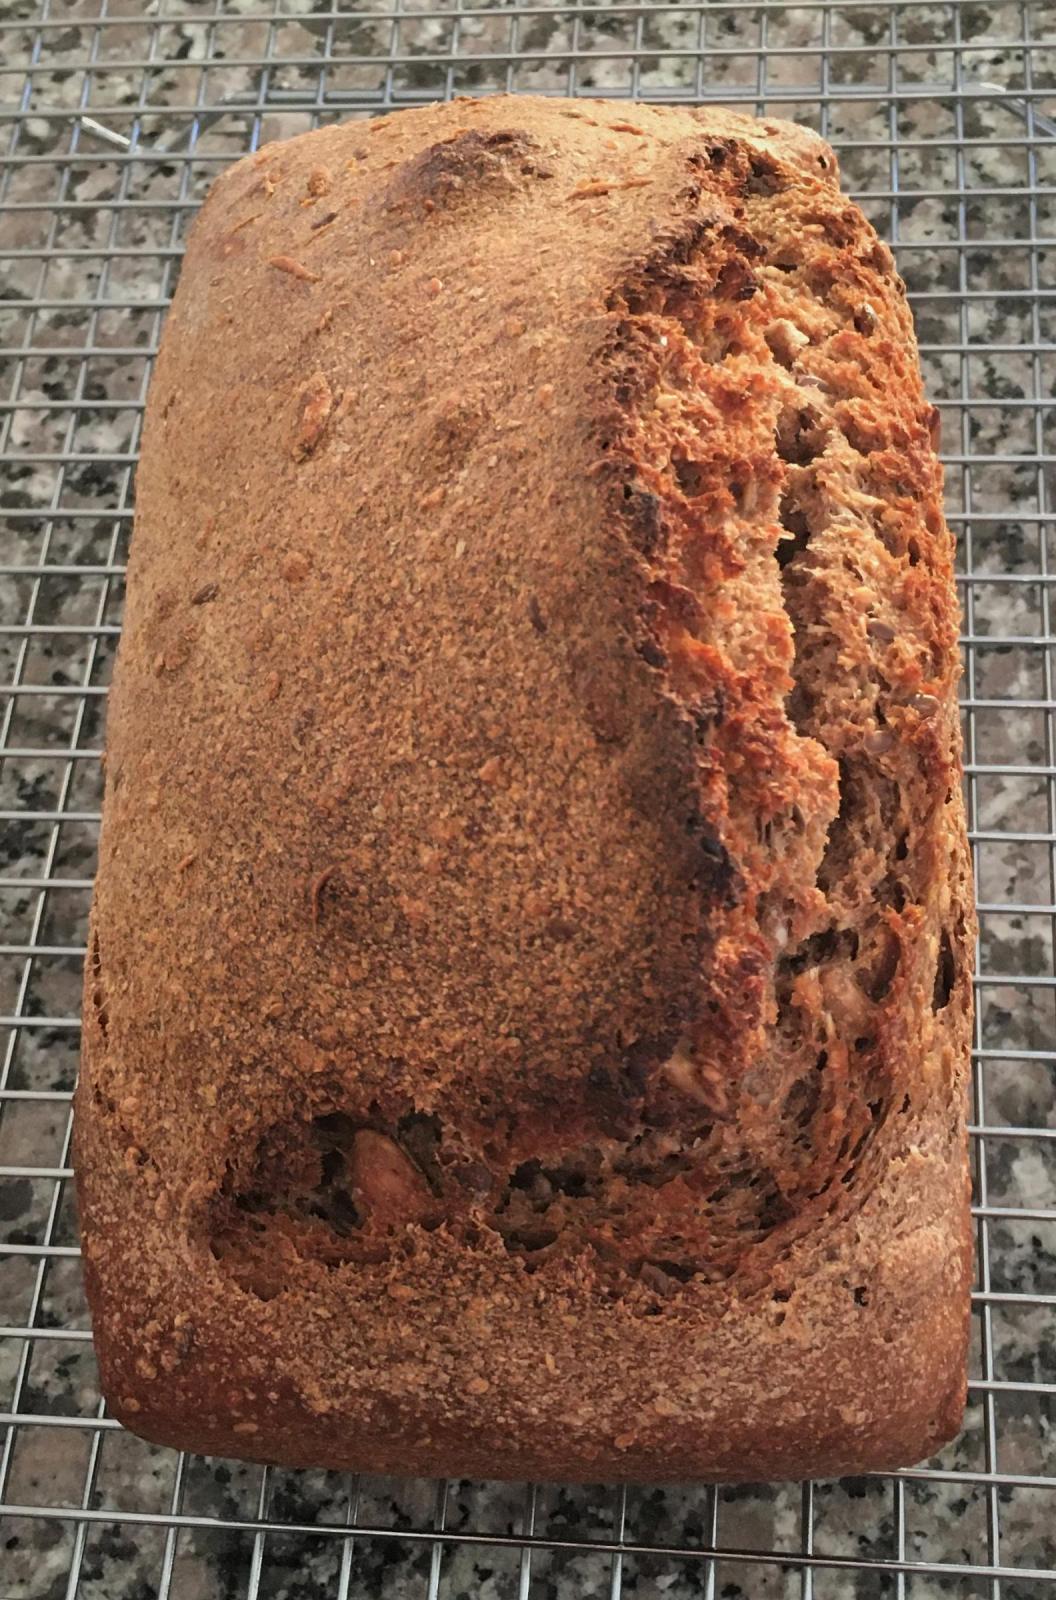
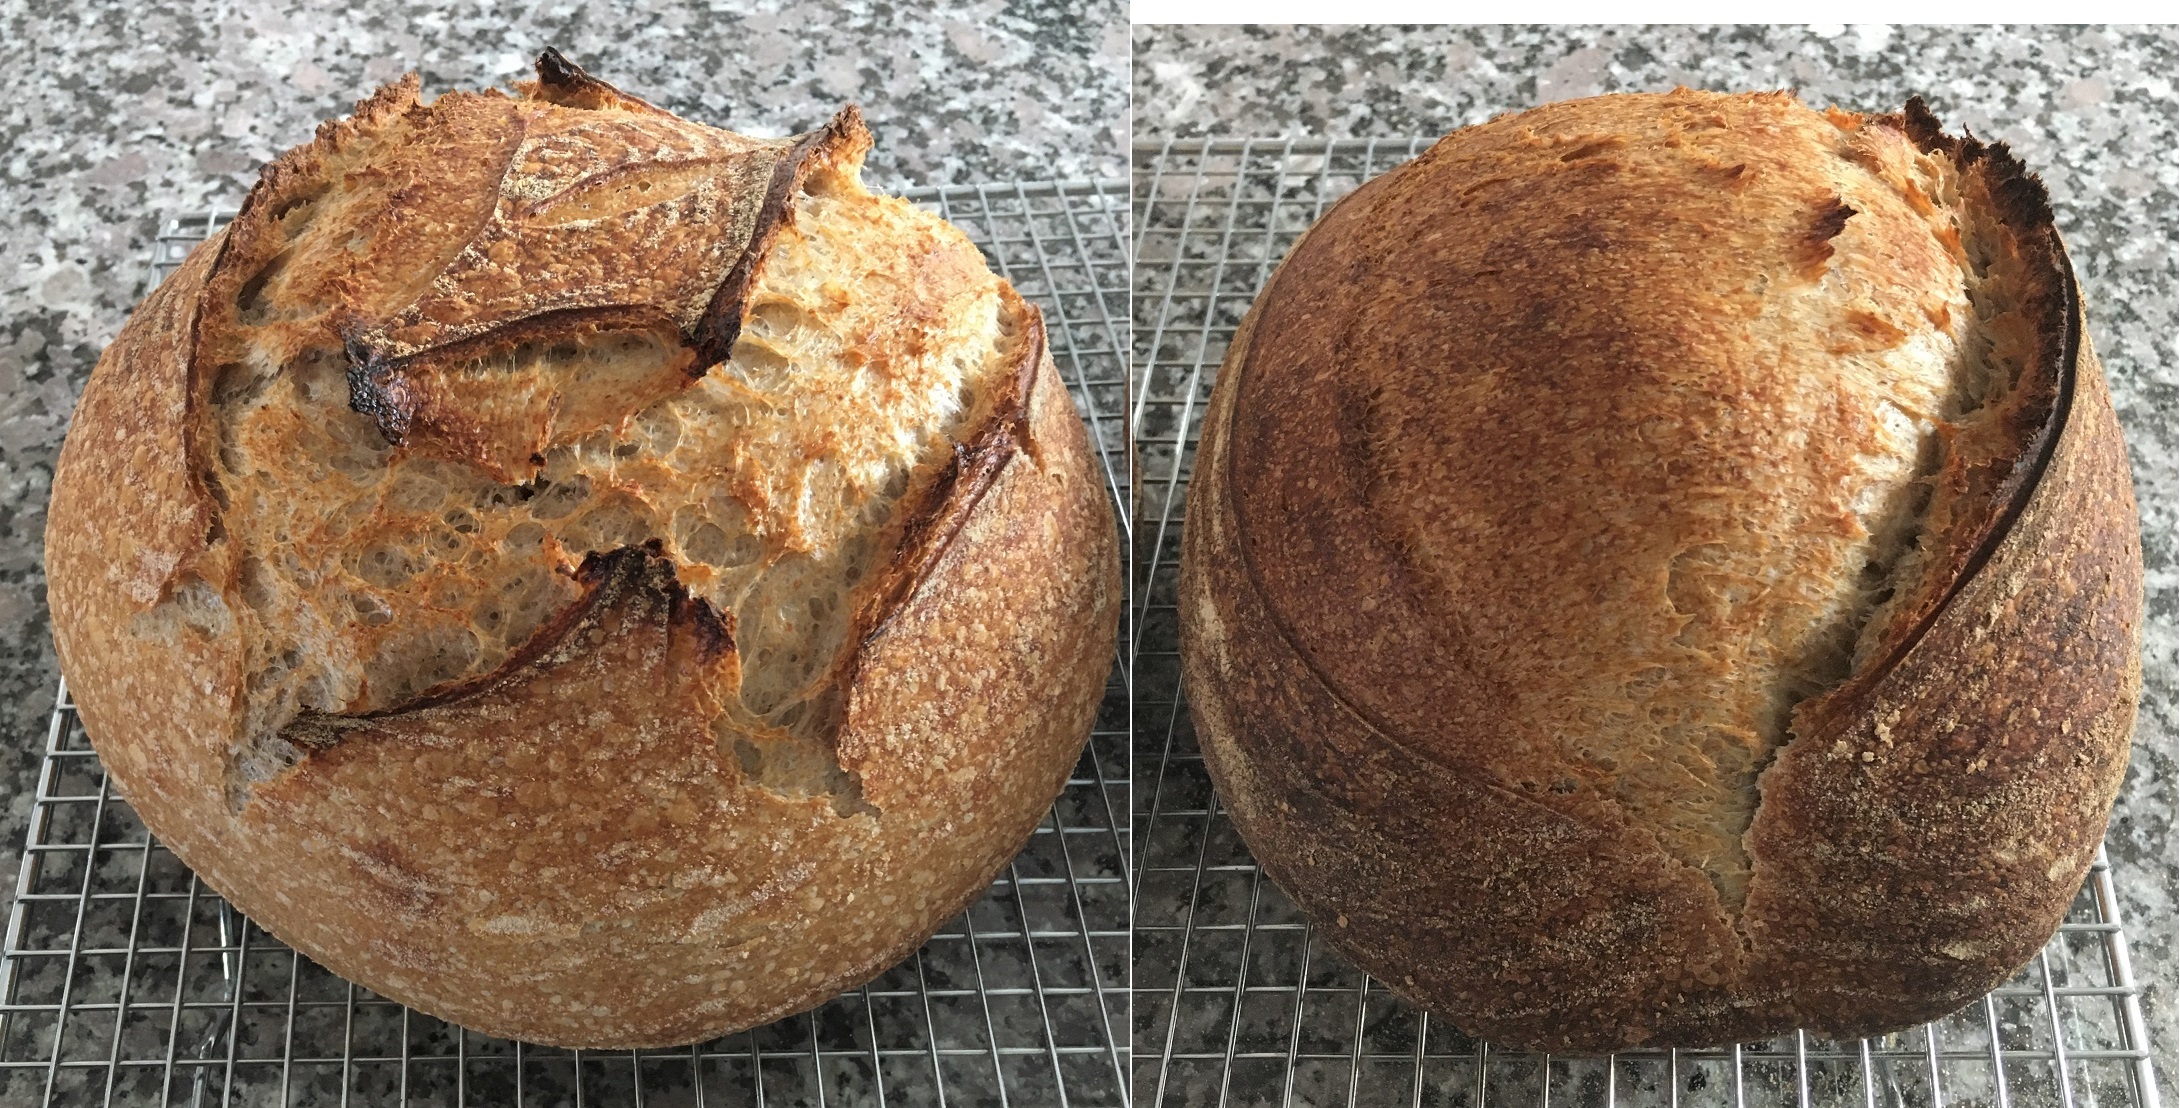
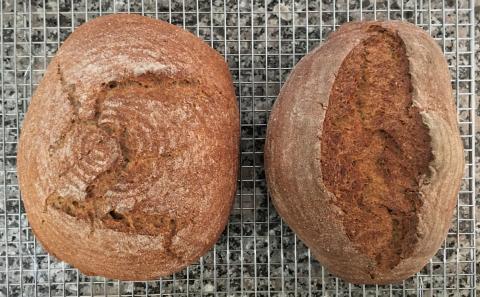
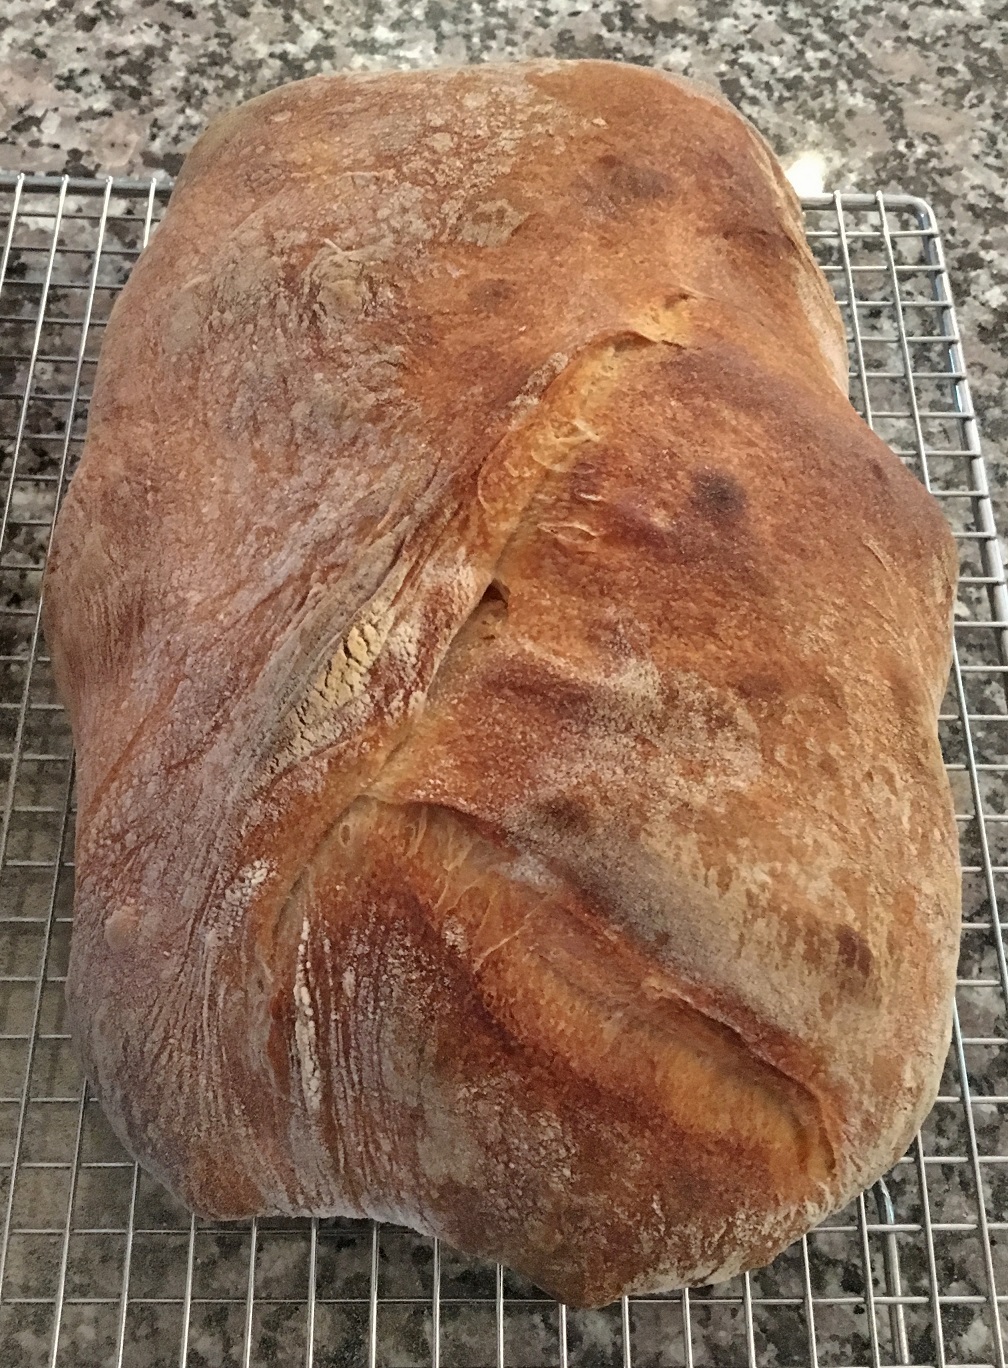
Here are the finished loaves from an angle.

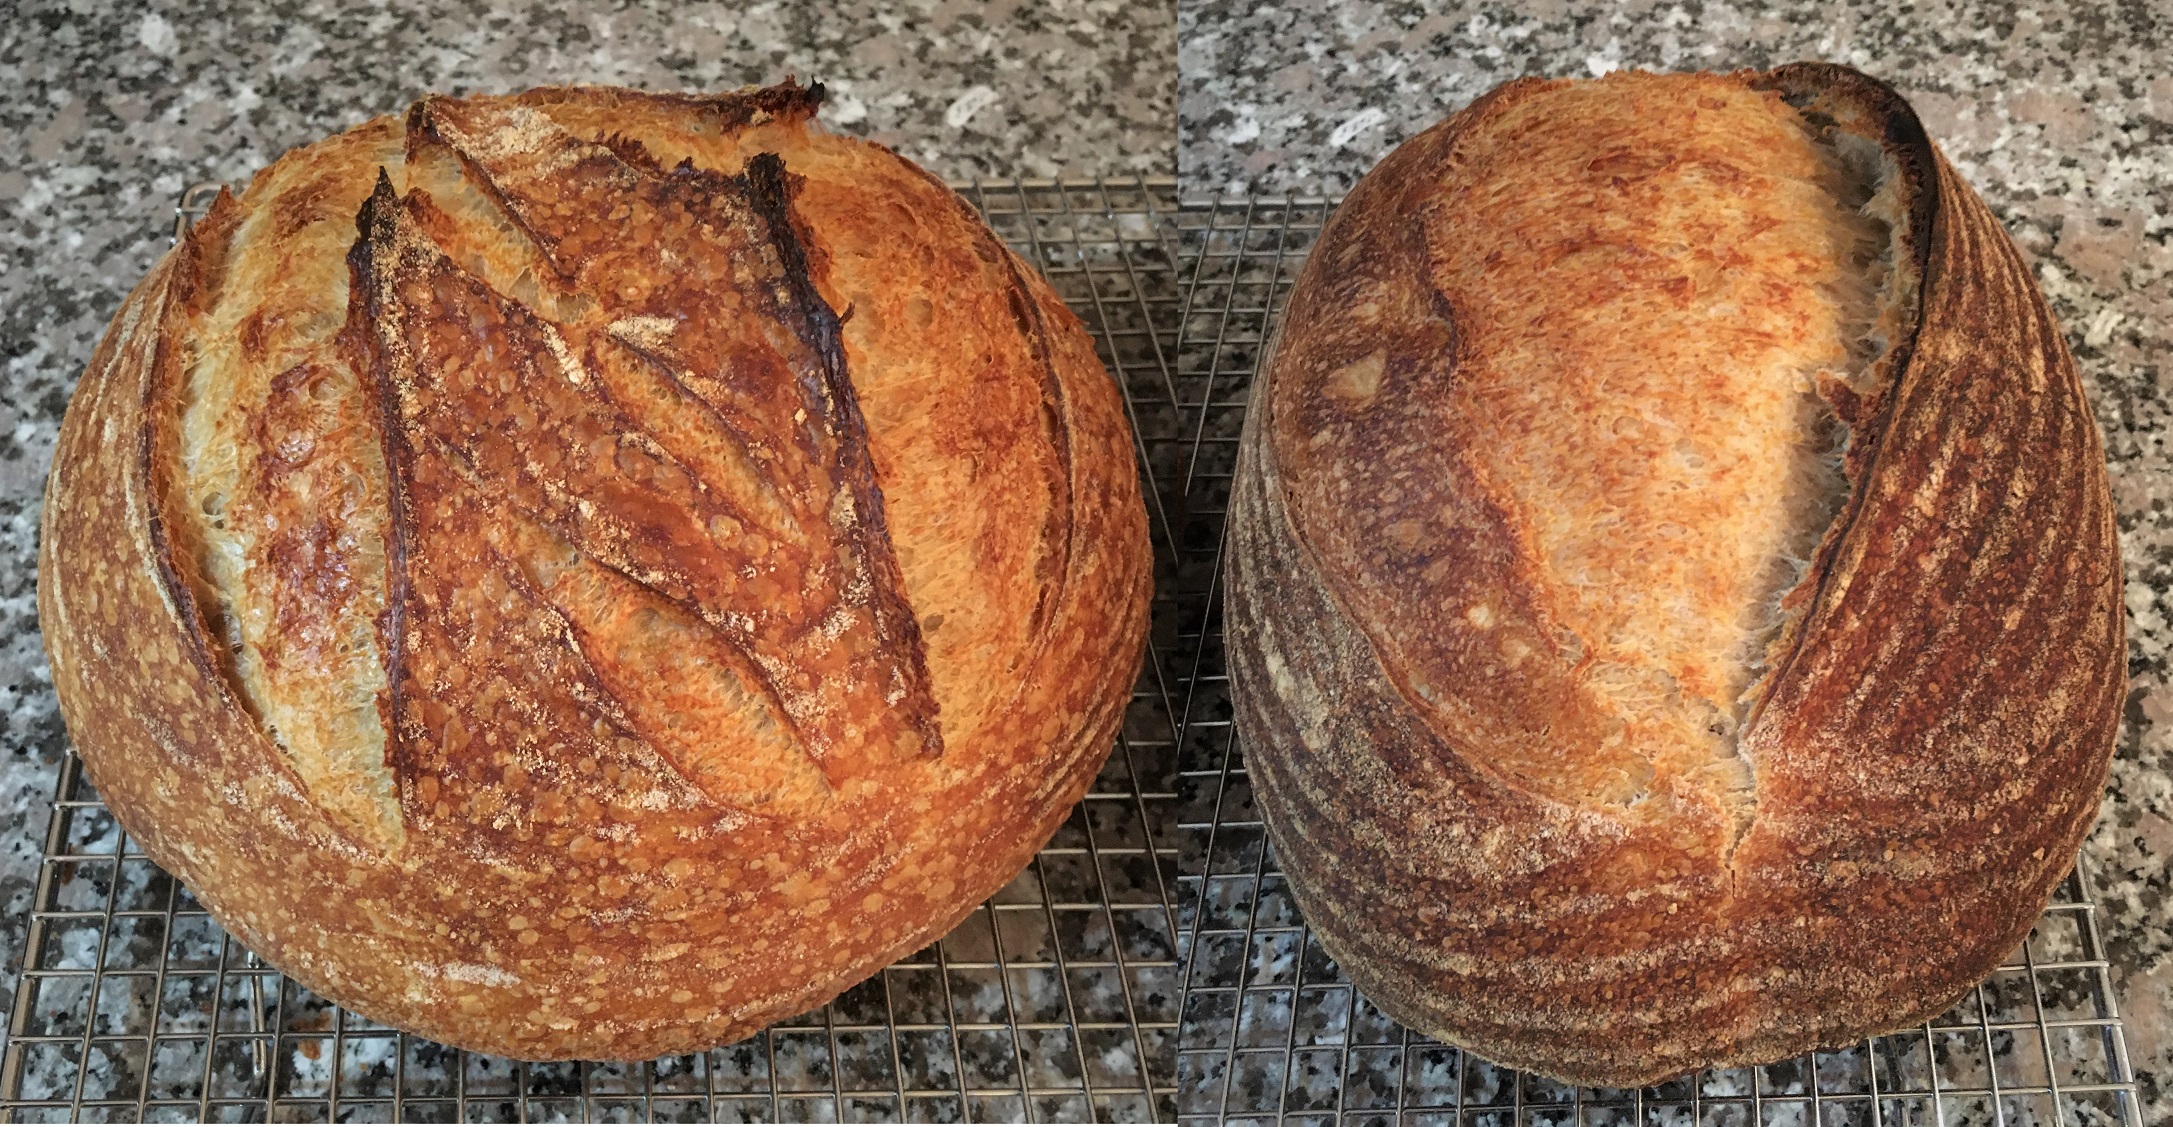
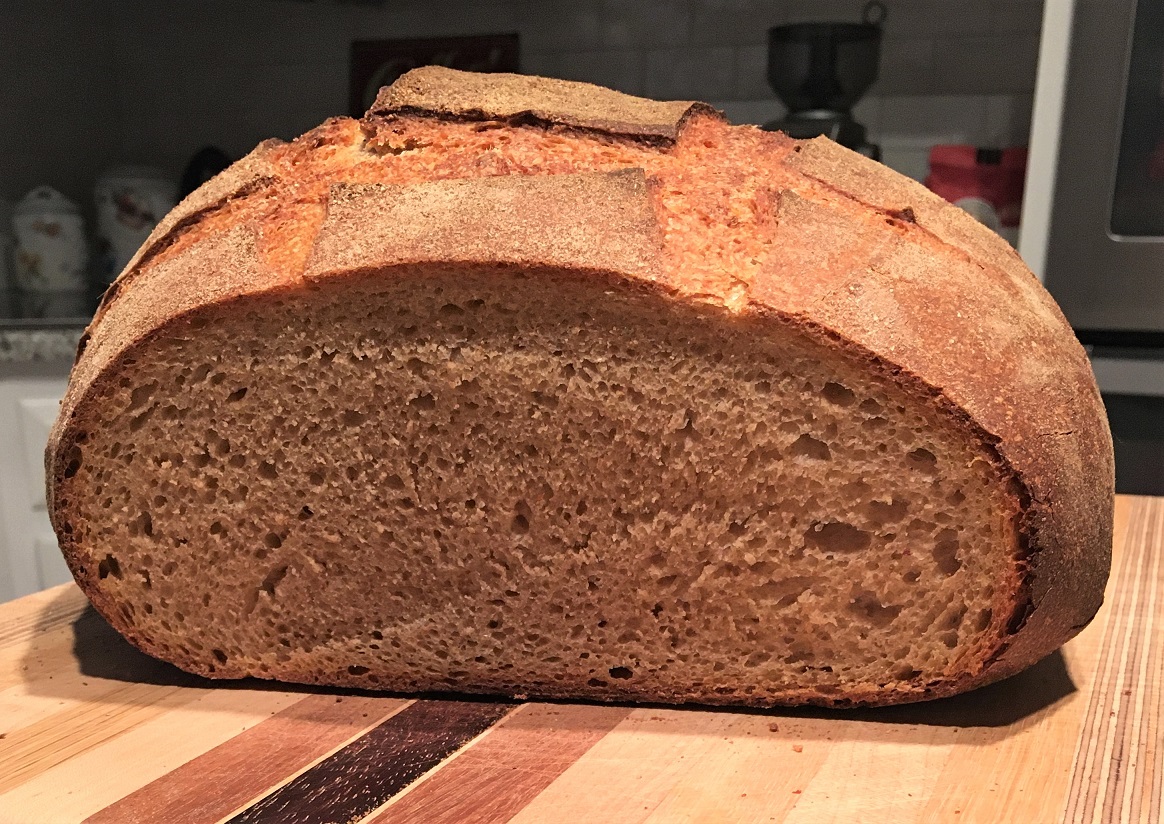
The batard baked for 42 minutes and the boule for 47 minutes at 450F.  (I typically find that the loaf on the baking stone needs less time than the one in the Dutch oven, and I check the internal temperature with my Thermapen to make sure it is at least 208F.)  The decision to pull the loaf from the oven essentially comes down to crust coloration, and I prefer a dark bake to enhance the flavor of the crust.

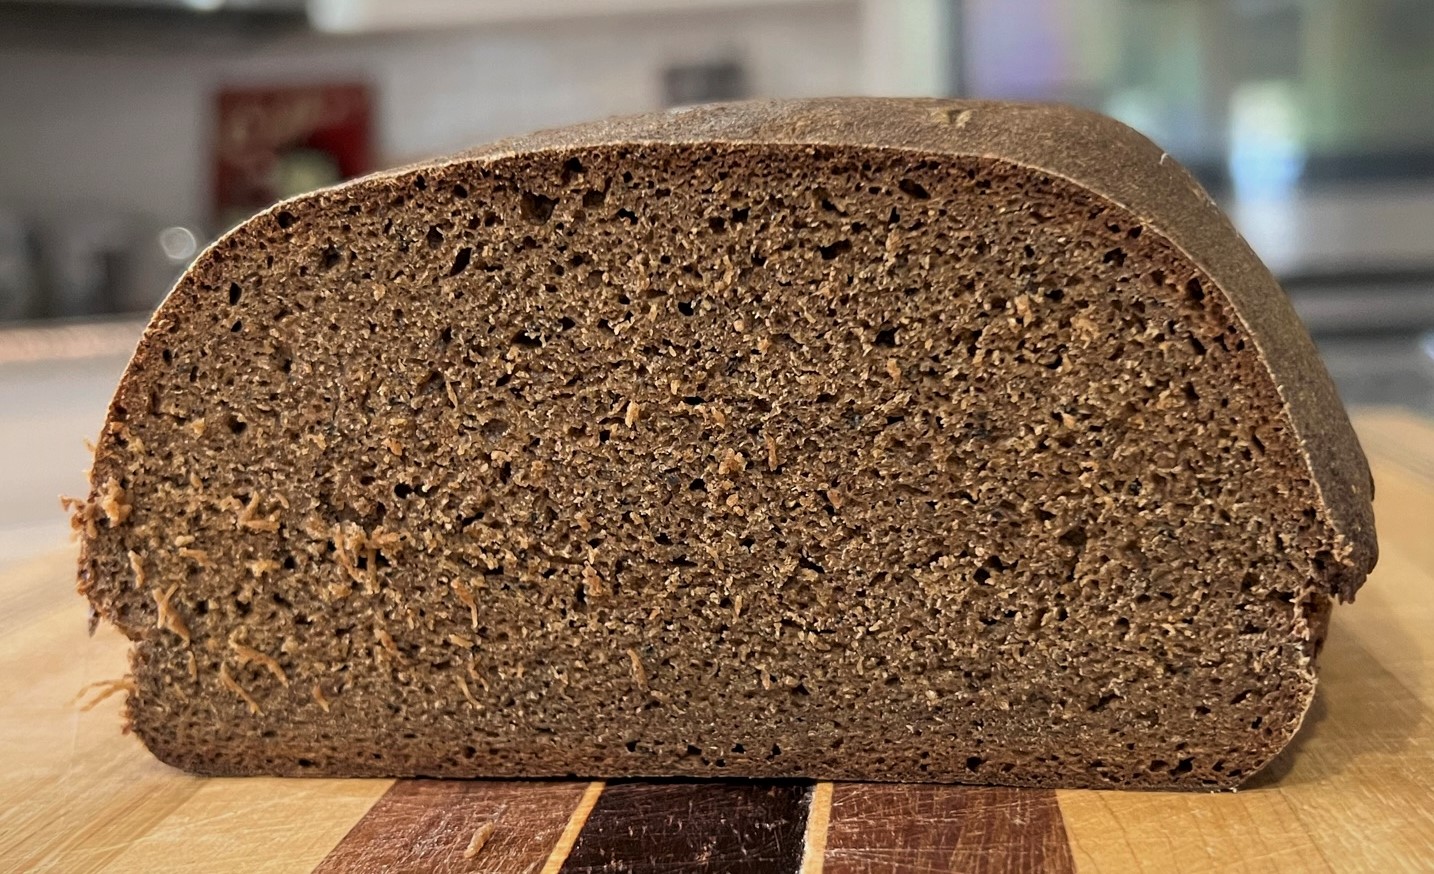
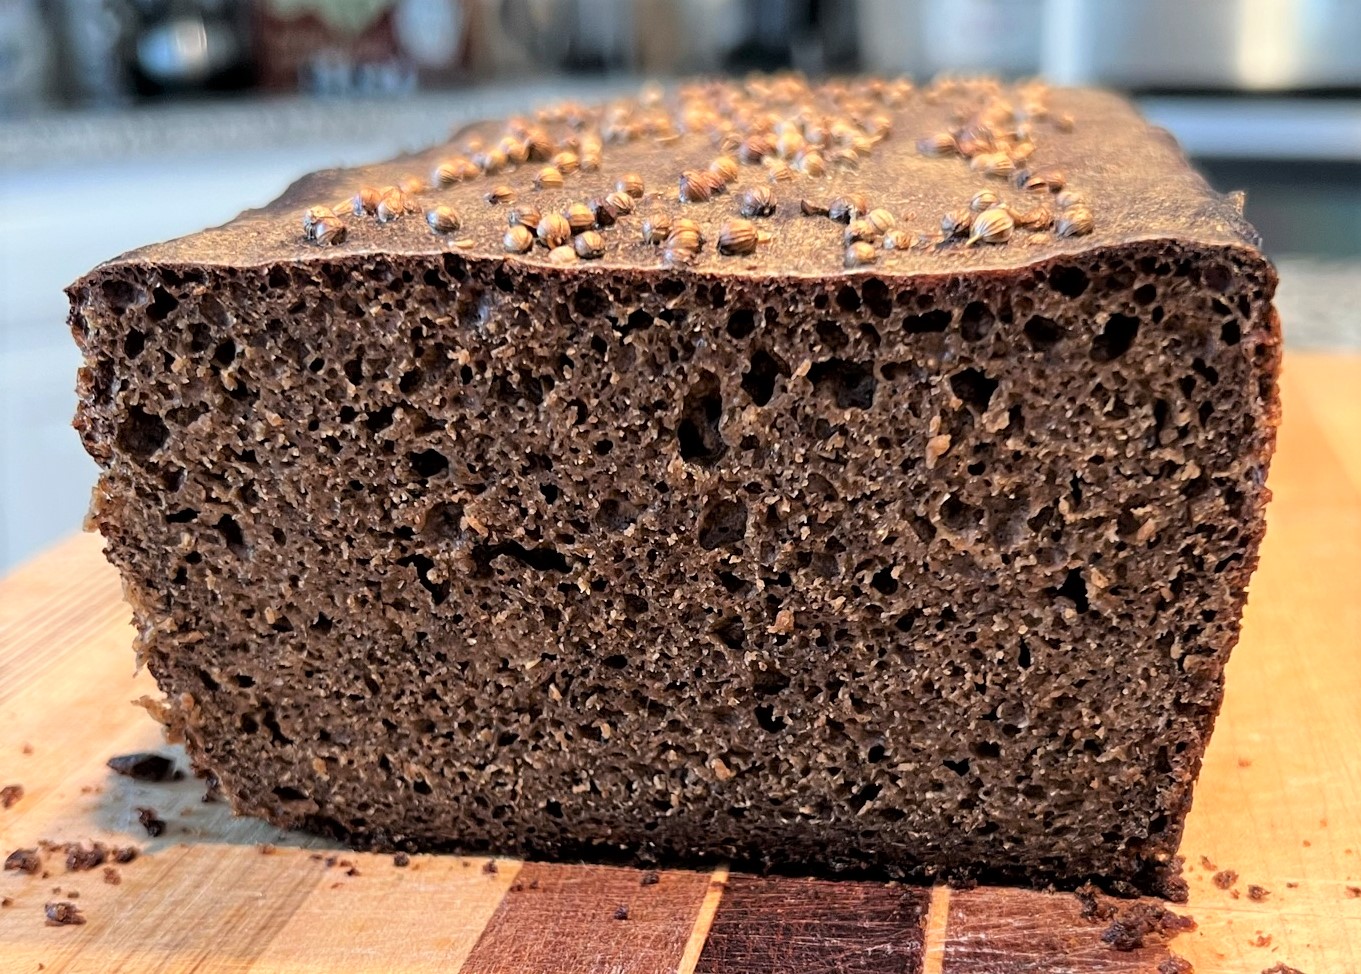
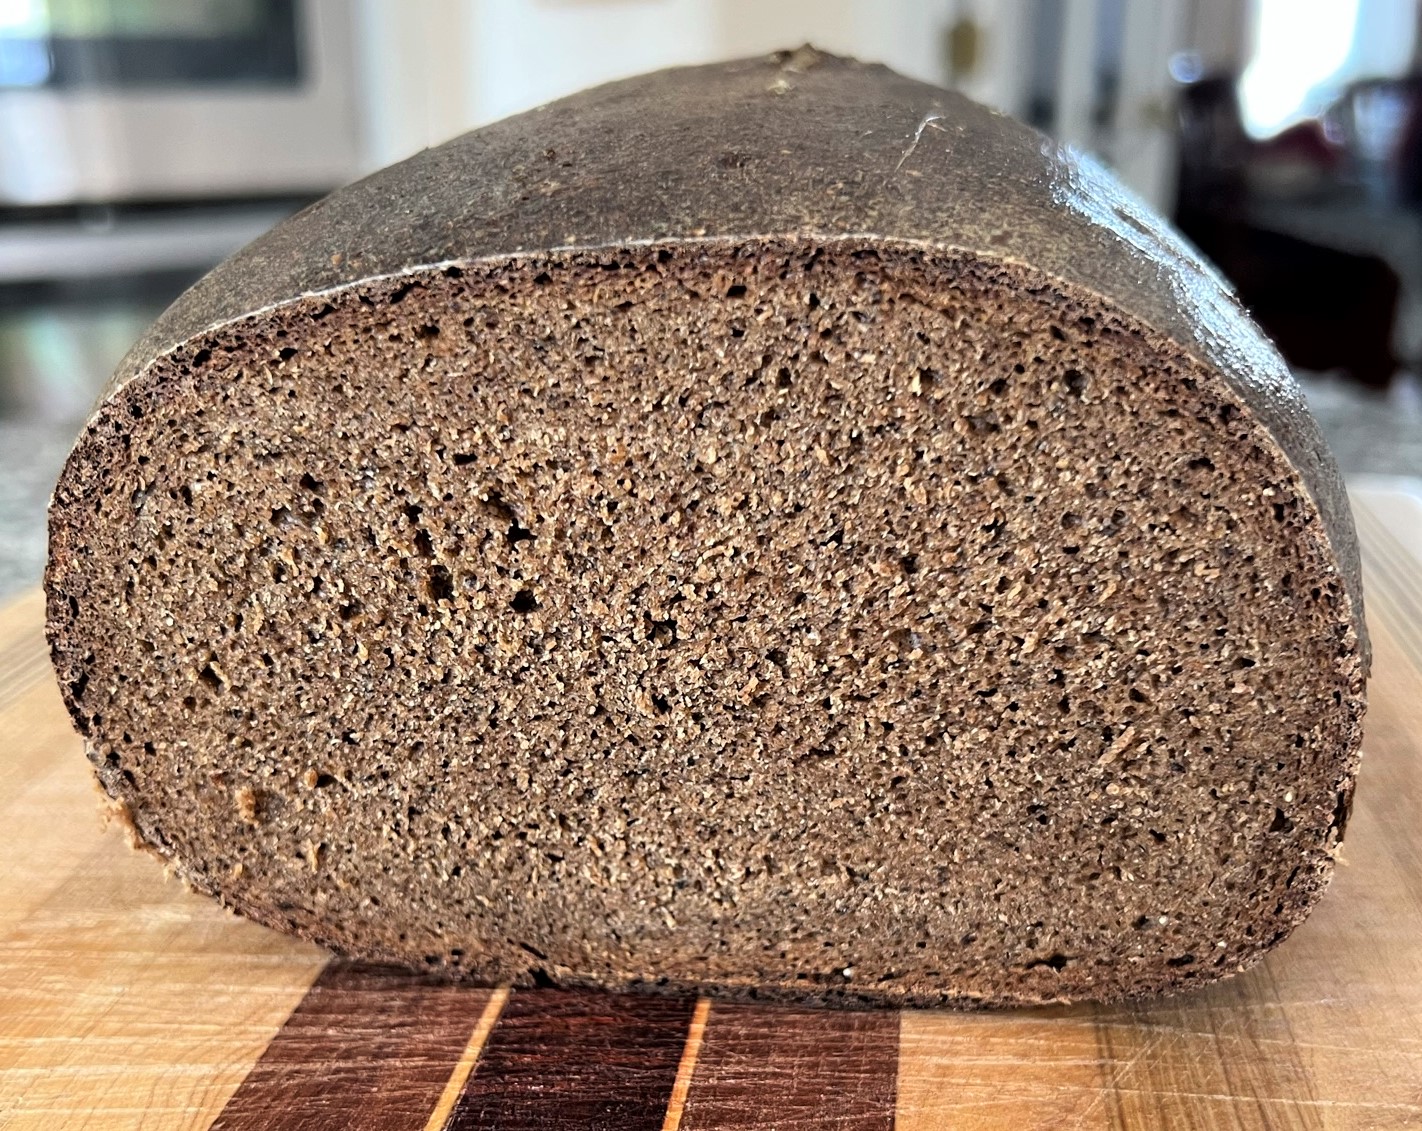
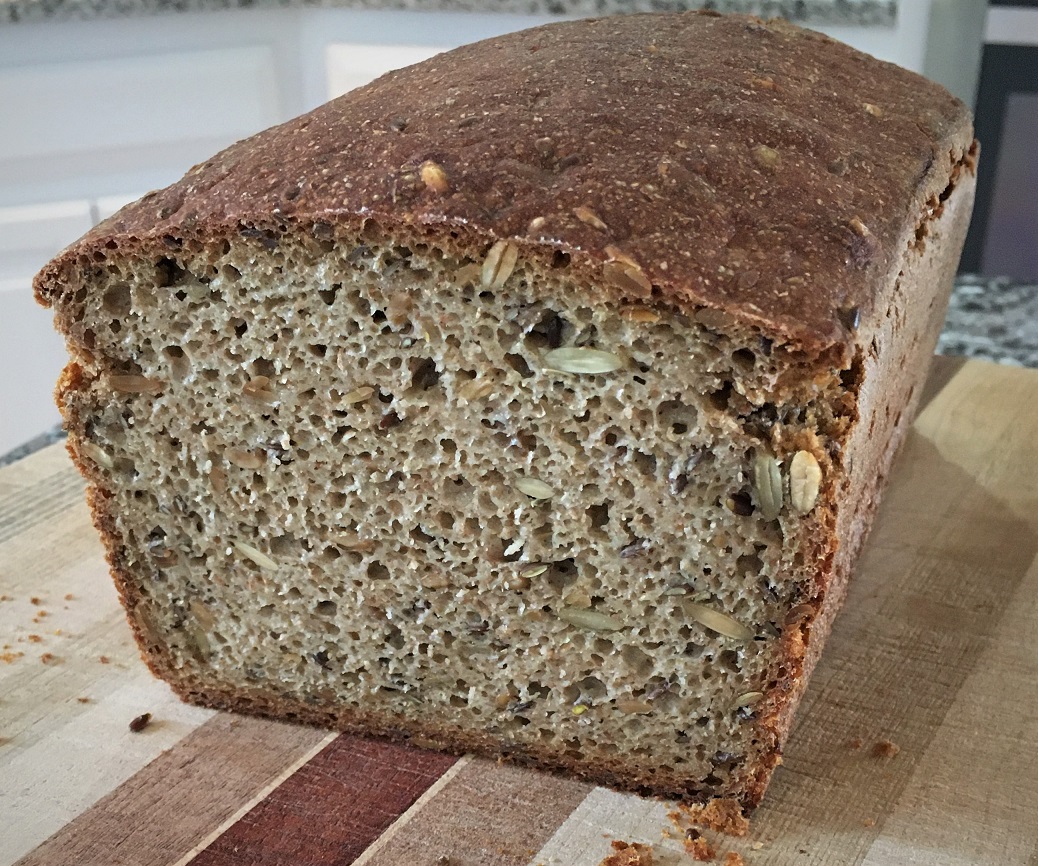
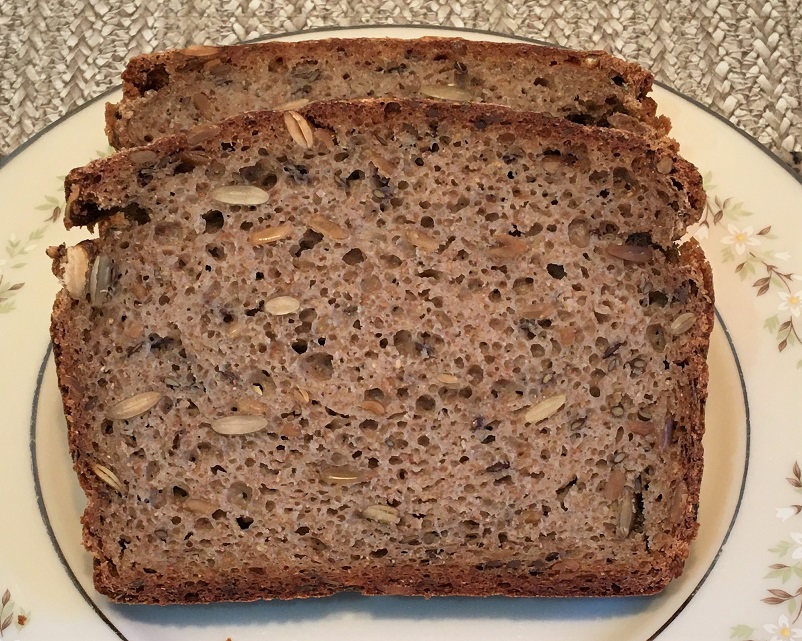
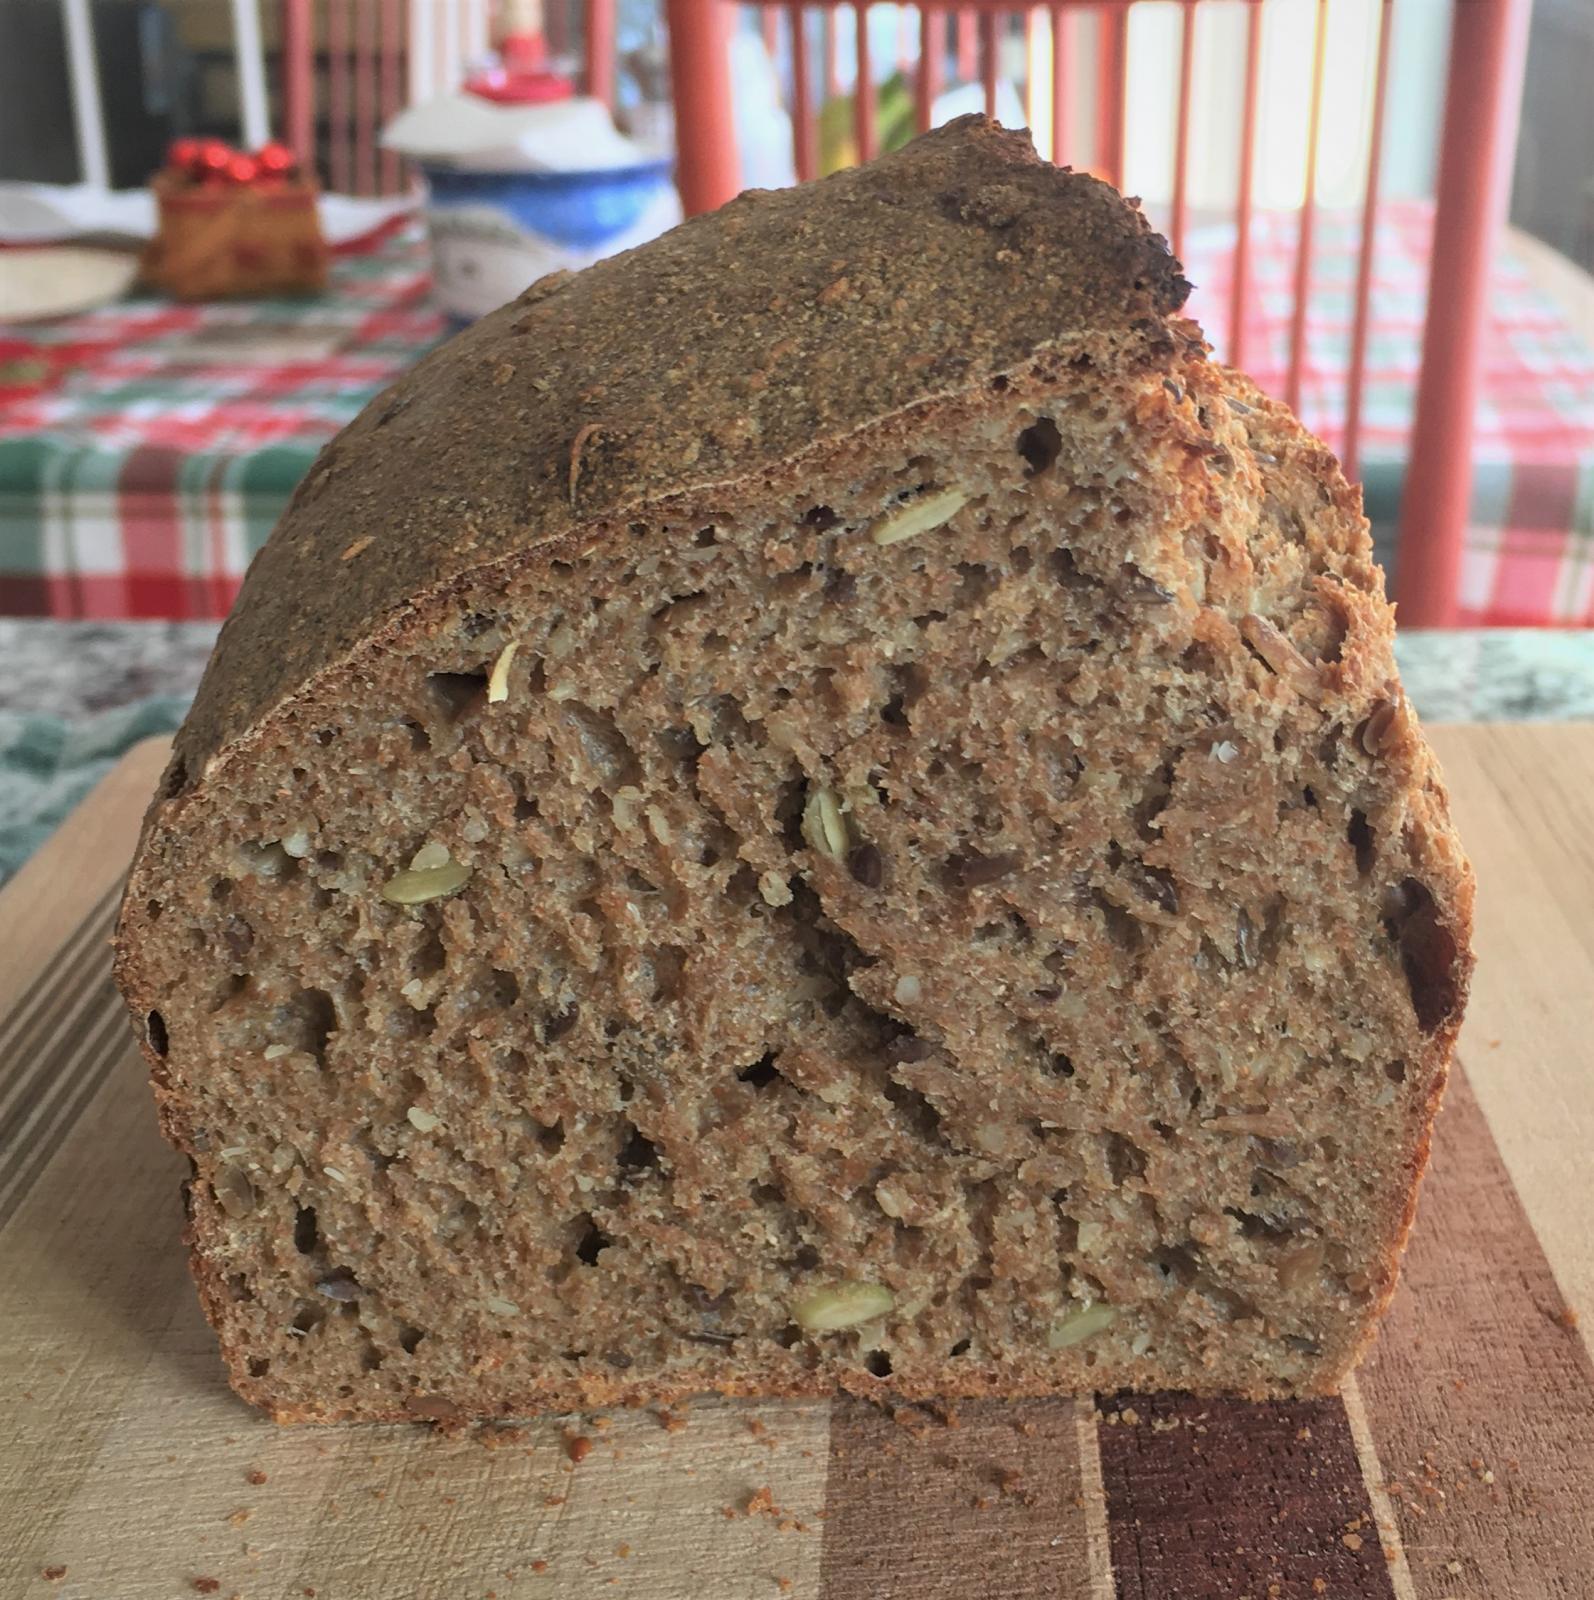
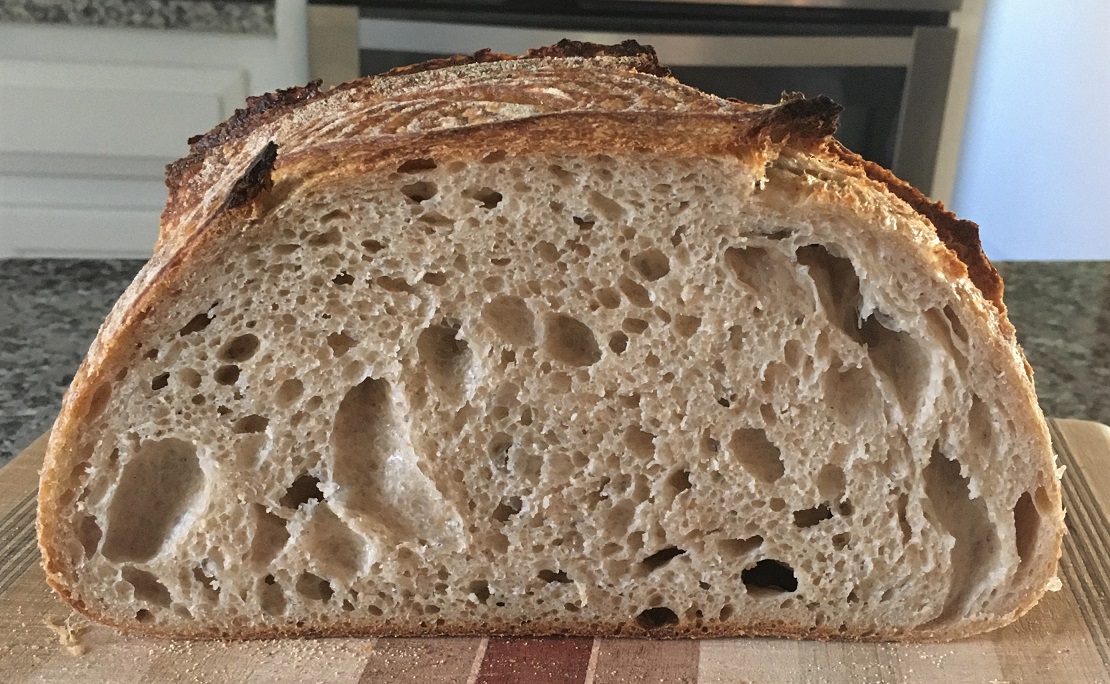
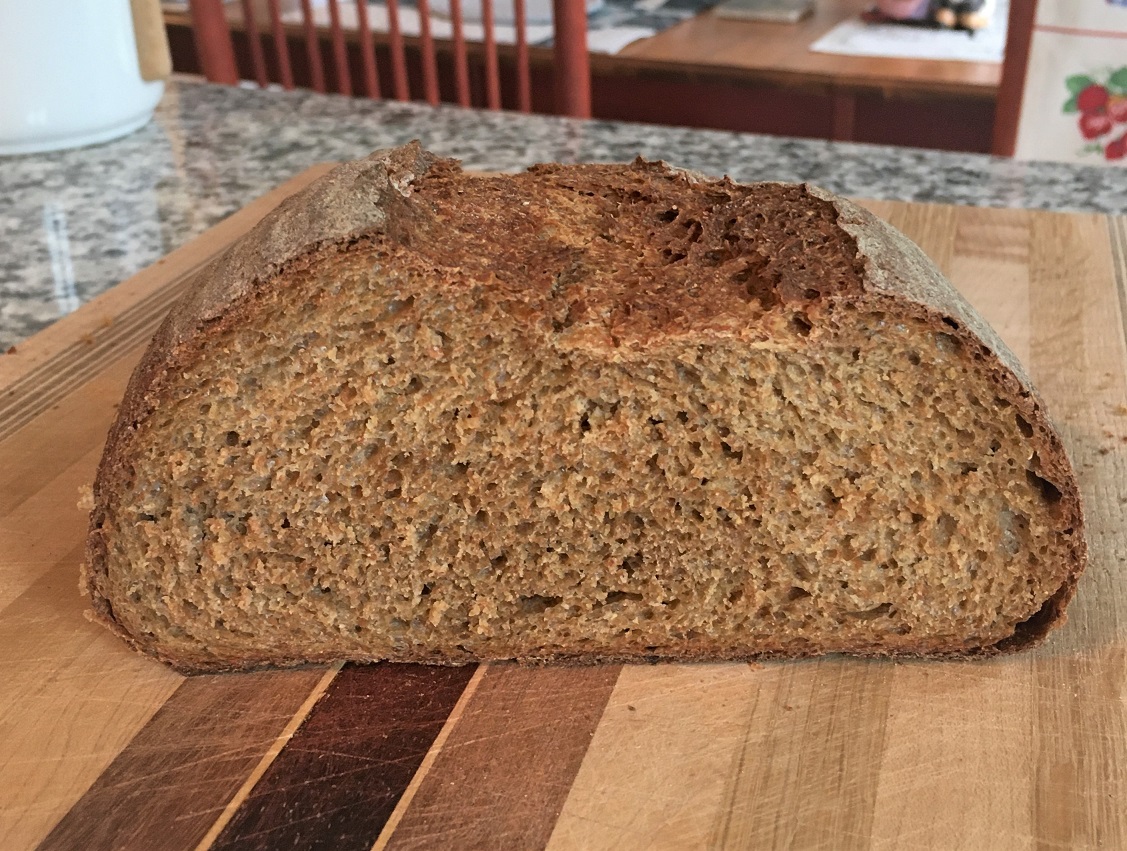
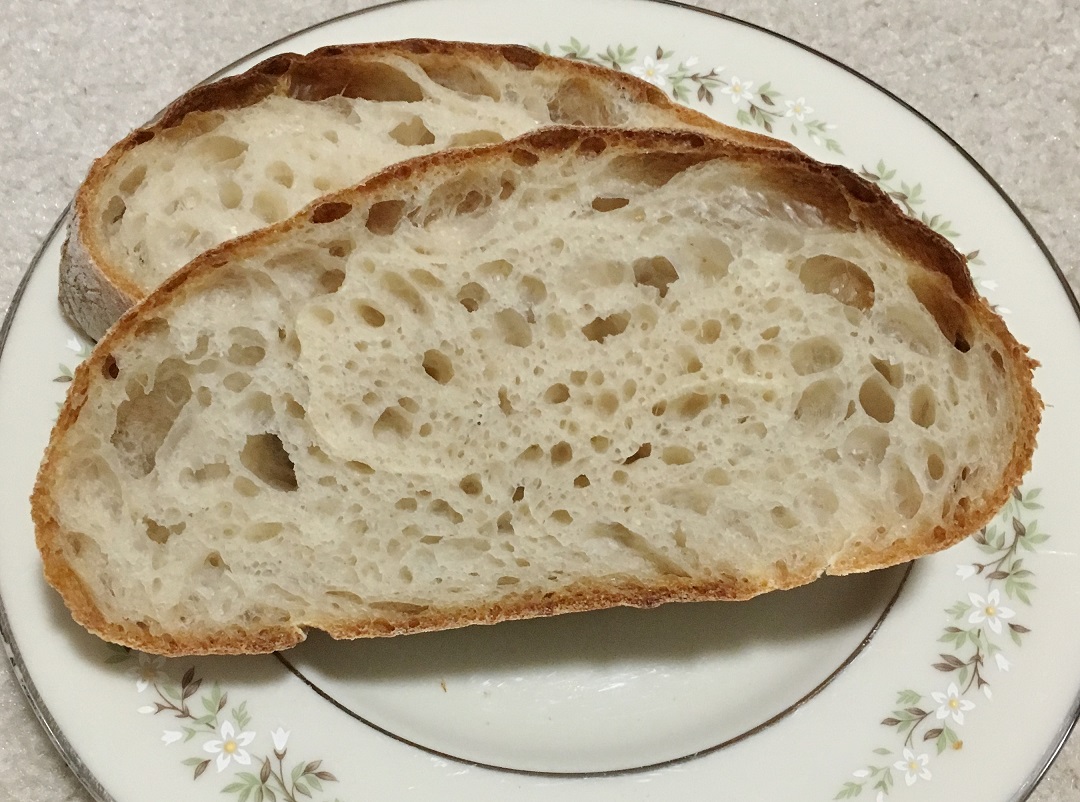
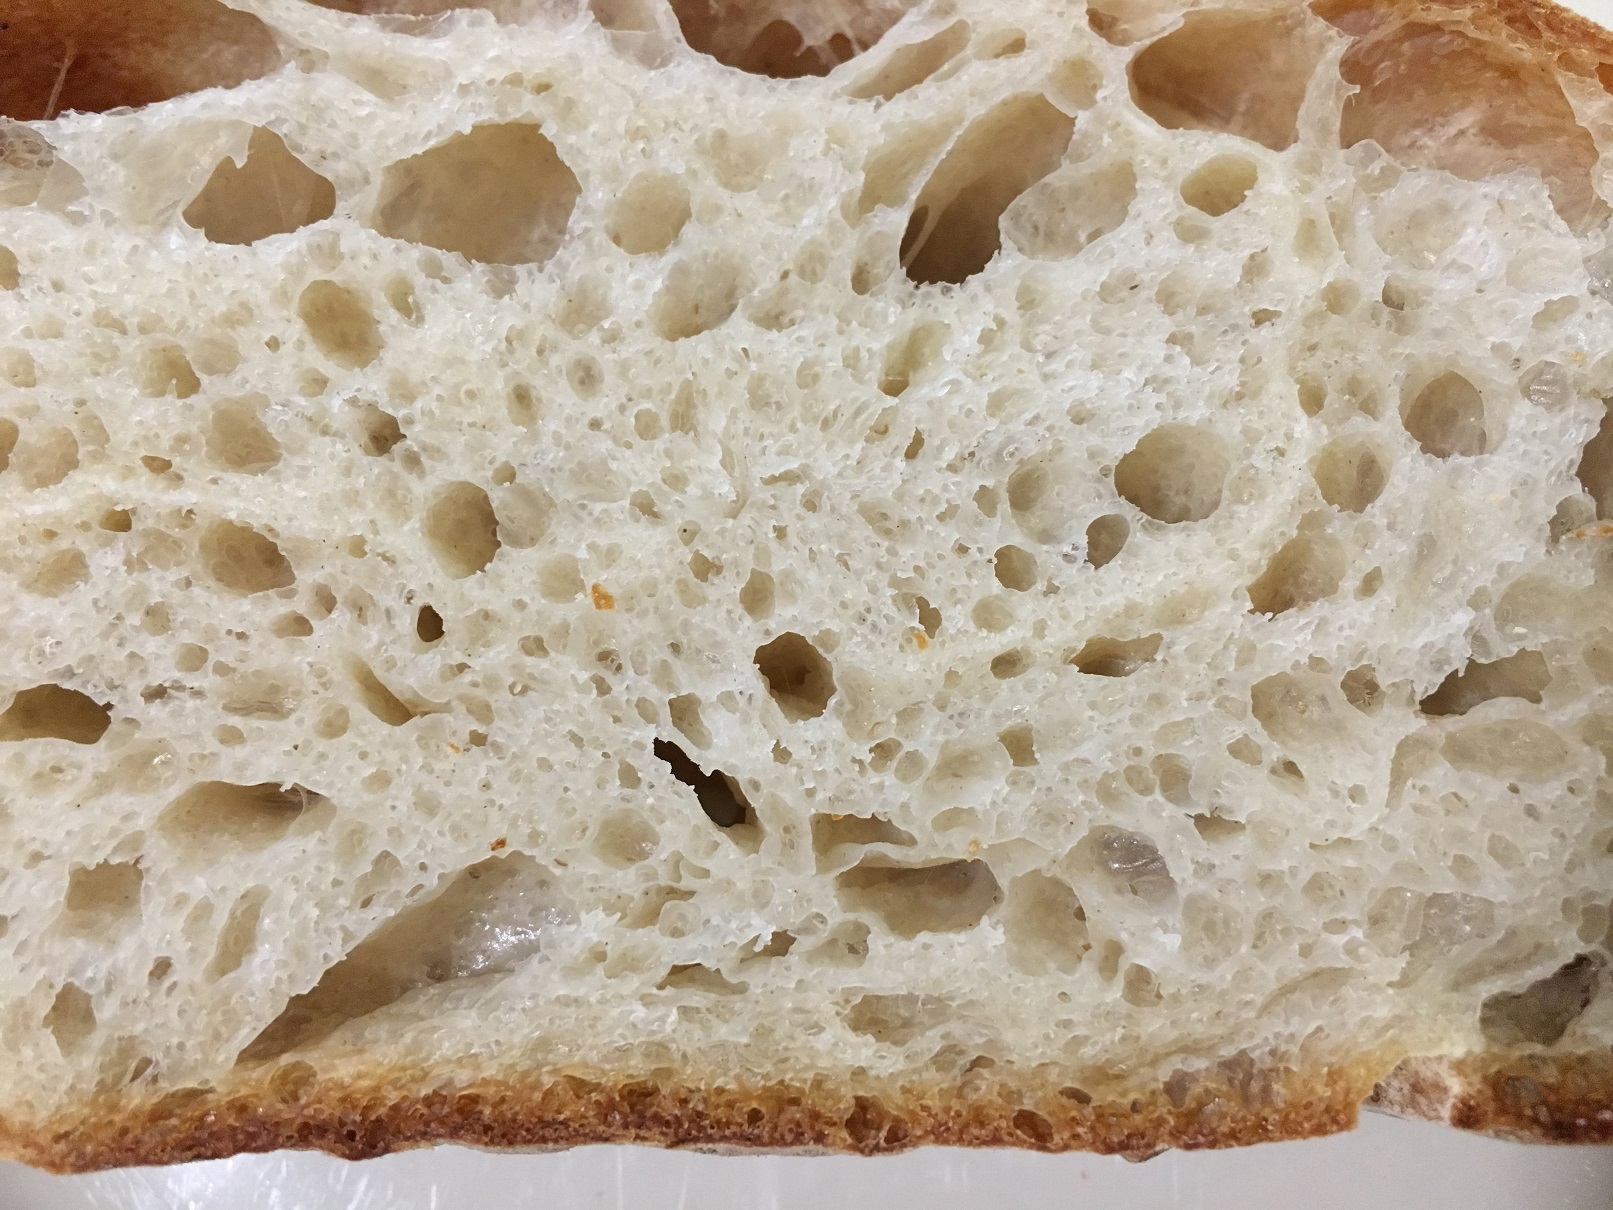
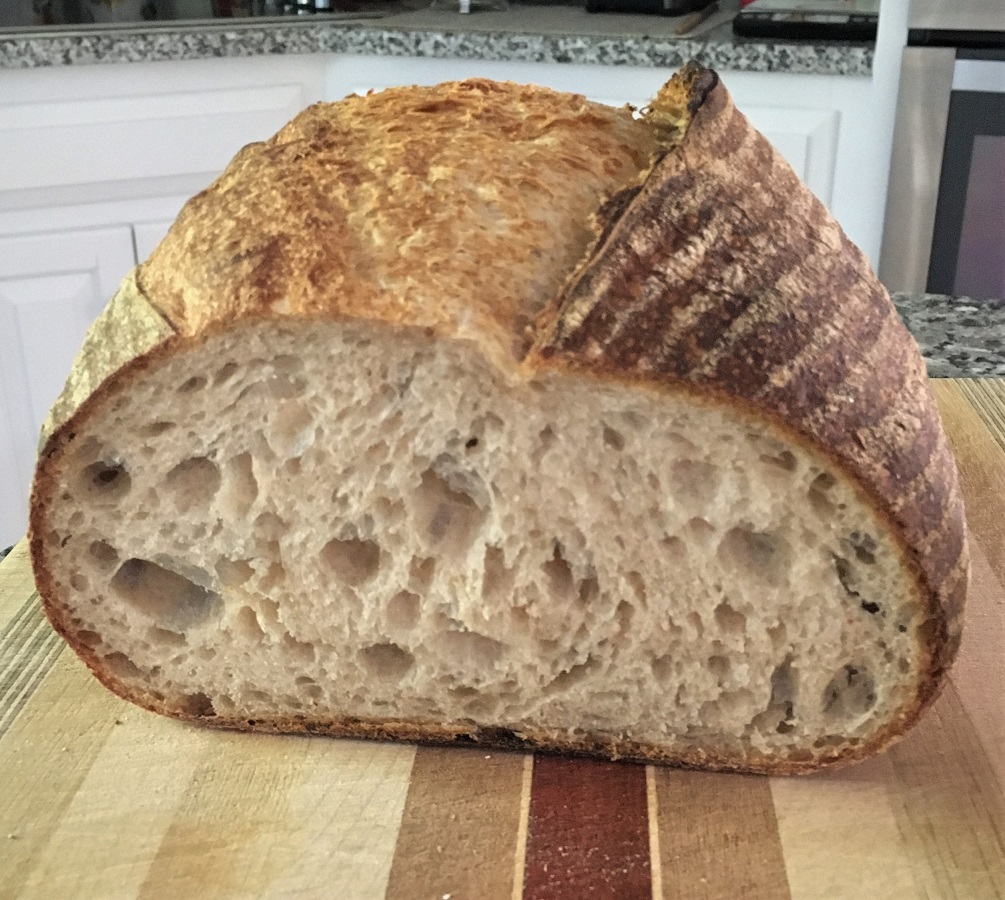
One of the loaves was a gift for a neighbor, but here is the crumb from the one we kept.

Thank you for reading this far, and I hope that you benefited from the details and photos.

WatertownNewbie's picture
WatertownNewbie

From the number of recent postings about sourdough starters, it appears that many have taken up bread baking.  This seemed a good opportunity to illustrate various steps during my preparation of Country Rye from the Tartine book.  I always benefit from seeing what something is supposed to look like, which is why I have included so many photos.

My starter is fed with a 50/50 blend of all-purpose and whole wheat flours (as described in Tartine, and I like the results, so I have stuck with this approach) and an equal amount of water in a 1:2:2 ratio.  For the levain I scaled the ingredients to 30 g of starter, 150 grams of the 50/50 blend, and 150 grams of water so that I would have 200 grams of levain available.  So little starter is needed, but it provides so much lift.

When all mixed together, the levain initially has much less volume than it does the following morning.  This composite photo shows the levain just after being mixed and then top and side views a little less than twelve hours later.

The Tartine method mixes the levain in the water before adding the flour.  Here is the levain going in and after being dissolved a bit in the water.

The flours are then added.  This bread is 83% bread flour and 17% whole rye.  The key at this stage is to get all of the flour wet, and a scraper helps to reach the dry flour at the bottom of my Cambro tub and distribute the water.

With no remaining dry flour, the mixture is ready for the autolyse stage.  I went for sixty minutes to give the gluten a chance to begin its formation.  This composite photo shows the dough mass at the beginning of the autolyse, at the end, and after the addition of the salt (20 g) and held-back water (50 g).

For this bake I decided to include some French Folds (aka slap-and-fold), but first I needed to mix the dough in the tub so that the salt could be distributed and the newly added water absorbed.  Finally I had a dough mass that could be worked on our granite counter top.  This photo shows the dough when first placed on the granite and then after the French Folds.  I did a set of 200 followed by a minute of letting the dough sit and then another 200.  The gluten development and strength of the dough were a pleasure to feel.  I always take the dough temperature at the end of the initial mixing so that I have an idea of what to expect for the bulk fermentation.

The recipe calls for four sets of stretch-and-folds (S&F) spaced thirty minutes apart.  This photo shows the dough just before the first and fourth of these sets, and the growth of the dough mass is evident.

Only two hours had passed by this point, however, and sourdough baking requires patience.  The Tartine book says to watch the dough and give it additional S&F as warranted.  To give this 80% hydration dough some added strength, I did three more until the dough had expanded sufficiently during the bulk fermentation and exhibited readiness to be divided (dough not spreading to the walls as quickly after an S&F, bubbles on the sides and bottom of the tub, a puffy feel from the gas being produced inside).  The entire bulk fermentation took about five-and-a-quarter hours in my 68 degree F kitchen.  This photo shows the dough about a half hour before it came out of the tub and then on the countertop ready for pre-shaping.

After pre-shaping I let the rounds sit for a twenty minute bench rest before the final shaping.  Then I shaped one into a boule and the other into a batard.  Into the bannetons they went.  This is a somewhat sticky dough, and I made sure to flour the bannetons with a mix of rice flour and whole wheat flour.  The bannetons were placed into plastic bags, which were clipped shut, and put into the refrigerator for overnight proofing.

This morning, after sixteen-and-a-half hours in the fridge, the dough had expended nicely.

I baked the boule in a Dutch oven and the batard on a baking stone.  The lid stayed on the Dutch oven for the first twenty minutes, and the total bake was 44 minutes.  I use two aluminum pie pans filled with lava rocks to steam the oven with the baking stone, and the total bake for the batard was 40 minutes.  Here are the loaves.

The batard was given to a friend, and this is the crumb from the boule.

Nice chewy crust and moist crumb with a definite but not overpowering rye flavor.  A really nice bread.

Hopefully some of you enjoyed going through the description and photos.  Happy baking -- and stay safe and healthy.

WatertownNewbie's picture
WatertownNewbie

This is such a fun bread to make, and in contrast to loaves that weigh a pound or two, this one weighed in at 1886 grams (~ 4.16 pounds).  It is from The Bread Baker's Apprentice (by Reinhart), and for those who have the book you will likely recognize the loaf as the one in the cover photo.

Made with half bread flour and half whole wheat, this bread has a great flavor, a somewhat tight but not dense crumb, and a superbly thin and tangy crust.  I enjoy this bread by itself or toasted with butter or jam.  I gave a friend a loaf a few weeks ago, and he said they were using it for French toast.  A truly versatile bread, and it will last several days.

If you are looking for a break from whatever your usual bread might be, consider this one.

Another view from an angle.

And the crumb.

Happy baking -- and stay healthy.

WatertownNewbie's picture
WatertownNewbie

After reading about this recipe, I decided to go for it, especially because I had never tried a 100% spelt loaf before and I like black treacle.  For the initial mixing I included sixty-five slap-and-folds because the dough felt reasonably strong, and that seemed to be fine.  Although I did try the letter fold technique for the first S&F, the dough stuck to my counter a lot, and I opted to leave the dough in my 6-quart Cambro tub for the second S&F and did the usual reach-under-and-lift-up.

The bulk fermentation took about an hour, but the final proofing accelerated, and I left the dough in bannetons for only 38 minutes (rather than the suggested 50 minutes from the recipe).  I shaped a boule for the Dutch oven and a batard for my baking stone.  The lid stayed on the Dutch oven for the first 20 minutes, and total time for that loaf was 39 minutes.  For the baking stone I opened the oven door after twelve minutes to vent steam and flipped the loaf around at the twenty minute mark.  Total time for the batard was 37 minutes.

The crust is crisp, and the crumb has a nice subtle but observable flavor supplied by the black treacle.  I suspect that this bread will toast very nicely too.  Scoring was difficult in that the dough is very soft and puffy, and the oven spring from spelt is not what you get from bread flour or all-purpose, but this was a fun bread to make.  In addition, because this bread uses only instant yeast and no preferment, I started at 9:00 am and removed the loaves slightly before 2:00 pm.

Here are the two loaves (photos spliced).

Here is the crumb from the batard.

WatertownNewbie's picture
WatertownNewbie

A few months after Alan (aka alfanso) posted his bake of the Scott McGee ciabatta, I finally got around to baking the bread.  The result was pleasing, with one loaf consumed at home by my wife and me and the other given away to a neighbor.

I used my KitchenAid Artisan mixer and followed Alan's directions for speed levels, but I have never done French Folds and decided not to make this my first venture into that technique.  Instead, I worked the shaggy dough in the mixing bowl by some hearty hand pulling (think of what Trevor J. Wilson does in his mixing bowls) and observed some nice gluten development already.  The bassinage was interesting.  I opted to combine the water, olive oil, and salt in a Pyrex measuring cup for easy pouring.  The shaggy dough was a little stiff, but when I added a bit of the mixture and the dough loosened, the speed of the mixer let me know to wait until that dose was absorbed.  I repeated that a few times, gradually incorporating the bassinage elements until upping the mixer speed to 6 and then 8.

The dough did not climb the hook very much, and I found that the pauses for scraping down the sides of the bowl seemed to give the dough a chance to recover.  By the end, with the dough slapping around on the 8 speed, the smooth and shiny texture I had been hoping to see was present.  As Alan predicted, the mixer generates some heat in the dough, and my final dough temperature was 83dF.  My water temperatures were 71dF for the initial mix and 65dF for the bassinage, but clearly these could be lowered.  On the other hand, aside from a slightly faster bulk fermentation and final proofing, I do not think that the 83dF made much of a difference from what something like 77dF might have produced.

This is an amazingly billowy dough, but with a lot of strength.  I chose to shape the dough by first dividing the mass into two portions and then flattening each portion into a rectangle and doing a letter fold on each before placing them onto a couche for proofing.  They puffed a bit, but when placed into the oven, they ballooned.

I use lava stones in pie pans for steaming, but I also spray ciabatta before it goes into the oven.  After thirteen minutes I opened the oven door and allowed the steam to escape.  Thereafter I kept an eye on the loaves, which started to darken.  A check of the internal temperatures showed 209dF after another dozen minutes, and ultimately I removed the loaves after a total of thirty-two minutes of baking.

Here are the loaves on the cooling rack.

The crumb has a very pillow-like softness with an assortment of large, small, and medium holes.  The crust is nice and chewy (for me an important characteristic of ciabatta).

These loaves became a deeper darker brown than any other ciabatta that I have baked, and for me that was a big plus.  It is likely that I could leave the loaves in longer the next time and see how dark they can be.  There was no burning on the bottom.

This is a fun recipe, and the dough has a feel of its own.  Thanks to Alan for posting his bake and giving me another option for ciabatta.

Happy Baking.

Ted

Pages

Subscribe to RSS - WatertownNewbie's blog