One of the posts that motivated me to join this group early this year was this one by troglodyte, Sourdough Bread for Bread Machines with Programmable Cycles
It wasn't so much the recipe, it was the principles/priorities by which (s)he arrived at it. Specifically, "This is a recipe of convenience... The benefit is consistent, tasty bread with a minimum of effort and time. It is sized to be suitable for a toaster or sandwiches." Very practical. What I call "daily bread". While I am experimenting and learning new techniques, I want something like this available every day.
Being "daily bread", it will most often get toasted and buttered, go well with soups and salads, and be a good receptacle for jams and the like. So this will be a pan loaf.
I have a couple more requirements. My metabolism and digestive system constantly remind me, they definitely prefer breads that are high in fiber. The more, the better. It also happens that my taste buds have always liked high-fiber grain products. I have pleasant memories of consuming massive quantities of Wheaties for breakfast as a child, with its unmistakable wheat-bran flavor. Our local coop sells bulk organic wheat bran for very reasonable $$$, so high bran content is on the priority list.
Another requirement is flexibility. I want something that can be prepared with equally-good results either in a competent bread machine, or made by hand and oven-baked.
I started with a recipe called "Double Bran" found in the Panasonic SD200 breadmaker manual. It's a pretty pedestrian recipe, with about 3/4 cup of wheat bran added to a 60/40 mix of whole-wheat and all-purpose flour for a 1.5 lb. loaf. It also had additives to make it "soft" which I'd rather not use.
This was a good starting point, with enough bran to appreciate it's contribution to taste and texture. It raised the question: How far can I take the bran content? How much of the total flour amount can be bran? The Max Bran project was underway.
Wheat bran is lightweight stuff, about 48 grams per cup by my measurement... about 1/3 the weight of wheat flours. So, despite the "Double Bran" moniker, adding 3/4 cup of it to over 3 cups of flour is quite minimal.
Over the following months, I gradually added bran while removing and rebalancing the flour and other ingredients. The dry milk and sugar were eliminated. I was experimenting with DIY "dough improver" (a small amount of gluten flour and Vit C powder) at the time, and I have continued to use it with this recipe, but it is optional. I started autolysing the flours, and then the bran as well, both of which significantly improved the flavor. This required a reduction in kneading time and an increase in mixing time to incorporate ingredients into the autolysed dough.
As of this writing I have made this bread 19 times, using 6 different bread machines, two different mixers and three different ovens. Although the oven-baked versions are slightly preferred, bread machines that mix ingredients well and bake at reasonable temperatures will produce excellent results.
Here are the recipes for roughly 1 and 1.5 pound loaves.
Autolyse: 1 lb 1.5 lb
------ --------
All-Purp Flour 165g 200g
Whole wheat Flour 83g 100g
Wheat Bran 83g 100g
Bread Improver (opt) 1/4 tsp 1/3 tsp
Water 225mL 280mL
Additions:
Salt 3/4 tsp 1 tsp
Sunflower Oil 3/4 tbsp 1 tbsp
SAF instant yeast 3/4 tsp 1 tsp (adjust for altitude)
Water 20mL 20mL (ditto)
Manual Process:
Combine the dry autolyse ingredients. Add the water and mix for an even distribution.
Form a ball, cover, and let sit for 30 min.
Tear the dough ball into 8-10 chunks to assist mixing. Add the remaining ingredients and mix until well combined.
Knead for 5-7 minutes.
Cover and let rise at 79-85ºF 1.5 hours or until doubled.
Degass and shape into loaf pan. I used an 8.5" Calphalon pan for 1.5 lb.
Cover and proof for 50-60 min at 79-85ºF.
Bake at 375ºF for 45 min or until interior measures 200ºF.
For electric ovens with dominant top elements, cover loaf top with a foil tent after it has browned as desired.
Bread machines:
Bread machines that have programs easily adaptable to incorporating an autolyse cycle are in the minority. The ones that do will typically refer to a so-called "Rest" period near the start of the cycle. Units like the old Panasonic SD-BT65P (1.5 lb.) and SD-BT56P (1 lb.) have near-perfect programs for autolysing. They also bake at 340ºF in heavy cast breadpans, and they are my favorite choice for this bread.
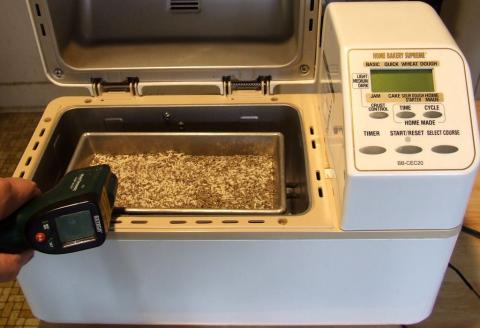
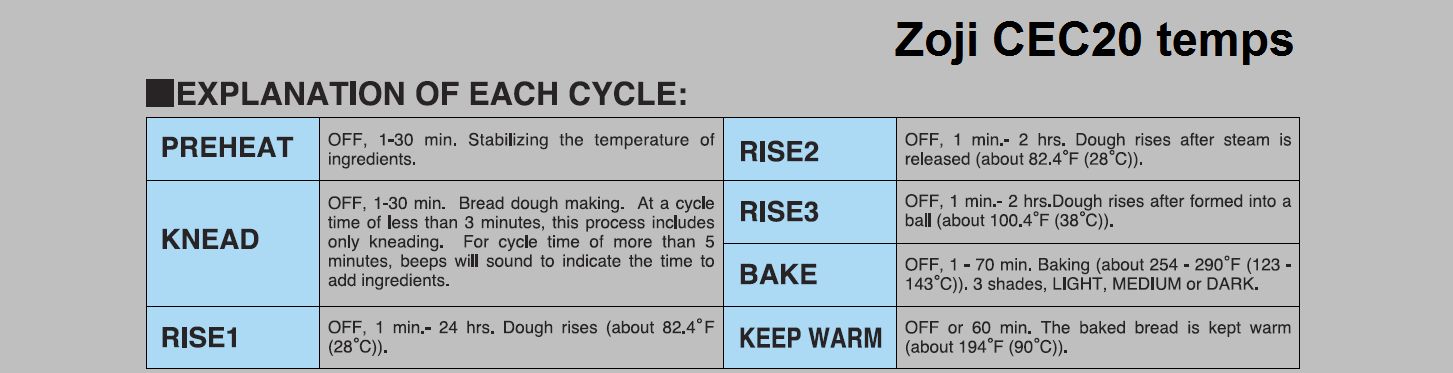
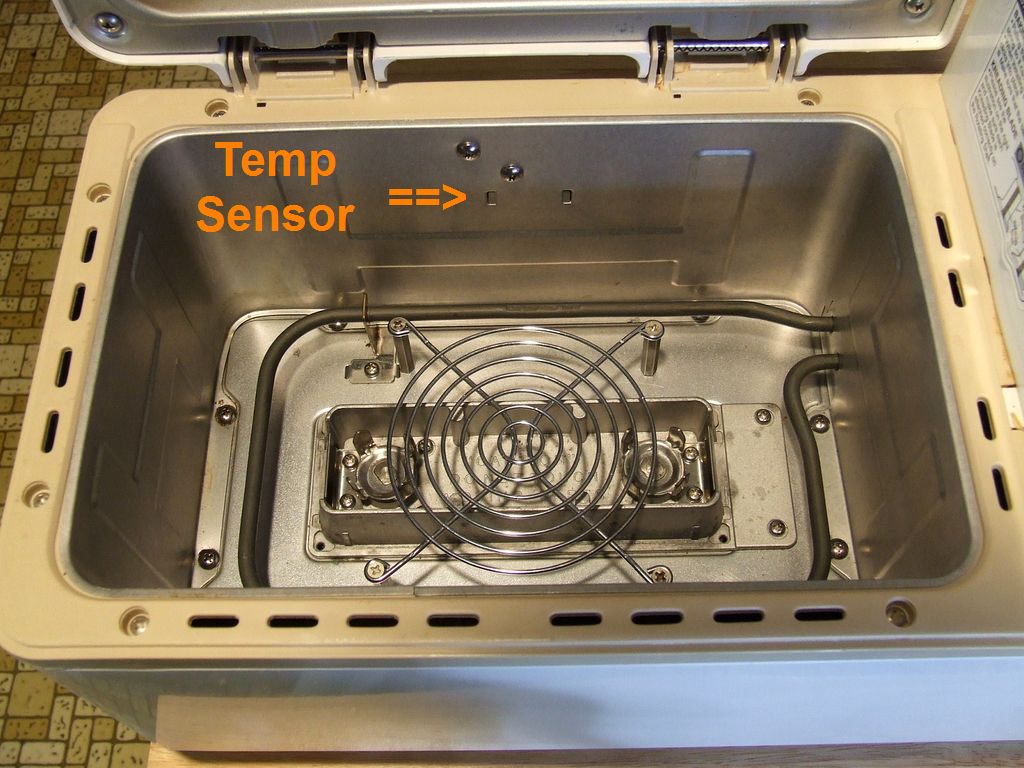
For programmable machines, you can create a custom program with 5 min mix, 30 min rest, 7-10 min knead, 90 min rise, short stir/degass, 55 min rise, and 45-60 min bake. The bake length depends on the baking temperature of the machine, and the loaf size; longer time for larger loaf and/or lower temps. The Zojirushi dual paddle models and the old Breadman TR2200C are both versatile programmable machines, but their baking temps are on the low side (292ºF and 312ºF, respectively).
For most machines, you'll have to improvise autolyse using their Dough and Bake programs. Use the times given above a guide.
Mix the autolyse in Dough mode, and stop the machine when combining is done.
Let it sit for 30 minutes.
Add the other ingredients and start the Dough program again for the 2nd mix and kneading.
If the knead cycle is too long (most machines knead way too long for autolysed dough), shorten it by lifting the pan enough to disengage the paddle, let it sit that way for the remainder of the knead, then replace in on the spindle for the rest of the dough cycle.
Remove the dough and mixing paddle, degass as you prefer to, shape the dough back into the pan, proof until ready, and bake.
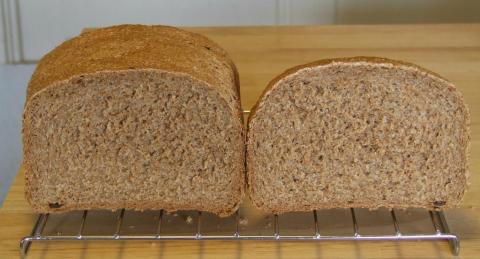
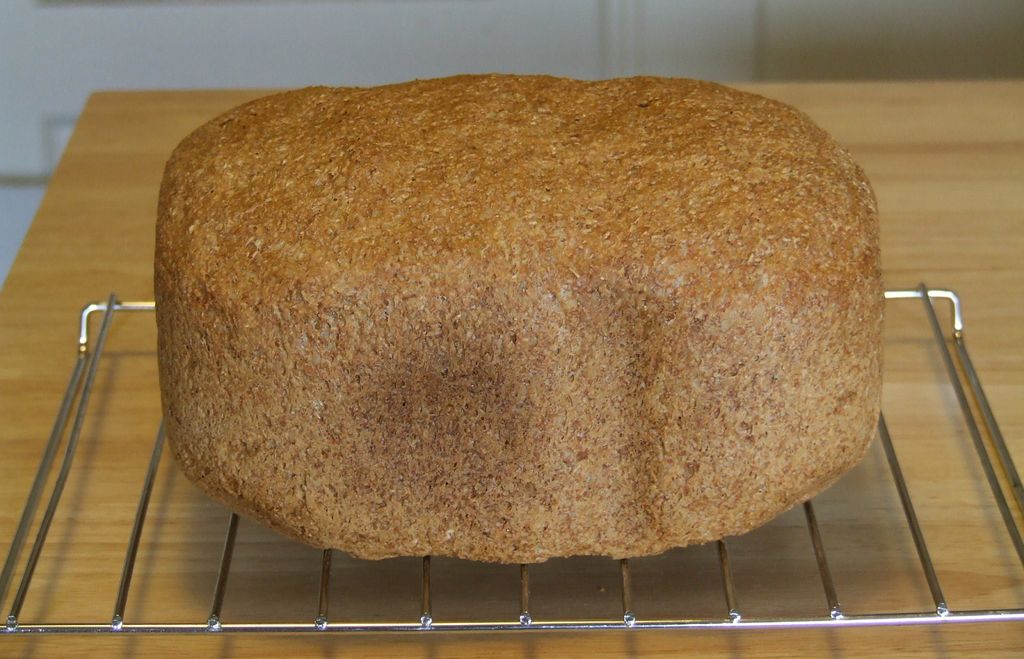
My favorite machines for this method are the T-fal PF311E51 aka 'ActiBread' and Cuisinart CBK200. They both bake at 388ºF, a very nice temp for this and other breads, and appreciably hotter than most machines. The attached pics are from a T-fal PF311 bake. Note the consistent browning over the entire loaf. Not many BM's can do that. (The Panasonics and T-fals do it best.)
Altitude Adjustments:
I live and bake high and dry at 7,000 feet, so if you're at or near sea level, chances are this recipe will create bran bricks. You will definitely need to increase yeast amount by 50% or more. Even more if using active dry yeast. You may not need to add any water in the second mix. And you might lower oven baking temps just a little. Water boils at 198ºF up here so I typically raise the baking temp to compensate.
If desired, bits of dried fruit, nuts, seeds, or a little honey can be added during the knead. I added diced dried apricot bits a couple weeks ago and liked it a lot. But I mostly make it plain.
This has become one of my favorite breads... my "daily bread" with strong wheaty taste. I hope you enjoy it too.