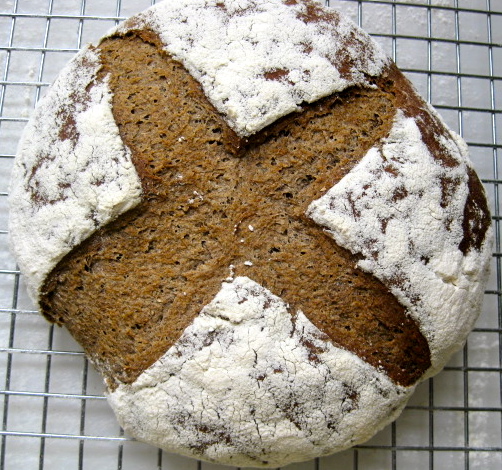
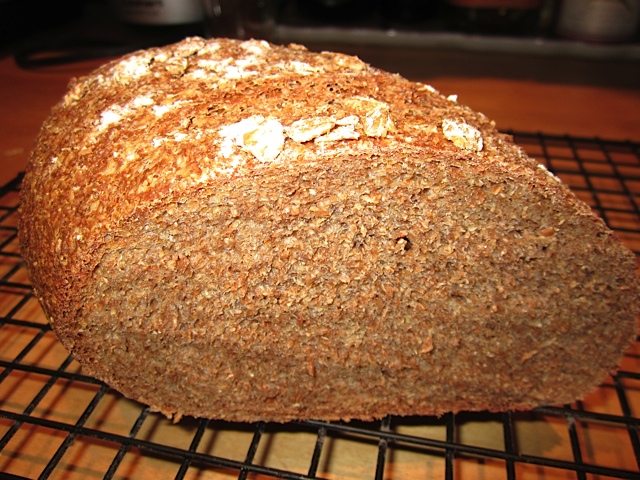
The Fresh Loaf

A Community of Amateur Bakers and Artisan Bread Enthusiasts.

hanseata's blog

hanseata's picture
hanseata


Hazel

Little Nut

In 2008 I stuck some fresh hazelnuts in the ground at different places in our yard. I also gave some to our friend Tamara for her gorgeous garden. In spring 2009 I checked for weeks the planting sites, but nothing showed, only some more weeds.

I don't bother too much about those, and when my husband complains about our untidy lawn, I say: "Green is green!" This motto was already an annoyance to my neighbors when I was living in Germany. My eco-friendly garden was a fertile breeding ground for dandelion and burning nettle seeds, and other horticultural threats that law abiding, Round-Up toting garden owners abhor.

Last year I looked at some puny rhubarbs planted many years ago along the fence before cedars and maples blocked the sun. I noticed a seedling with round, serrated leaves that seemed familiar. After almost two years a hazelnut had sprouted! Though I scanned every centimeter of our yard for more, it was the only one. But Tamara gave me another nut-ling, she got several of them.

My two little hazelnuts cheerfully grew more leaves, while I watched them like a hawk, knowing my Richard's merciless efficiency with the lawnmower. They survived last winter, buried by tons of snow, and outgrew their yogurt container collars (protection from certain people to who believe that nature should be "beaten into submission").

With some luck, and if some people - I name no names - keep their greedy weed whackers off them, "Hazel" and "Little Nut" will grow into nice, big bushes, providing us with an abundance of delicious nuts. Unless our fat squirrels eat them first!

And this is it why I need hazelnuts:

The photo shows a pecan version of the delicious Hazelnut Mini Bread. Both recipes you find here:

http://www.thefreshloaf.com/node/23952/karin039s-pecan-mini-breads


hanseata's picture
hanseata

After realizing that we preferred tangy sourdough breads to milder fruit yeast loaves, I banned my apple yeast water into the no-see area of my refrigerator - the place where stuff goes that is hardly ever used. Bad conscience made me feed it together with my other two starters before I went on my trip to Germany, but after I came back I forgot all about it.

Leafing through Jan Hedh's "Swedish Breads And Pastries" again, I felt enticed by his "Pain au Levain with Bran and Vinegar" and rummaged in the fridge for the sorely neglected apple yeast water. Halfways expecting it had perished due to starvation, I opened the lid of the recycled sour cream container. It smelled still sweetish sour, but had some suspicious little white specks floating on the surface.

I poured most of the fruit water into the sink, retaining only the "sludge" on the bottom. From this I took a spoonful to build up my levain, wondering whether it was still alive. Amazingly, it was. It fermented through all 3 steps as it should, it took only longer, so I left it overnight on the counter (NOTE to all other abusive fruit yeast parents: your offspring is way more resilient than you think!).

Adding the other dough ingredients to my lively fruit yeast levain, I realized what an enormous amount of bran was to go into the breads, about 48% (= 250 g bran per 518 g flour for 2 loaves). But it was the first time I was going to make this bread, so I obediently followed the recipe.

From my former experiences with Jan Hedh's recipes I knew better than to stare at the kitchen timer, but let the dough and the shaped loaves proof at their own good time. With former fruit yeast breads I had been too impatient to wait that long - and they had grown "horns" and done other weird things in the oven (see my blog).

I also knew that the baking times in the recipes were often much longer than the breads actually needed in my oven. So when my loaves went into the oven I kept an eye on them. They had some oven spring, and didn't act out like their older siblings, but it was obvious that they would not turn out quite like the loaf shown on the picture in the book:

Jan Hedh's Pain au levain with bran and vinegar - as it is supposed to look like (in the book): light and airy, with some little brown specks.

My bread was anything else: brown and dense - it suffered from a severe case of bran-o-mania!

This could not just be one stupid German baker's screw-up - I wonder whether there was a zero too many in the recipe: 25 g bran instead of 250 g?

What it did have, to my surprise, was a really good taste: slightly sweetish (no sweetener added). Much different from an almost whole wheat loaf - what it basically was.

hanseata's picture
hanseata

Much as I enjoy my Kindle for reading novels - e-cookbooks really suck!

My favorite baking books are full of scribbled exclamations, observations and suggestions. But try to enter notes in an e-book - and then IDENTIFY them again in their separate storage space on the e-reader - nothing is more cumbersome and annoying.

Therefore my only e-cookbook is Nils Schöner’s: “Brot - Bread Notes From a Floury German Kitchen” (written in English). First I got the free online version, but after I realized how much experience and work went into this compilation of recipes, I decided to give Schöner his due, and pay for the Kindle edition - a print version doesn’t exist.

Working with e-recipes is easy as long as you follow the recipe to the t, but if you want to change something, you have to write your notes on a piece of paper, and copy the recipe plus alterations and comments in your recipe program (or write them in a notebook) for later use.

Schöner didn’t make the task of navigating his book any easier by forgetting to add a table of contents to his book - but you can find it at Amazon with the book listing, and print it out.

His recipes are not “Bread Baking for Dummies”, either, and the procedure is often not described in great detail. So I adapted his recipes to my preferred method, introducing a soaker and overnight fermentation. I also found that baking it with slightly different temperatures resulted in a better crust.

KORNTALER - a hearty loaf with flax seeds, millet and, interestingly, dried, toasted soybeans.Link to the recipe:http://www.thefreshloaf.com/node/23538/korntaler-crunchy-bread-quotfloury-german-kitchenquot

hanseata's picture
hanseata


With St. Patrick's Day approaching I was asked whether I could bake some Irish Soda Breads for A & B Naturals, the store that sells my breads. Never having successfully baked one before - my first trial at King Arthur's "Whole Grain Soda Bread" ending in a brittle brick - I said, of course: "YES!"
"Yes" usually means that I know where to find a recipe, and, indeed, I remembered having seen one in "Cook's Illustrated". I studied the write-up for Irish Soda Bread to find out what had gone wrong with my prior misbegotten trial.
Mixing Irish Soda Bread has nothing in common with making regular breads. Apart from the right kind of flour - Irish white flour is quite low in protein, it has less gluten than American all-purpose flour - it doesn't require yeast but is leavened with baking soda.
Clueless about the true nature of this Irish tradition, I had given my King Arthur bread the usual treatment, kneading the heck out of it, adding more and more flour because it seemed too wet, and then cursing helplessly because, in spite of all my efforts, it strongly resisted being folded and shaped. What finally came out of the oven was a grainy, unappetizing brick that would have surely gone to the dogs if Buffy had already been with us.
Fortunately America's Test Kitchen never fails to take the scary out of cooking. Reading their introduction I understood that, with my uncouth handling, I had debilitated my hapless first trial bread. To achieve Soda Bread perfection the dough had to be mixed like muffin batter, barely allowing the ingredients to come together, before turning it out onto the counter and gently patting it into a round.
Enthusiastically I started preparing my first Classic Soda Bread, following the instruction. Everything went well until I emptied the bowl over the counter. The dough fell apart in larger and smaller lumps, and, also, shed quite a bit of loose flour. When I gingerly started turning it over, trying to capture the loose flour, a band of unruly crumbs broke free, rolling all over the counter.
When I finally managed coaxing all loose flour to stick, and herding back the crumbs that had gone AWOL, the sweat I broke was not only due to the oven heat.
While my bread was baking I looked through all those other Irish Soda Bread recipes I had gathered, and, also, consulted with Youtube. Did anybody know a way to make this procedure less of a crumbly challenge, more streamlined? For baking several loaves at one time? Even using a mixer?
What I read and saw was all hands-on only, even Jeffrey Hamelman described his experiences in Dublin as being "literally up to the elbows " in dough. The idea of handling a large batch of soda dough more likely to resist centripetal forces than submitting to them seemed rather daunting. Moreover, handling it with the gentlest touch!
My Irish Soda Bread turned out very nice, it was well worth the effort. And finally, I found at least a way to make it a little easier to bring the dough together without overworking it


hanseata's picture
hanseata

Dark Buckwheat Rye

During my pregnancy with my son Per, I was very health conscious, studying all kinds of parenting books and magazines on how to provide my firstborn with an optimum of nutrition. As a result I ate buckwheat "porridge" for breakfast every day, for buckwheat is not only high in minerals, like iron and potassium, and full of antioxidants, it's also a good source of protein, and, not only that, it has more Vitamin B than wheat!

It took me a while to get used to its strong and distinctive taste, but after a while I found that I liked my buckwheat cereal, especially since I "softened" it with generous amounts of cream and honey. Seeing buckwheat flour in the supermarket, I remembered my positive experience, and thought that buckwheat might add an interesting flavor to bread. Leafing through my German bread baking books I found a recipe for buckwheat bread, and started experimenting with it.

I tried it with biga, than with sourdough, but the result was never really satisfying. Something was missing, the taste not balanced, "too healthy", or downright sour (with the starter), so I put the recipe away, to work on it another time.

But buckwheat grows right here in Maine, and when I tasted my first Ployes (French Acadian buckwheat pancakes) at the American Folk Festival in Bangor, I decided to revive my quest for a good buckwheat bread.

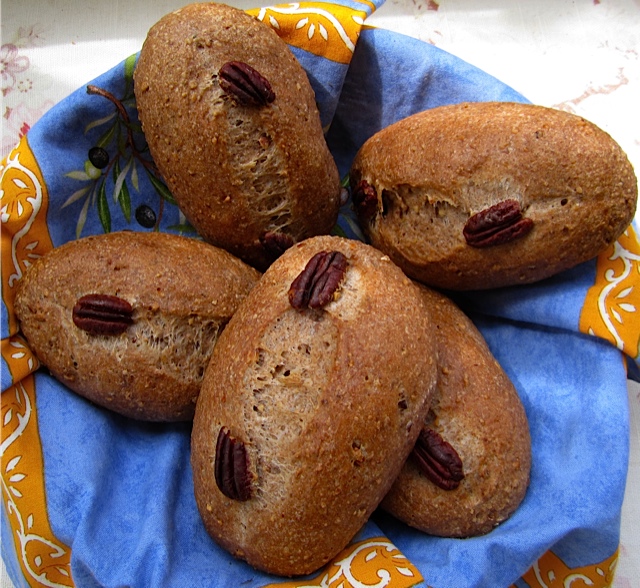
And this time, adding some spices and a little bit of honey, my buckwheat bread turned out as tasty as I had hoped. "Buckwheat Rye" can be made with white buckwheat flour (Ployes), whole buckwheat, or a combination of both, depending on your preference for a milder or more assertive buckwheat taste.

Light Buckwheat Rye - with 100% light buckwheat flour (ployes) - the other end of the spectrum.

2/3 Light Buckwheat Rye (2/3 light buckwheat + 1/3 dark buckwheat flour)

Medium Buckwheat Rye (half light/half dark buckwheat flour). Only the slashes show a different color from the 2/3 light buckwheat. BUCKWHEAT RYE - BUCHWEIZEN-ROGGENBROT

SOAKER
100 g whole rye flour
200 g buckwheat flour (either all light, or all dark flour, or a combination of white and whole buckwheat flours)
4 g salt
225 g water

FINAL DOUGH
175 g water (lukewarm)
6 g instant yeast
all soaker
295 g bread flour
4 g salt
16 g honey
1 tsp. coriander, ground
½ tsp. anise seeds, ground


DAY 1

In the morning, stir together soaker ingredients, until well hydrated. Cover, and let sit at room temperature.

In the evening, stir together water and instant yeast. Add to other ingredient for final dough, and mix (with paddle attachment) on lowest speed for 1 minute (or by hand). Let dough sit for 5 minutes.

With dough hook (or by hand), knead on medium-low speed, for 2 min. Dough should be very supple and sticky. Continue to mix for 4 min. more. Dough will still be sticky (feels like rye dough)

Transfer dough to floured work surface, and, with wet or oiled hands, stretch and fold dough. Let rest for 10 min, and repeat S & F 3 more times (total time 40 minutes). Gather dough into a ball, place in a lightly oiled bowl, cover, and refrigerate overnight.


DAY 2

Remove dough from refrigerator 2 hrs. before using.

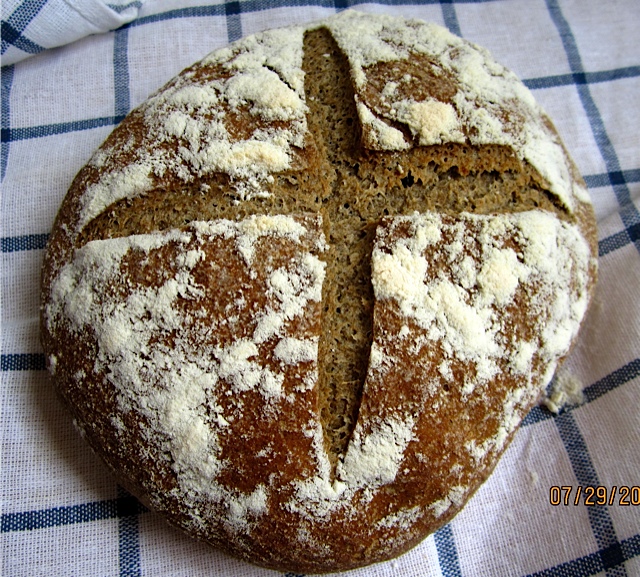
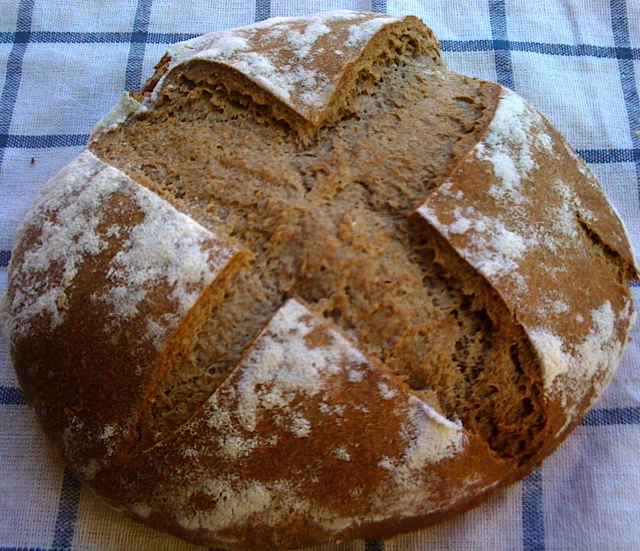
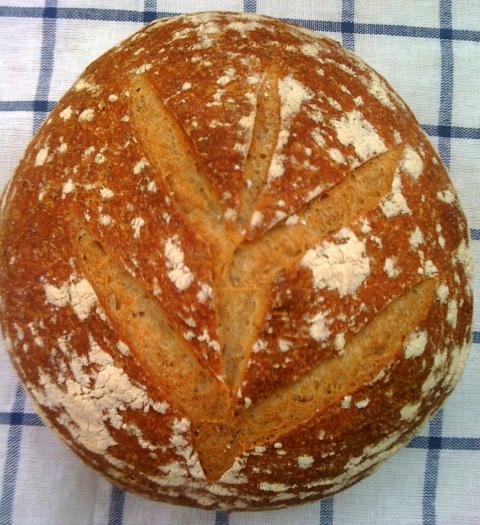
Preheat oven to 475 F/250 C, including steam pan. Divide dough in 2 equal pieces. Shape 2 boules, and proof in bannetons (seam side up) or on parchment lined baking sheet (seam side down), for ca. 45 - 60 minutes, or until grown to 1 1/2 times their original size. (I proofed it on the baking sheet and sprinkled it with flour, so that the cross slashing would really show).

Score breads crosswise. Bake at 400 F/200 C, steaming with 1 cup of boiling water. After for 15 minutes, rotate loaves 180 degrees, remove steam pan and continue baking for another 15 minutes (internal temperature at least 200 F/93 C, and bread should sound hollow when thumped on bottom).

Let breads cool on wire rack.                                                                     Light Buckwheat Rye, made with all light buckwheat flour (Ployes) is much airier than the darker breads.2/3 Light Buckwheat Rye has still a rather open crumb.
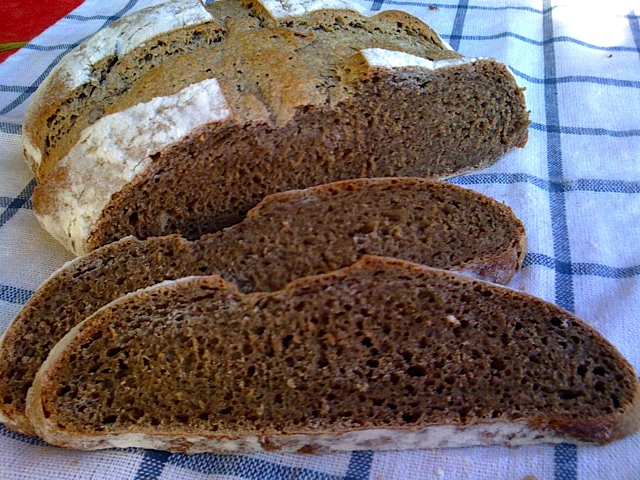
Medium Buckwheat Rye Crumb (1/2 dark and 1/2 white buckwheat flour) looks nearly as dark as Dark Buckwheat Rye.Dark Buckwheat Rye crumb.(Updated 8/4/11
hanseata's picture
hanseata


Two years ago we found a little stranger on our doorstep, attracted by the tantalizing smell of barbecued chicken, and my (universally understood) call to the food bowl: "Miez, Miez, Miez (= kitty, kitty, kitty)!" The little Maine Coon was skin and bones under her pretty fur, and ate ravenously what we gave her. She must have been lost for quite a while.

A call to the animal hospital led to a tearful reunion of kitty and her owners. They told us she had vanished three months ago, and they had given up all hope of seeing her again. A token of their gratitude were two large bottles of wine, one white, one red.

Since I am the only occasional imbiber in this household - Richard getting headaches from alcohol - I had to figure out what to do with the 2-liter bottles of vin ordinaire. Once open, the contents had to be consumed - or else turn to vinegar.

The white finally ended in the glasses of the non-discriminating younger members of my family. The red started collecting dust in the basement. Finally I found a recipe for "Beef Goulash in Barolo", a clipping from a German foodie magazine. Being pretty sure that any other dry red would do as well, half of the bottle found its way into this delicious, spicy stew.

But what about the other half? Not another stew, not noble enough for Coq au Vin, so it had to be pastry. Red Velvet Cake was an obvious choice, but too much fuss, I wanted something simpler. And I found it, rich and spicy enough to mellow the dryness of the wine, moist and scrumptious: Red Wine Cake.

Here is a link to the recipe:
http://hanseata.blogspot.com/2011/02/red-wine-cake.html

hanseata's picture
hanseata

One of my favorite stores in Portland is Micucci's, an Italian whole and retail grocery. They don't only have Südtiroler Speck and the best Fontina, they also carry nice wines at reasonable prices (I'm too cheap to spend more than 7 - 10 dollars for a bottle - and choosing European wine is easy because of the standardized labeling).  There I purchase Italian 00 flour and spices in bulk, and such items as Marzano tomatoes, cooked chestnuts and gooseberry jam.

Micucci's also has a little bakery, selling pizza by the slice, sfogliatelle with ricotta filling, ciabatta and fluffy "Luna" breads. But what enticed me to show up last Friday at 8:00 sharp was their special "Wheat Walnut Poppy Seed Bread", cut in quarters from a large boule. You have to be there when it comes out of the oven - an hour later it may be already snatched up by customers waiting eagerly in line.

Micucci's Wheat Walnut Poppy Seed Bread

I really like this bread, but since we're in Portland perhaps once a month, and not necessarily on Fridays, I wanted to re-create this specialty at home. I also thought I could probably even improve it - it's slightly sweet than necessary. Looking closely at the crumb I realized that these dark spots were not all poppy seeds but some other black seeds, too. Smaller than flax, and darker: black sesame.

The dark reddish color of the slices must come from the walnuts, there are plenty in the bread. I don't know how it is leavened, but the tag doesn't specially mention sourdough. The crumb is fairly open - the dough must be well hydrated, and I doubt that it is 100% whole wheat. I wanted to try a spelt version, prefering its nuttier taste to wheat.

How large is the percentage of seeds? I measured walnuts, poppy and black sesame seeds, and eyeballed the amounts. Walnuts with 80 g/510 g flour, and poppy and sesame with 10 g each. Using a basic formula from Reinhart's "Whole Grain Breads" ("Transitional Country Hearth Bread"), I came up with this formula, exchanging spelt for wheat, and adding nuts and seeds. Since it was already afternoon, I didn't work with pre-doughs, but used the stretch & fold technique (from Artisan Bread Every Day").

Usually I bake these kinds of lean bread like my German Feinbrot (preheat to 500 F, bake 10 minutes at 475 and 30 minutes at 425 F) - the crust is thinner and crisper than the one from the original recipe), but I wanted to try a technique I learned from Martin Pöt Stoldt (www.der-Sauerteig.de), falling temperatures to imitate the slowly diminishing heat in a wood fired oven.

WALNUT POPPY SEED SPELT BREAD

312 g water, at 95 F
    6 g instant yeast
284 g spelt flour
227 g bread flour
    9 g salt
  80 g walnuts, slightly toasted
  10 g black sesame
  10 g poppy seeds

DAY 1

Dissolve yeast in warm water. Add to all other dough ingredients (except for walnuts) in mixing bowl. Mix together for 1 - 2 min. by hand or with mixer at low speed, until ingredients come together in sticky, coarse ball. Let dough rest for 5 min.

Knead dough for 2 min. at medium-low speed, feeding the nuts slowly in it, and adjusting with some more water as needed, dough should be smoother but still sticky. Continue kneading for another 4 min., the last 20 sec. at medium-high speed (or more vigorously by hand). Dough should be still somewhat sticky. Prepare clean, lightly oiled bowl.

Transfer dough to lightly floured work surface. With wet or oiled hands, stretch dough gently into rectangle. Fold it like a business letter. Turn folded dough around and fold it from the sides again in 3 layers like a letter. Pick dough ball up, tucking sides under, and place it into clean bowl. Cover and let rest for 10 min.

Repeat those stretches and folds 3 times, with 10 min. intervals (total time 40 min.) After last stretch and fold maneuver, cover and immediately place into refrigerator for overnight fermentation.


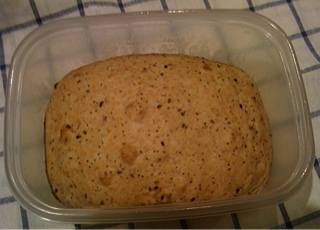
The dough handled really well, was very smooth and elastic. - That's what it looked like after the final S & F. (a bit more orangey because of the artificial light). The next morning it had considerably darkened with a purplish hue, thanks to the walnuts, and risen to almost double its original size.

DAY 2

Remove dough 2 hrs. before using.

Preheat oven to 480 F/250 C, including steam pan.

Shape boule and place in banneton. Proof for 45 - 60 min., or until it has grown 1 1/2 times to almost double its original size. Turn out onto peel. Slash.

Bake with steam (1 cup boiling water) at falling temperatures:

10 minutes at 480 F/250 C, 10 minutes at 445 F/230 C, remove steam pan, rotate bread 180 degrees. Continue baking
10 minutes at 410 F/210 C, 10 minutes at 375 F/190 C, 5 - 10 min at 355 F/180 C (internal temperature should be at least 205, better 210 F/96 - 99 C). Bread should sound hollow when thumped on bottom.

Let cool on wire rack.


Walnut Poppy Seed Spelt Bread                                                 Crumb: not quite as dark as the Micucci version

The falling temperatures create a really amazing crust!! The bread tasted very good, but next time I would rather make it with a white sourdough starter - we love the little more tang.


hanseata's picture
hanseata

When Andy/ananda posted his student Faye's success at the "Young Baker of the Year" competition, he mentioned that Faye was inspired by my trials to re-create the taste of blue fenugreek (not available in the US) with nettle. In German that kind of flattery is called: "he brushed my tummy". I felt very much "tummy brushed" and admired the creativity of the young winner from Newcastle College. (By the way, Andy, how was the final competition in November?)

This week I looked at the recipe again, worked out how to make the 60% hydration white levain with my 75% whole wheat mother starter (Andy's recipes do not allow for Dummies), and adjusted the recipe to best fit my schedule. Nettles thrive - and burn - in abundance in Germany and Scotland, but don't grow in Maine  (maybe one should introduce some to annoy pesky neighbors). So, instead of picking and home drying fresh ones, I used dried nettles from A & B Naturals, the friendly store that sell my breads. I also stretched and folded the dough (as in P. R.'s "Artisan Bread Every Day") and retarded the portioned dough overnight - something Faye most likely couldn't do under competition circumstances, anyway.

While I was preparing the dough, the house was filled with the appetizing smells of steeped nettle and toasted cumin. And the dough looked very promising. It was very smooth and elastic (I had added more water than in the original recipe), and handled very well.

 Nettle Bread dough after final S & F

The next morning the dough portions had doubled in size and looked like well stuffed, bouncy pillows. The rising time of the shaped boules at room temperature was, of course, much longer than in a commercial proofer. Before the breads were fully proofed in the bannetons I noticed that their seams (on top) started opening far too wide, so I took them out and placed them, seam side down, on a parchment lined baking sheet. I didn't want gaping holes on the bottom of the loaves.

The total baking time was 35 minutes, then another 10 minutes in the switched off oven with the door slightly ajar.

This is the result:

Speckled crumb from the nettles

Faye really deserved her award - THIS BREAD IS A WINNER! It tastes quite unusual, but very delicious. We served it to out dinner guests yesterday night, and they were absolutely delighted. I think I'm going to bake this for my customers, too.

WHITE STARTER
76 g whole wheat mother starter, 75% hydration
232 g bread flour
146 g water
 
FINAL DOUGH
all g starter, 454 g
550 g bread flour
16 g salt
4 g instant yeast
385 g water, more as needed
3 g cumin seed, toasted
4 g coriander, ground
4 g nettle, dried


DAY 1

In the morning, prepare white starter.

In the evening, boil 200 g of the water with dried nettles, and allow to cool. Mix with rest of the water (185 g).

Mix all ingredients for final dough on low speed for 1 - 2 minute. Let dough rest for 5 minutes. Switch to medium-low speed and knead for 2 min., adjusting with more water as needed, dough should be sticky. Knead for 4 more minutes (dough should be still somewhat sticky).

Transfer dough to lightly oiled work surface. With wet or oiled hands, stretch and fold dough, gather dough into a ball, place into slightly oiled bowl, and let rest for 10 minutes. Repeat S & F another 3 x, at 10 minute intervals, misting the stretched dough before folding with more water, as needed, to keep it slightly sticky.

After the last S & F, divide dough into 2 equal portions (ca. 700 g), place in lightly oiled containers, and refrigerate overnight.


DAY 2

Remove dough from refrigerator 2 hours before using (or shape cold and let proof longer).

Shape dough into tight boules, and place, seam-side down, on parchment lined baking sheet. Sprinkle with a little flour. Cover, and let rise for 60 - 90 minutes, or until almost doubled in size (finger poke test!).

Preheat oven to 450 F/230 C, including steam pan.

Score breads. Bake them for 20 minutes (with steam), rotate pan with loaves 180 degrees, remove steam pan, and continue baking for another 25 minutes - if the sides brown faster, check after 10 minutes and turn the loaves a bit around (internal temperature 205 - 210 F/96 - 99 C).

Let breads cool on wire rack.

Post updated (some ingredient amounts and baking procedure) 6/13/16


hanseata's picture
hanseata

What did I do during the holidays? Baking, of course! (We were invited for Christmas dinner, so no family cooking). I love my newest addition to my evergrowing collection of baking books, Jan Hedh's "Swedish Breads & Pastry". Though I do not follow his technique in every step (I prefer steaming with a steam pan and a cup of boiling water), and, also found the baking times for some recipes way longer than the bread needed in my oven, I think it's a great book.

After my first trials with apple yeast leavened Pain au Levain, I tried my hand with Miche Bread with Sourdough. Jan Hedh suggests rising the shaped loaves on a couche. I own one, but I rarely use it, preferring a perforated baguette pan for my Pains a l"Ancienne, bannetons or simply a parchment lined baking sheet for boules and bâtards. Though I dusted the loaves with flour, and covered them with a towel, after 2 hours (without extra plastic wrap protection) the breads had developed a skin (except for the bottoms). When I tested them with my finger, it felt like poking a rubber ball - the skin didn't allow a small indentation, but folded in somewhat, and then bounced back.

No scoring was required, and I placed my rubber balls in the oven, hoping that their soft belly would let them spring, even if the skin didn't. Fortunately I was forewarned, by my earlier experience with Hedh's bread, not to trust the baking time in the recipe. Indeed, the bread reached the desired 208 F/98 C internal temperature already after 28 minutes, instead of 45! And though they didn't have much oven spring, the crumb was good, my rubber balls had been filled with all the air they needed during the rise. The bottom, as to be expected - not having a "skin" - was less brown, and the crust thinner.

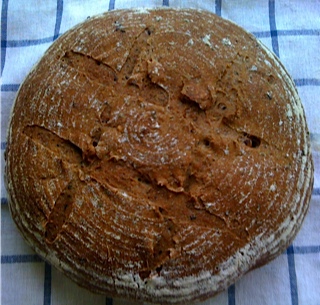
Miche with rye sourdough

Miche crumb shot shows the difference between top (drier skin) and bottom (no skin).

My next bread was, again, an example of The Power of The Apple Yeast. Fed with juice drops from cutting oranges for our cereal, the apple yeast water was peacefully fomenting in the fridge, waiting to become leaven for the next dough. I started building a 3-steps-levain, with my lamp-on-only oven as perfect environment. WhileRising the breads - two large loaves - I had another surprise. With the same temperature in the kitchen, these breads rose much faster than the time given in the recipe, whereas proofing the sourdough miche had taken nearly twice the time. Well, I've heard somewhere that "the dough is always right, not the clock".... This time I let the boules rest on a parchment lined baking sheet, they rose mightily, no skin development - and no bouncing rubber balls.

Because of my earlier experiences with shorter baking times, I checked the breads for done-ness after 30 minutes, but, surprise, this time they needed the full 50 minutes, as stated in the recipe.

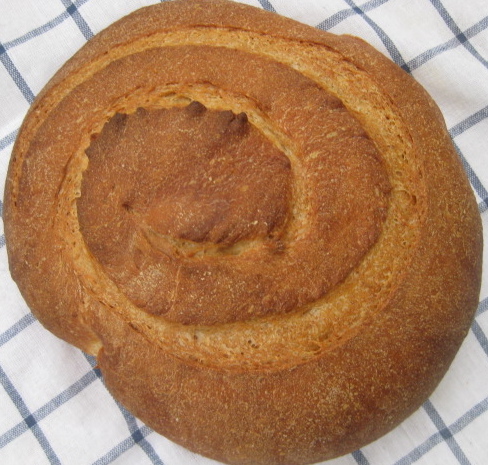
Pain de Campagne with apple yeast - spiral scoring inspired by txfarmer.

Pain de Campagne crumb

Both breads had an excellent taste, and kept for 3 days in a brown bag. The large Pain de Campagne loaf (ca. 1200 g) I cut in halves and froze the other half.

After all that serious bread baking - the stollen and lebkuchen being eaten - I needed some peanut butter relief, while a Nor'easter howled around the house and a blizzard promised a great workout with the shovel. Several opened glasses with peanut butter (our daughters tend to dump their kitchen leftovers at our house) provide a never ending supply, creamy or crunchy, organic or less healthful.

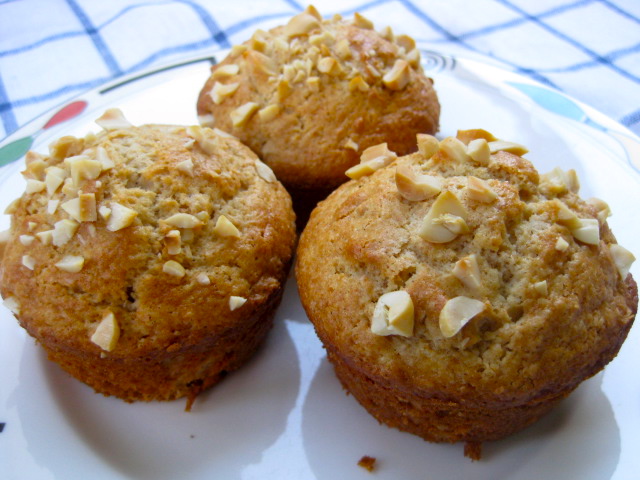
Peanut Butter Muffins from "The Muffin Bible".

These muffins are wonderful, moist and, with an additional dose of toasted peanuts , even more peanutty.

hanseata's picture
hanseata

The kids no longer living with us, I get late into Christmas mode. No Adventskranz (traditional wreath with 4 candles lit for each Sunday before Christmas) on the table, no calendar window to open. Holiday baking happens usually in a rush on the 23. and 24th, but this year we are invited for Christmas dinner, and nobody's around to eat all the goodies (not counting a dog that would LOVE to help us with that task!).

Having to limit my output I decided on two of the best: Mohnstollen (poppy seed stollen) and Lebkuchen (German spice cookies). Before I came to Maine I never made either of them, stollen I always got from my mother, and I never cared too much for Lebkuchen. If Cooks Illustrated had not published a recipe for German spice cookies last year, I would never have dreamed of making them. Sheer curiosity prompted me to try it ("Americans and German Lebkuchen, haha!").

Reducing the sugar just a little, I followed the recipe, and the result was - incredibly good! Instead of the chewy, dry-ish store-bought stuff I sometimes had at home, this was a delicate, moist cookie, where you could actually taste the toasted hazelnuts; and the spices were spicy in a good way, harmonious, not crude. Last year we ate them so fast, I had to make two batches, and gave some to the nice people from A & B Naturals (the store that sells my breads), too.

Lebkuchen

To find a perfect recipe for Mohnstollen was not easy - there are so many of them. I settled on one whose ingredients I liked best, from a German cooking magazine's website (essen&trinken.de). But I would add an overnight fermentation, reduce the sugar, and exchange half of the raisins with cranberries for a little bit of tartness. So far so good! But what about the poppy seed filling? Germans always use Dr. Oetker's "Mohnback", a ready-made poppy seed mix you can buy everywhere. Fortunately the "internets" yielded a recipe for home made poppy mix, too, with almond paste, semolina flour, milk and eggs.

Our Cuisinart coffee mill that we were about ready to trash - it did a miserable job with the coffee beans - now got it's second chance. And, lo and behold, it ground the poppy seeds as if it were made for just that. The last ingredient I had to find was candied citrus peel. Our supermarket had only some tutti frutti mix left, full of Maraschino cherries (I hate them). Again, Google, helper of the clueless, linked me to a recipe.

Candied orange peel

The Mohnstollen turned out as good as expected, I sold some, too - and I won't tell my mother that it's better than hers.

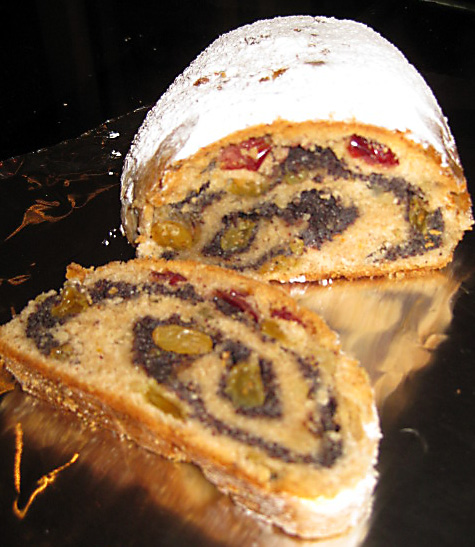
"Downeast" Mohnstollen with cranberries


Pages

Subscribe to RSS - hanseata's blog